Sawmill Alignment
Complete Alignment Procedure
7
7-24 60HDdoc102619 Sawmill Alignment
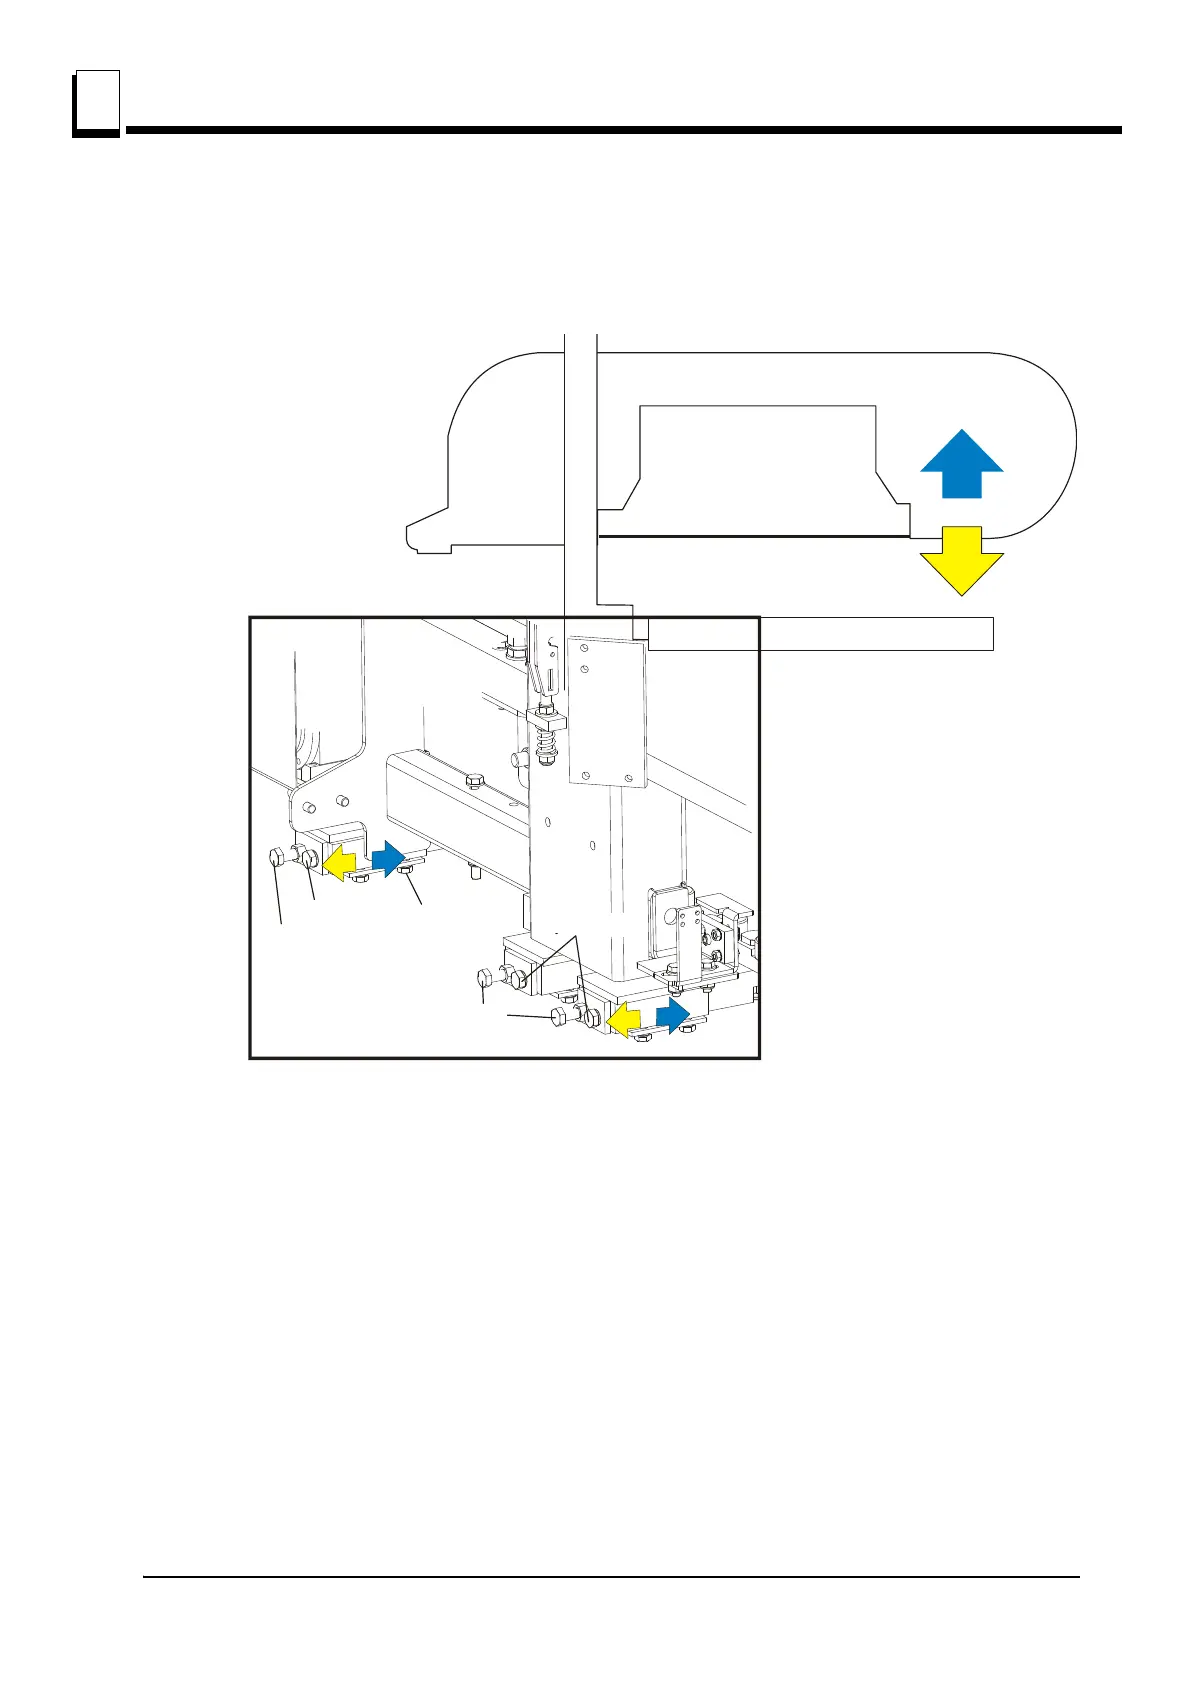
See Figure 7-23. To adjust the saw head tilt, use the bolts located at the bottom of the saw head
mast. Loosen the three sets of four retaining plate bolts. To raise the outside of the saw head, back
the stop bolts out, then tighten the adjustment bolts. To lower the outside of the saw head, loosen the
adjustment bolts and tighten the stop bolts. Recheck the saw head tilt and readjust the bolts as
necessary. Retighten the retaining plate bolts.
4. Move the clamp so it is 10" from the clamp stop. Adjust the clamp down to its lowest postion. Move
the saw head forward until it is positioned over the clamp. Raise the saw head until the blade
measures 15 5/16" (385 mm) from the clamp at its lowest position.
5. Adjust the front pivot rail 90° to the main bed tube.
6. Move the saw head to center the blade over the front pivot bed rail.
FIG. 7-23
Stop Bolt
DETAIL OF LOWER TRACK ROLLER ASSEMBLY
Stop Bolt
Adjustment Bolt
Retaining
Plate Bolts
Tighten adjustment
bolts to raise saw head;
Loosen adjustment
bolts to lower saw head
Adjustment Bolt
Stop Bolt
Stop Bolt
Adjustment Bolt
Adjustment Bolt
Retaining
Plate Bolts
Tighten adjustment
bolts to raise saw head;
Loosen adjustment bolts
to lower saw head
DETAIL OF LOWER TRACK ROLLER ASSEMBLY

 Loading...