4 - 79
ENG
CRANKSHAFT
6. Check:
• crankshaft operation
Rough movement → Repair.
7. Lubricate:
• centerstand shaft
(with the recommended lubricant)
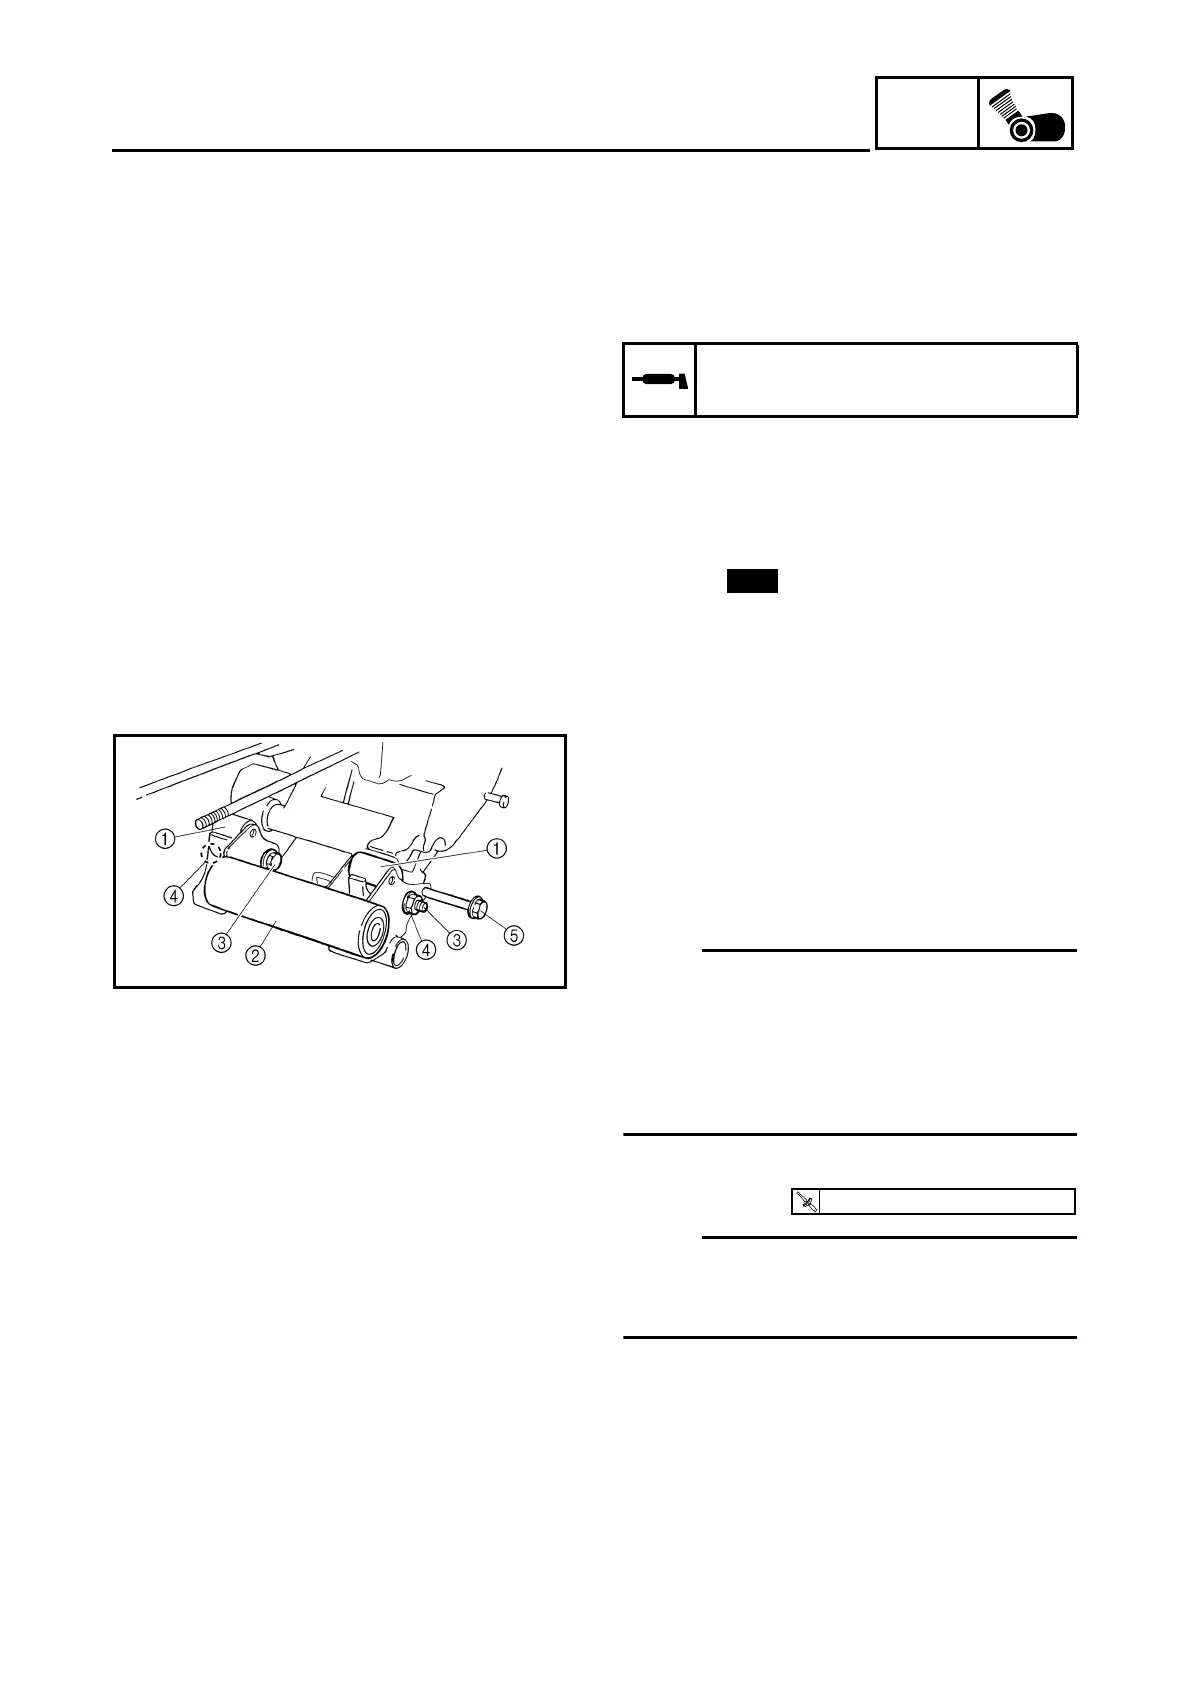
8. Install:
• centerstand spring
• centerstand
• centerstand shaft
• washer
• circlip
Recommended lubricant
Lithium-soap-based grease
9. Install:
• spacers
• rubber dampers 1
• engine bracket 2
• lower engine mounting bolts 3
• nuts 4
• 8 mm bolt 5
NOTE:
• Do not fully tighten the lower engine mount-
ing bolts and nuts.
• Insert an 8 mm bolt or similar rod into the
hole in the engine bracket and into the hole
in the left crankcase to ease the installation
procedure.
10.Tighten:
• nuts 4
NOTE:
First tighten the nuts on the left crankcase
side, and then tighten the nuts on the right
crankcase side.
11.Remove:
• 8 mm bolt 5
T
R
.
.
32 Nm (3.2 m · kg, 23 ft · lb)