6 - 46
CHAS
STEERING HEAD
EAS00679
REMOVING THE LOWER BRACKET
1. Stand the motorcycle on a level surface.
WARNING
_
Securely support the motorcycle so that
there is no danger of it falling over.
2. Remove:
• leg shield
Refer to “REMOVING THE FRONT COWL-
ING AND LEG SHIELD” in chapter 3.
3. Remove:
• front fork
Refer to “FRONT FORK”.
4. Remove:
• handlebar
Refer to “HANDLEBAR”.
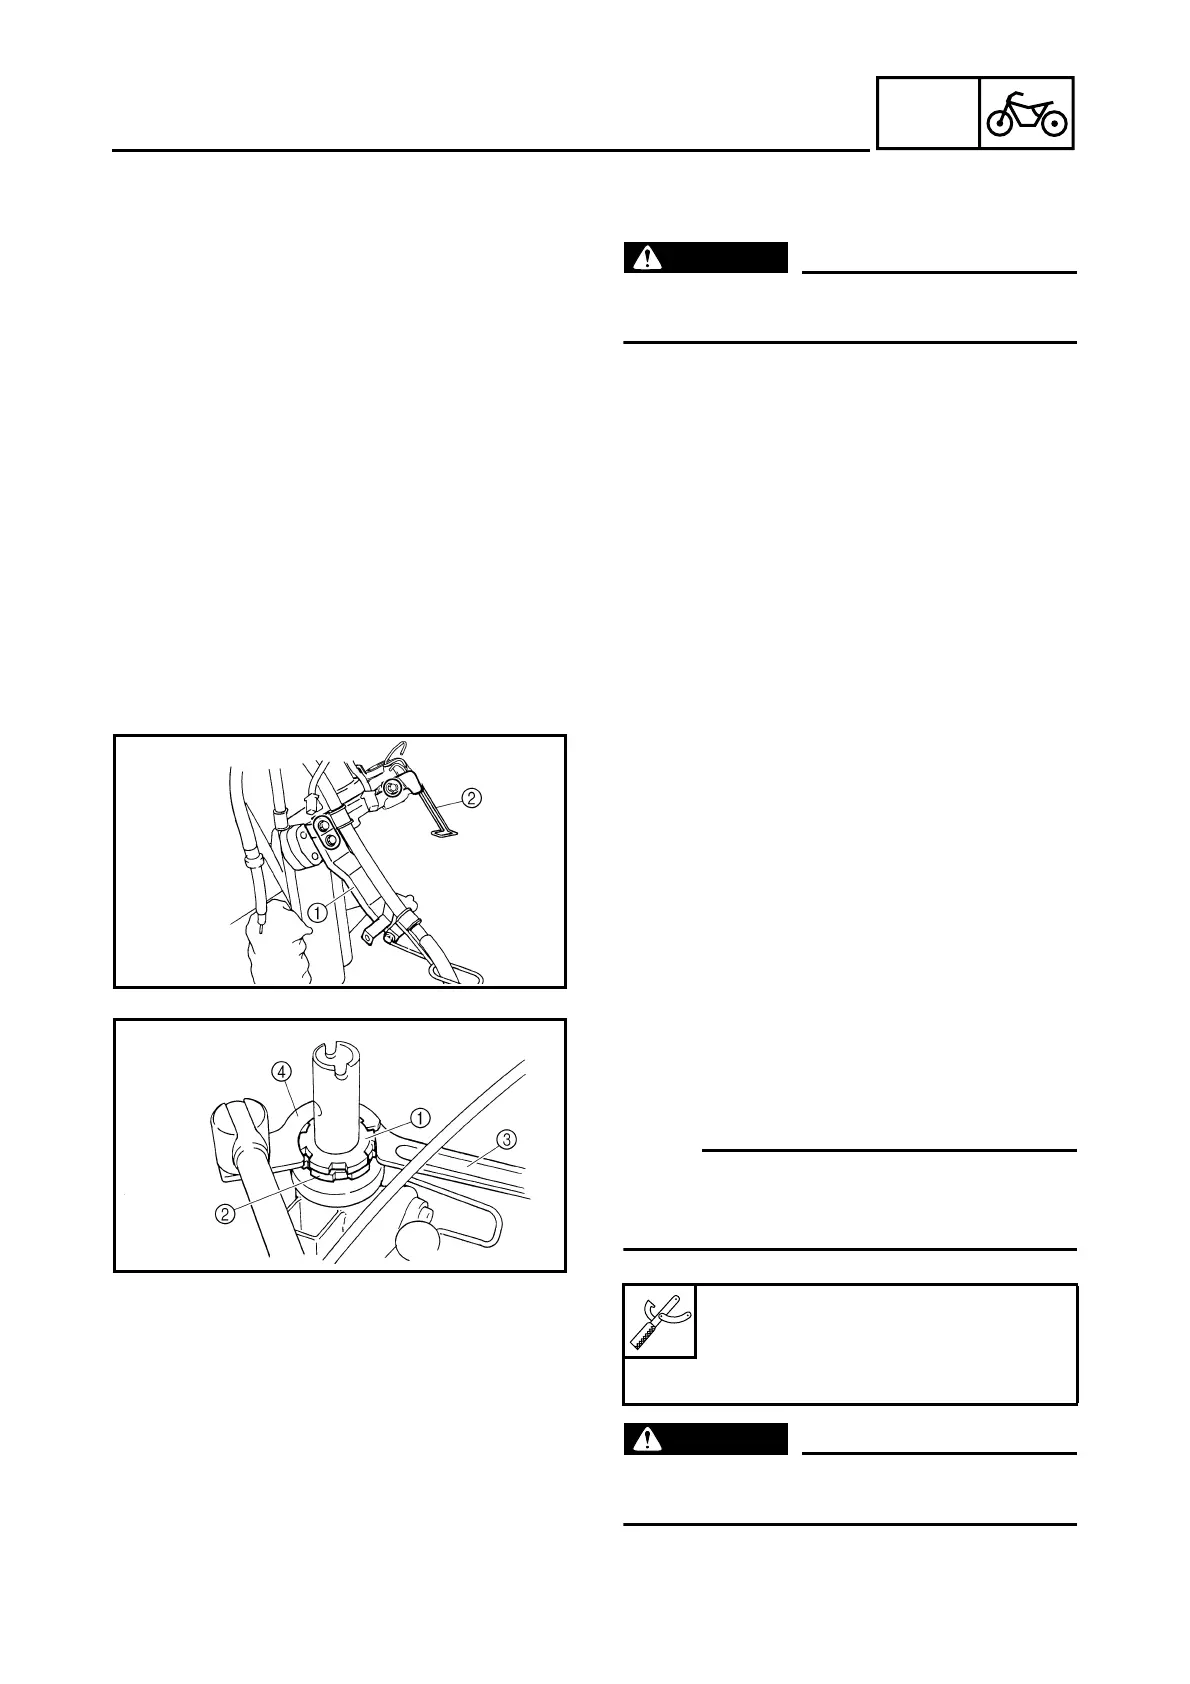
5. Remove:
• brake hose holder bracket
1
• speedometer cable guide
2
6. Remove:
• upper ring nut
1
• lower ring nut
2
• lower bracket
NOTE:
_
Hold the lower ring nut with the ring nut wrench
3
, and then remove the upper ring nut with
the steering nut wrench
4
.
WARNING
_
Securely support the lower bracket so that
there is no danger of it falling.
Steering nut wrench
90890-01403
Ring nut wrench
90890-01268