7 - 8
– +
ELEC
CHECKING THE BULBS AND BULB SOCKETS
CHECKING THE CONDITION OF THE
BULBS
The following procedure applies to all of the
bulbs.
1. Remove:
• bulb
WARNING
_
Since the headlight bulb gets extremely
hot, keep flammable products and your
hands away from the bulb until it has
cooled down.
CAUTION:
_
• Be sure to hold the socket firmly when
removing the bulb. Never pull the lead,
otherwise it may be pulled out of the ter-
minal in the coupler.
• Avoid touching the glass part of the head-
light bulb to keep it free from oil, other-
wise the transparency of the glass, the
life of the bulb, and the luminous flux will
be adversely affected. If the headlight
bulb gets soiled, thoroughly clean it with
a cloth moistened with alcohol or lacquer
thinner.
2. Check:
• bulb (for continuity)
(with the pocket tester)
No continuity → Replace.
NOTE:
_
Before checking for continuity, set the pocket
tester to “0” and to the “Ω × 1” range.
▼▼▼▼ ▼ ▼▼▼▼ ▼ ▼▼▼▼ ▼ ▼▼▼▼ ▼ ▼▼▼▼ ▼ ▼▼▼▼ ▼▼▼
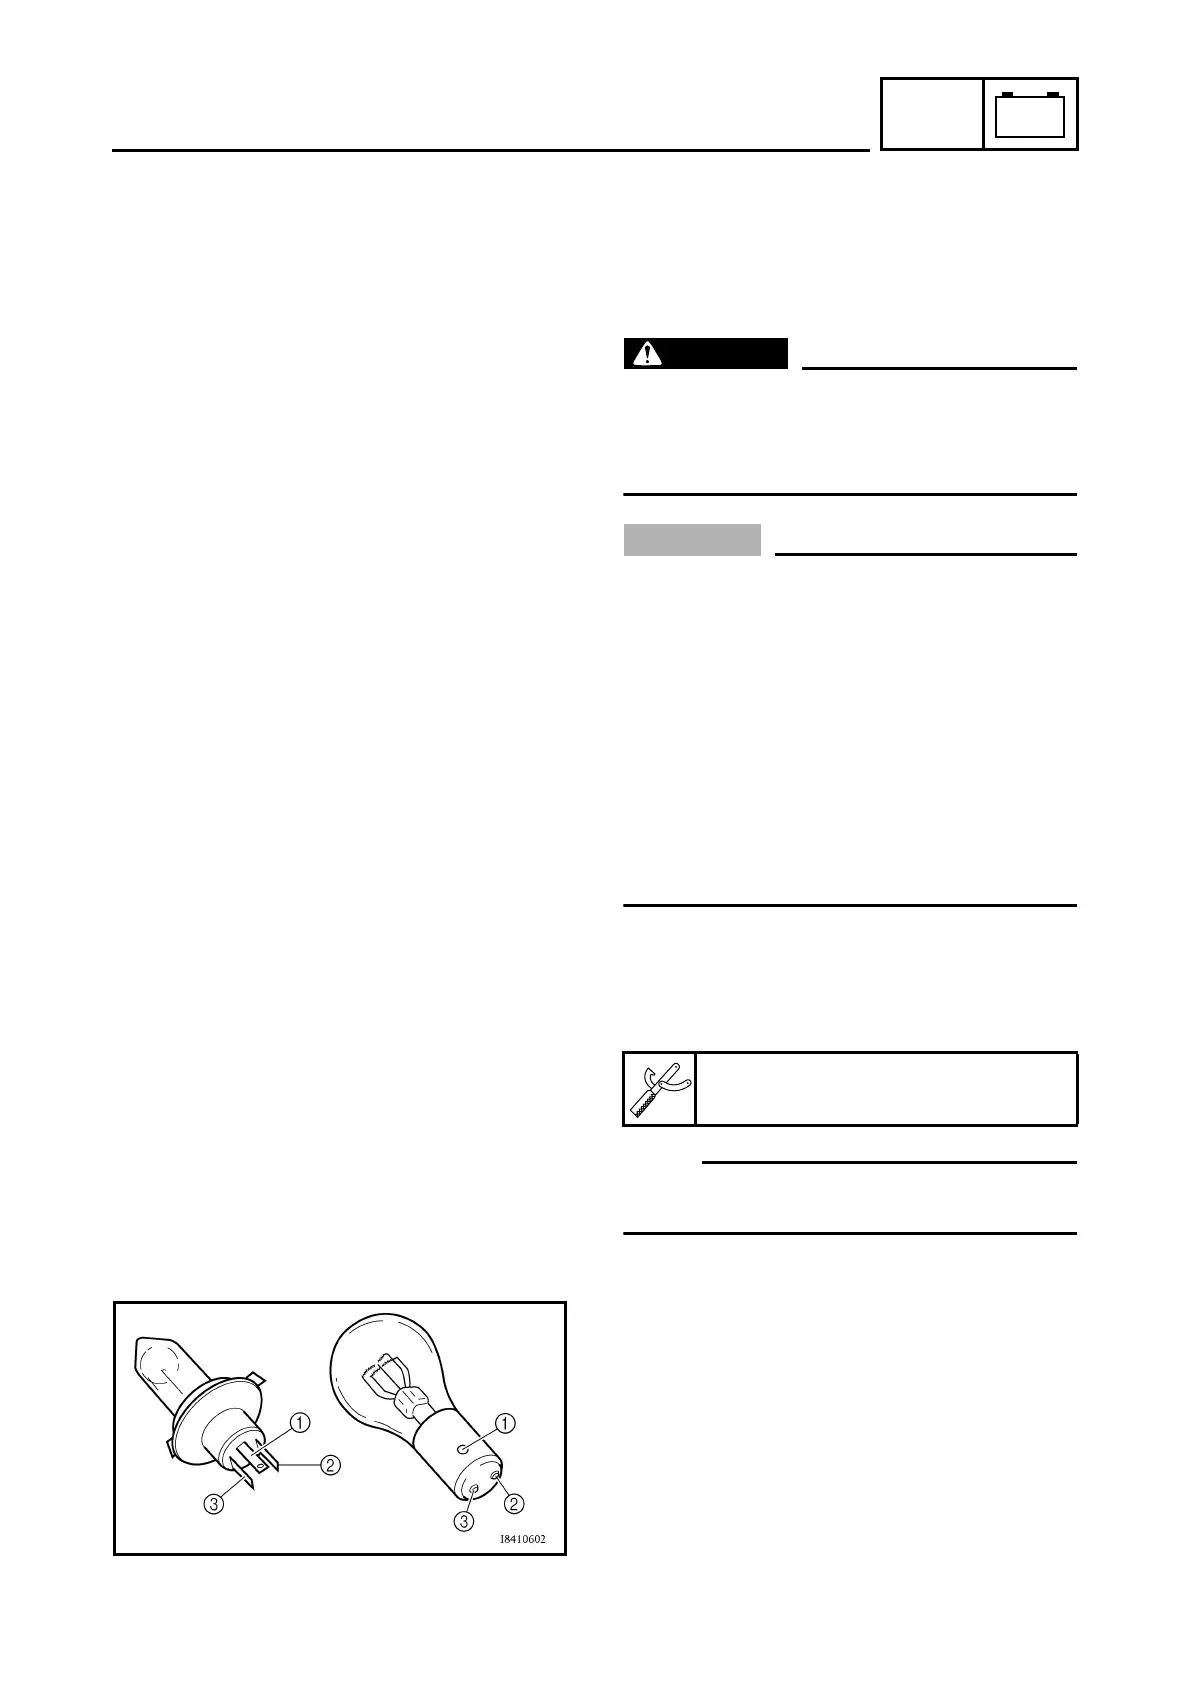
a. Connect the positive tester probe to termi-
nal 1 and the negative tester probe to ter-
minal 2, and check the continuity.
b. Connect the positive tester probe to termi-
nal 1 and the negative tester probe to ter-
minal 3, and check the continuity.
c. If either of the readings indicate no continu-
ity, replace the bulb.
▲▲▲▲ ▲ ▲▲▲▲ ▲ ▲▲▲▲ ▲ ▲▲▲▲ ▲ ▲▲▲▲ ▲ ▲▲▲▲ ▲▲▲
Pocket tester
90890-03112