3 - 30
CHK
ADJ
CHECKING AND ADJUSTING THE STEERING HEAD
4. Adjust:
• steering head
▼▼▼▼ ▼ ▼▼▼▼ ▼ ▼▼▼▼ ▼ ▼▼▼▼ ▼ ▼▼▼▼ ▼ ▼▼▼▼ ▼▼▼
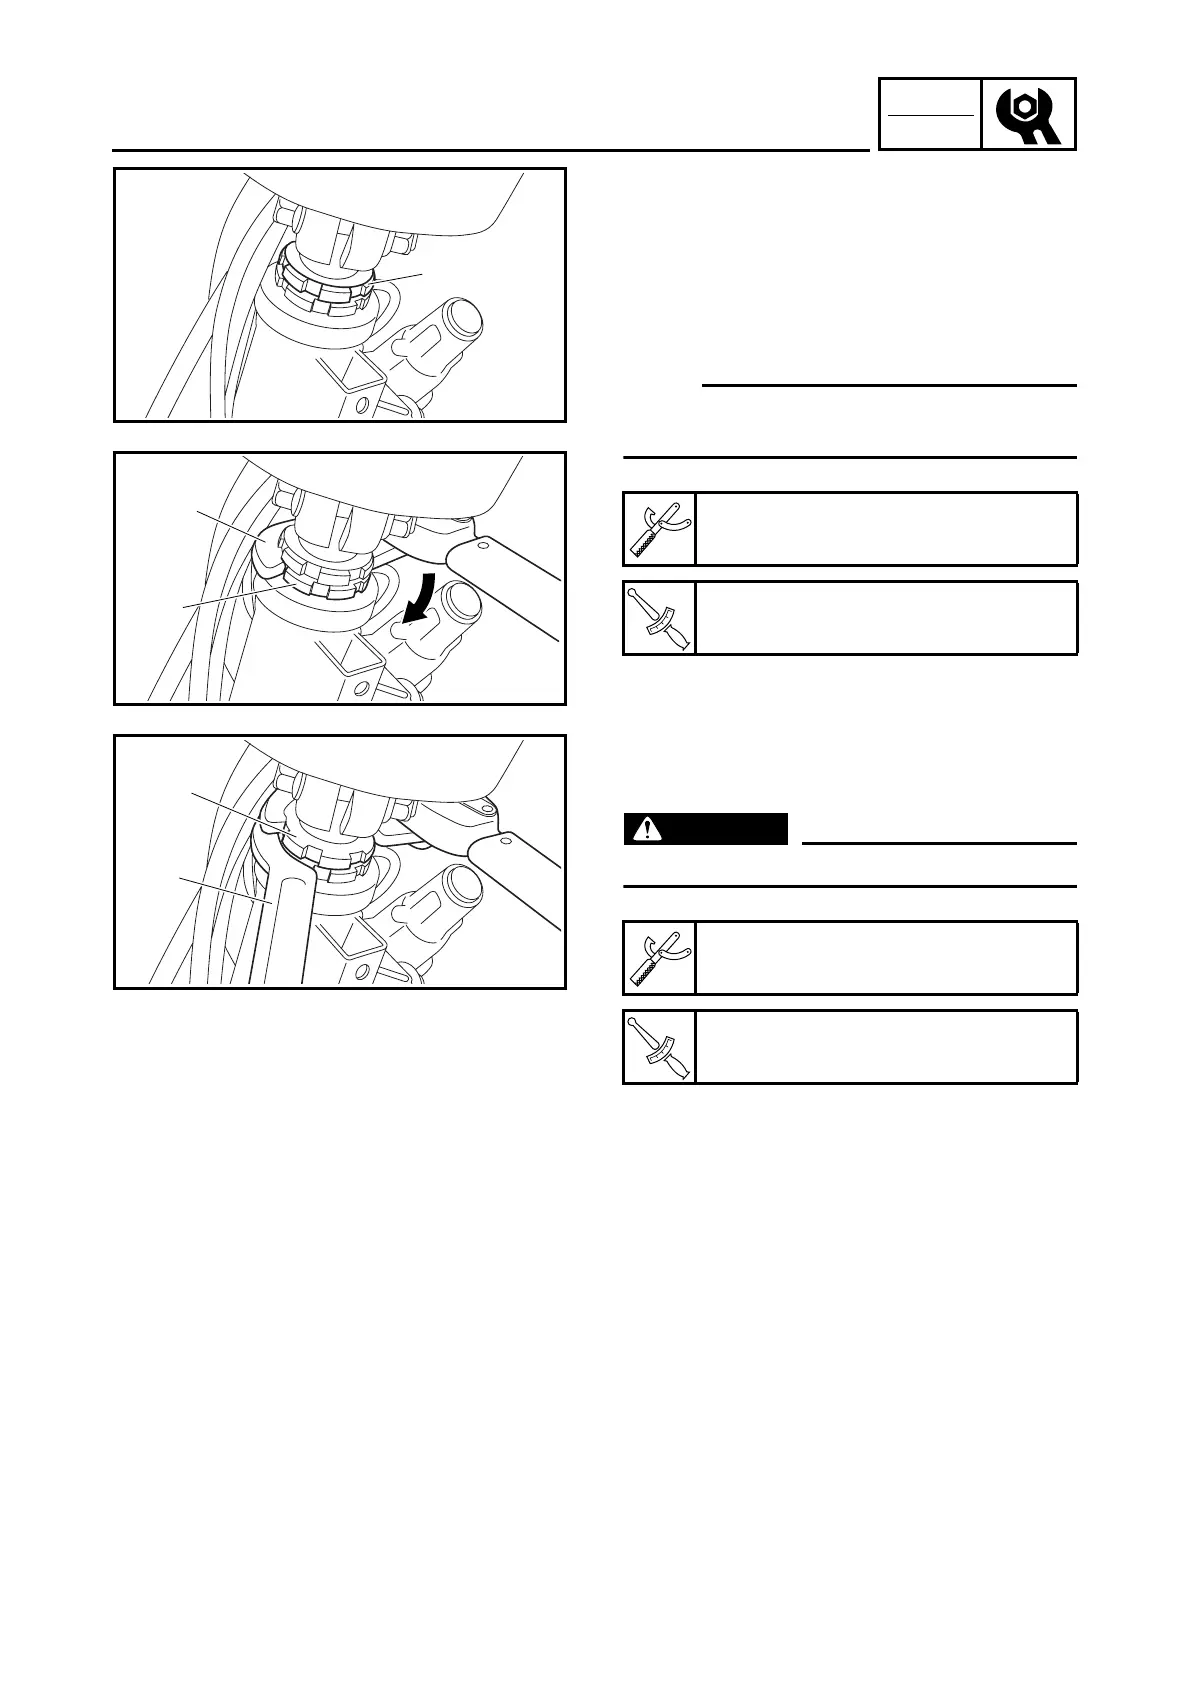
a. Loosen the upper ring nut 1.
b. Loosen the lower ring nut 2 and then
tighten it to specification with the steering
nut wrench 3.
NOTE:
_
Set the torque wrench at a right angle to the
steering nut wrench.
c. Loosen the lower ring nut counterclockwise
1/4 of a turn.
d. Hold the lower ring nut with a ring nut
wrench 4 and tighten the upper ring nut 1
with a steering nut wrench.
WARNING
_
Do not overtighten the lower ring nut.
e. Check the steering head for looseness or
binding by turning the front fork all the way
in both directions. If any binding is felt,
remove the lower bracket and check the
upper and lower bearings.
Refer to “STEERING HEAD” in chapter 6.
▲▲▲▲ ▲ ▲▲▲▲ ▲ ▲▲▲▲ ▲ ▲▲▲▲ ▲ ▲▲▲▲ ▲ ▲▲▲▲ ▲▲▲
5. Install:
• leg shield
• footboard
• front bottom cowling
• bottom cowling
• front cowling
Refer to “INSTALLING THE FRONT
COWLING AND LEG SHIELD”.
Steering nut wrench
90890-01403
T
R
.
.
Lower ring nut
30 Nm (3.0 m · kg, 22 ft · lb)
Ring nut wrench
90890-01268
T
R
.
.
Upper ring nut
75 Nm (7.5 m · kg, 54 ft · lb)
1
3
2
1
4