2-1
IM 701510-01E
Name and Use of Each Part
2
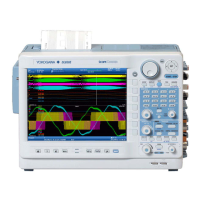
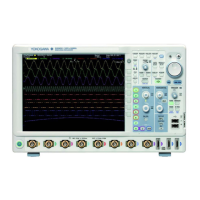
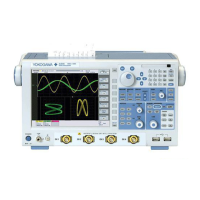
2.1 Front Panel / Rear Panel / Top View
Front Panel (2 channels are provided with DL1520/DL1520L.)
Time axis setting knob
→Page 5-10
CRT screen
Description of display contents
→Page 2-5
Floppy disk drive
Saving and loading of data from the
floppy disk
→Chapter 12
Rotary knob
Used to enter setting values and selections
CAL signal output terminal
Outputs a calibration signal for a probe.
→Page 3-6
Function grounding terminal
Used to connect the ground line to
calibrate a probe.
Input terminals
Used to connect a probe.
→Page 3-5
(For DL1540/DL1540L,
CH1 to CH4 input terminals are provided.
For DL1520/DL1520L, CH1 and CH2 input
terminals and an external trigger /external
clock terminal are provided.)
Power switch
Description of ON/OFF operation
→Page 3-4
This key is not provided with
DL1520/DL1520L.
Front panel keys
Description of each key
→Pages 2-2 to 2-4
!
!
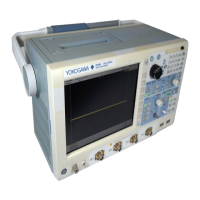
Rear Panel (Varies depending on the model. Refer to the their individual specifications.)
GP-IB connector
Used to connect an external plotter.
Connection method →Page 10-7
For a description of communications functions,
refer to the Communication Interface User's
Manual (IM 701510-11E).
(For DL1520/DL1520L, a RS-232-C connector is
provide depending on its specifications.)
Trigger output terminal
How to use the trigger output signal
→Page 14-1
(Not provided with DL1520/DL1520L.)
External trigger/clock input terminal
Description of external trigger →Page 6-3
Description of external clock →Page 5-8
(Provided on the front panel in the case of
DL1520/DL1520L.)
Power connector
Connection method →Page 3-5
Power supply fuse
For fuse replacement →Page 15-8
Support
Use the support to use this instrument with
the display facing upwards.
Vent holes
Vent holes
Connector for half
pitch interface
(For DL1520/DL1520L,
a Centronics
connector is provided
depending on its
specifications.)
!
!
!
!
Top View
Rear panel
Handle
Hold the instrument by these handles
when you carry it.
Built-in printer (optional)
How to output data to the printer
→Chapter 10
Front panel
Vent holes

 Loading...