2: Installation and Setup
Installing the Windows Printer Driver
P1061942-001 Zebra ZXP Series 1 Card Printer Service Manual 21
2.7 Installing the Windows Printer Driver
2.7.1 USB Driver Installation
Step 1. If not already done, connect power to the printer. Turn power OFF.
Step 2. Connect the USB port on the rear of the printer to the computer’s USB port.
Step 3. Ensure that the Printer’s power switch is in the OFF (O) position.
Step 4. Insert the User Documentation and Drivers CD into the CD drive of the host
computer. The Main Menu will open.
Step 5. From the Main Menu, click Install Zebra Printer Driver.
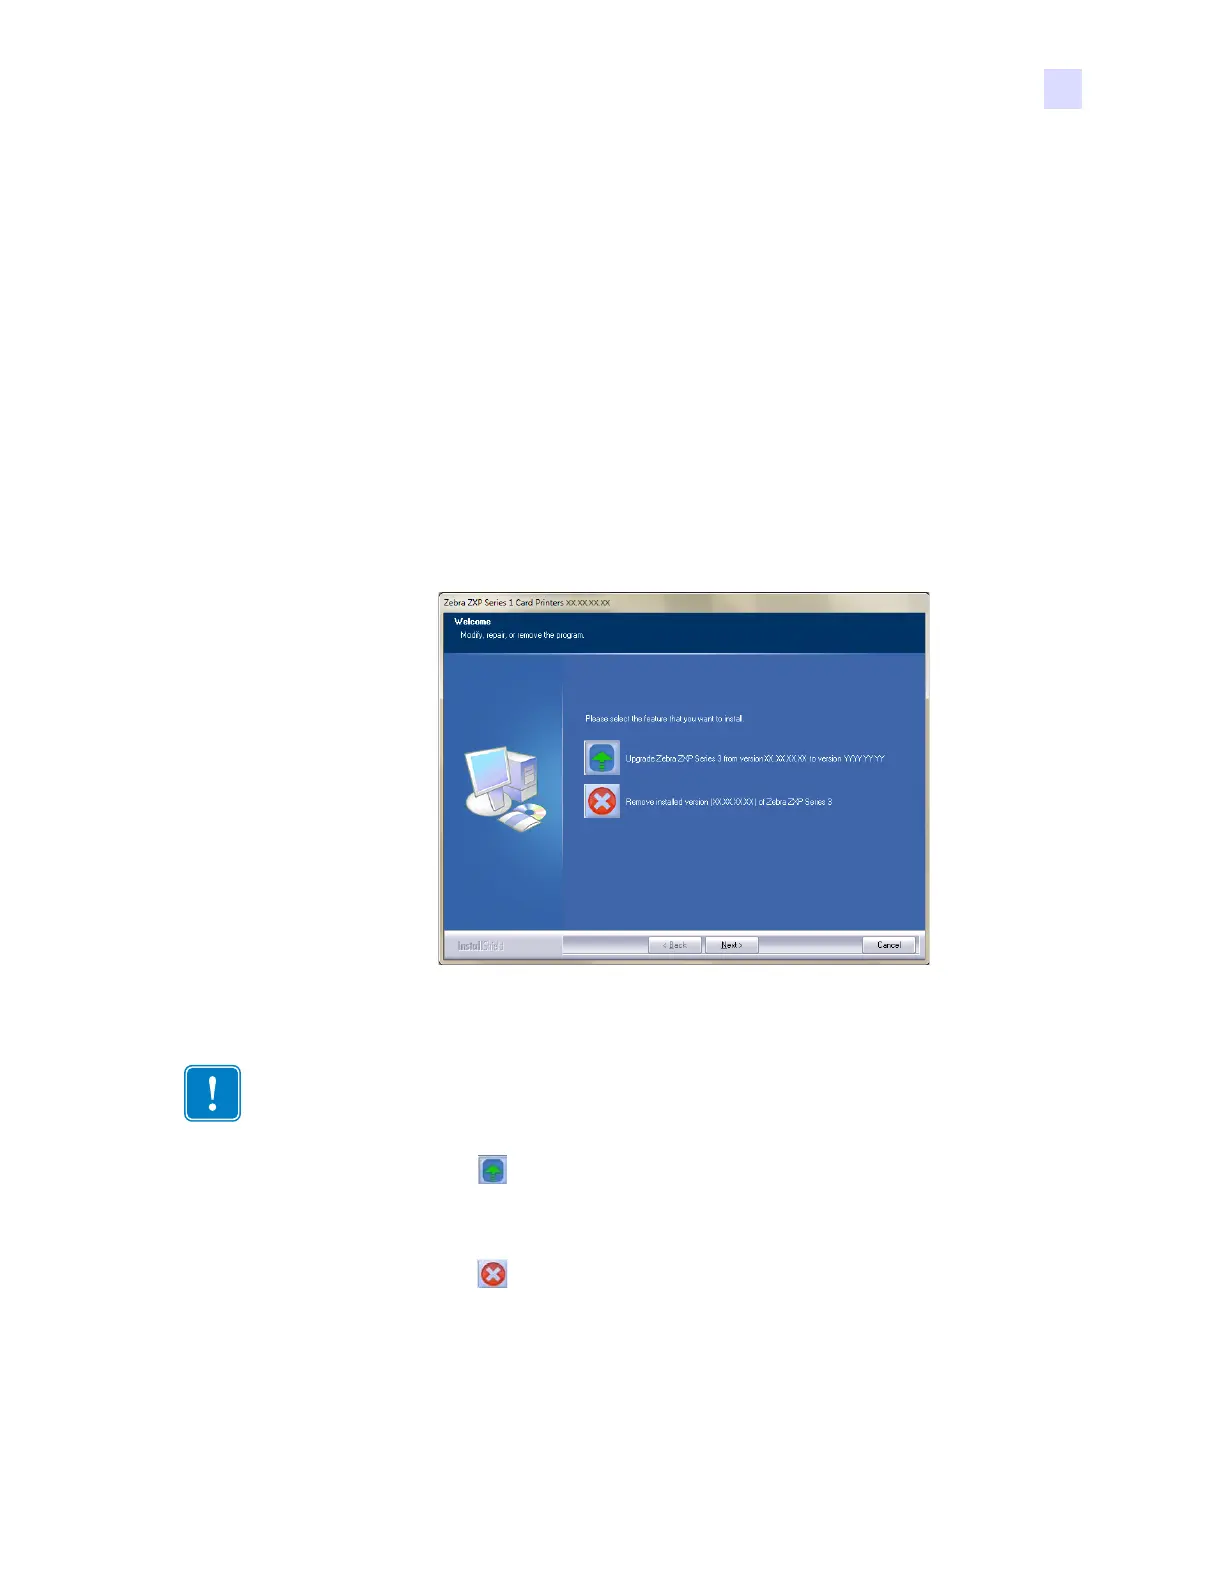
Step 6. If an older Printer Driver is installed on your computer, the Select Features window
will be displayed; otherwise go to Step 8.
Step 7. In the Select Features window, choose the maintenance operation to be performed:
a. Select to upgrade the older printer driver, click the Next button, and
follow the screen prompts. At the end of the process, you will be asked to
re-boot your computer. Re-boot your computer. The upgrade is complete.
b. Select to remove the older printer driver, click the Next button, and
follow the screen prompts. At the end of the uninstall process, you will be
asked to re-boot your computer. Re-boot your computer, and start over
with Step 1.
Step 8. The InstallShield Wizard window will open. To proceed with the installation, click
the Next button.
Important • Windows requires you to reboot your computer anytime after a driver is
updated or un-installed. Failure do to reboot may cause Windows to not recognize your
newly installed or updated driver correctly.
 Loading...