EasyManuals Logo

Zebra ZXP 1 Series User Manual

Zebra ZXP 1 Series
270 pages
To Next Page IconTo Next Page
To Previous Page IconTo Previous Page
Page #157 background imageLoading...
Page #157 background image
5: Replacement Procedures
Procedures
P1061942-001 Zebra ZXP Series 1 Card Printer Service Manual 151
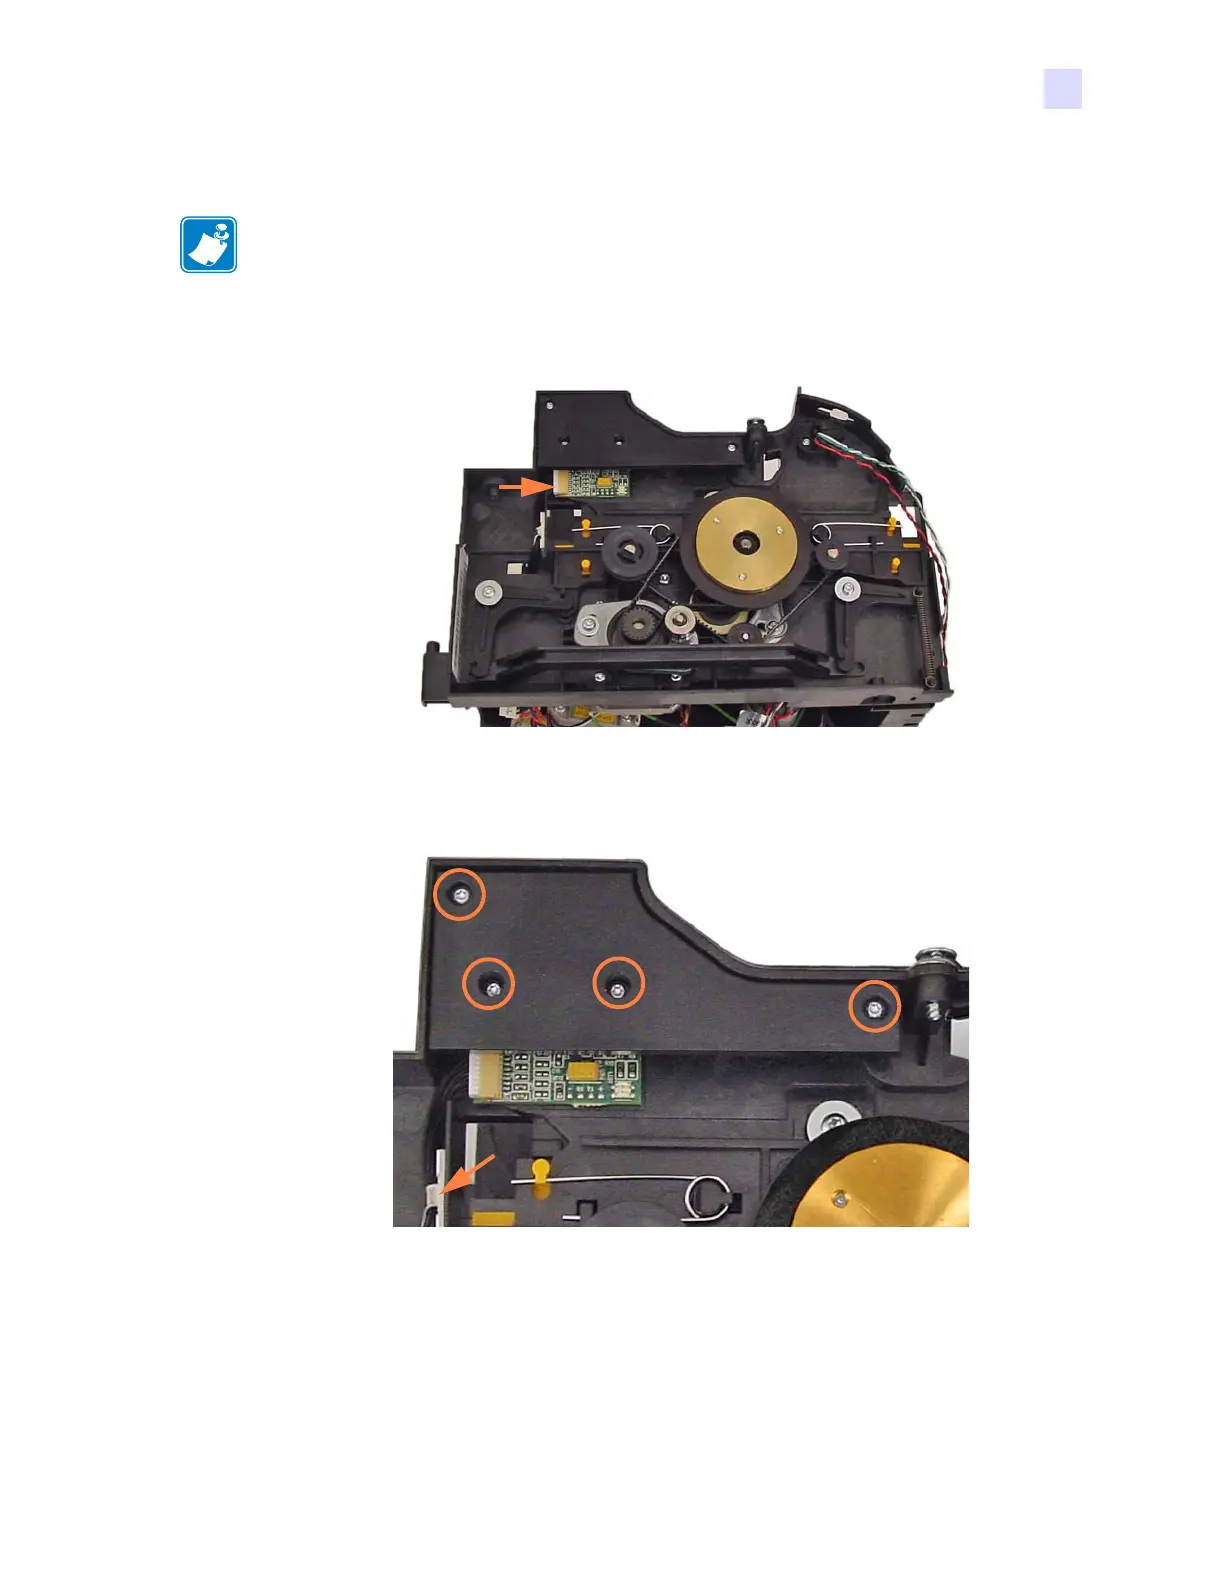
5.6.27 Ribbon ID PCBA
Step 1. Locate the PCBA. The PCBA is mounted behind the cover (arrow below).
Step 2. With a flat-blade screwdriver, free the cable (arrow below) from the cable clamp.
Step 3. With a TORX T7 driver, remove the four screws (SCR, PLAST, 2-.25, 2.5 in-lb)
holding the
cover in place; circled above.
Step 4. Remove the Cover.
Step 5. Slide the two springs off their respective standoffs.
NOTE • This procedure uses Spare Kit # P1031925-009: KIT, CRYPTOGRAPHIC PCBA
or Spare Kit # P1031925-047: KIT, COVERS FOR FRAME.

Table of Contents

Questions and Answers:

Question and Answer IconNeed help?

Do you have a question about the Zebra ZXP 1 Series and is the answer not in the manual?

Zebra ZXP 1 Series Specifications

General IconGeneral
Resolution300 dpi
ConnectivityUSB 2.0
Power Requirements100-240 VAC, 50-60 Hz
Print TechnologyDye sublimation
Card Capacity100 cards (input hopper)
Card SizeCR-80 ISO 7810
Dimensions368 mm (D)
Memory32 MB
Operating Temperature15°C to 30°C
Operating Humidity20% to 65% non-condensing
Card Thickness0.3mm - 1.06mm

Related product manuals