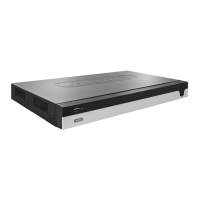
Select an appropriated type from the tab bar. A list with
one or more entries of cameras with data for export (A1–
A16) will appear. Select the desired data by clicking on
the buttons . Select “Export All” to export all of the
displayed list entries, or “Export” to only export the
selected data.
In order to continue the data export, proceed as follows:
1. The data can be exported via USB on the video
recorder
2. Connect a suitable storage device to the recorder
3. In the next step, select a directory on the storage
device
4. Define whether the video player or the video data
should be exported.
5. The export process is carried out:
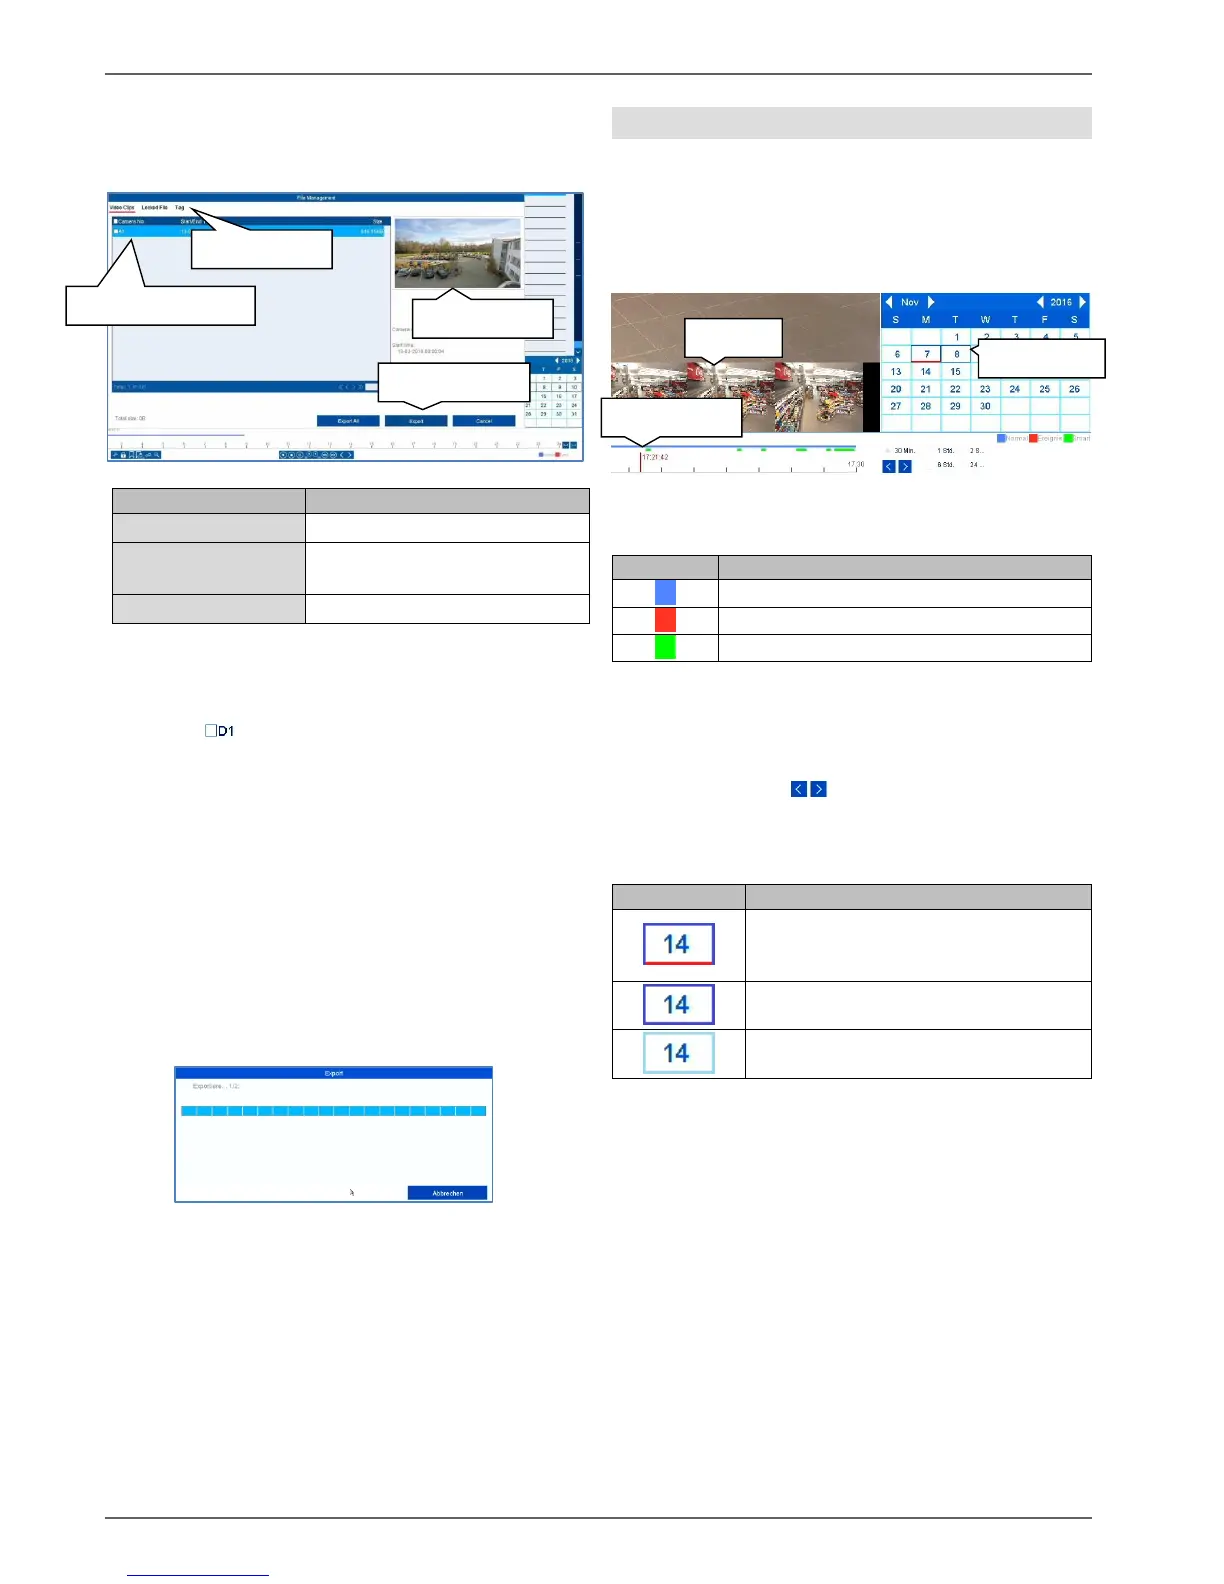
Using the timeline and calendar
The most important control element on the timeline is the
time tracker. The time tracker indicates the current time
of playback. First, move the mouse cursor along the time
bar in order to see a preview of the scene. Then, click on
the time bar to start the playback from the desired time.
Recordings are shown by coloured bars in the time bar.
The colour coding is explained below:
The standard setting of the display area on the time bar
is 30 minutes. This means that the last 30 minutes of
recording are displayed across the timeline. You can
connect to the camera’s recordings over the whole day in
increments using the button.
The days are selected using the calendar. The colour
coding for calendar days is explained below: