Setting: Configuration
35
Select the alarm output to adjust
the settings.
Enter a clear description, e.g.
warehouse door contact
Select the dwell time for switching
the alarm output.
Define the linkage action.
Activate the alarm output by ticking the "Settings"
box.
Define the schedule for the recorder alarm output in
the event of an alarm under "Settings".
Linkage action
The “Linkage action” menu is the recorder’s central event
control function. From here, event-based recording, time
schedules, emails, acoustic warnings, CMS notifications
and PTZ actions can be programmed.
Linkage actions are available in various menus on the
recorder (e.g.: alarm, motion detection, VCA).
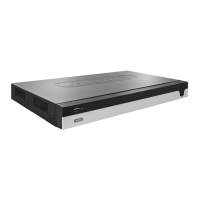
Trigger channel tab
Tick the corresponding box to select which camera
channel is triggered in the event of an alarm.
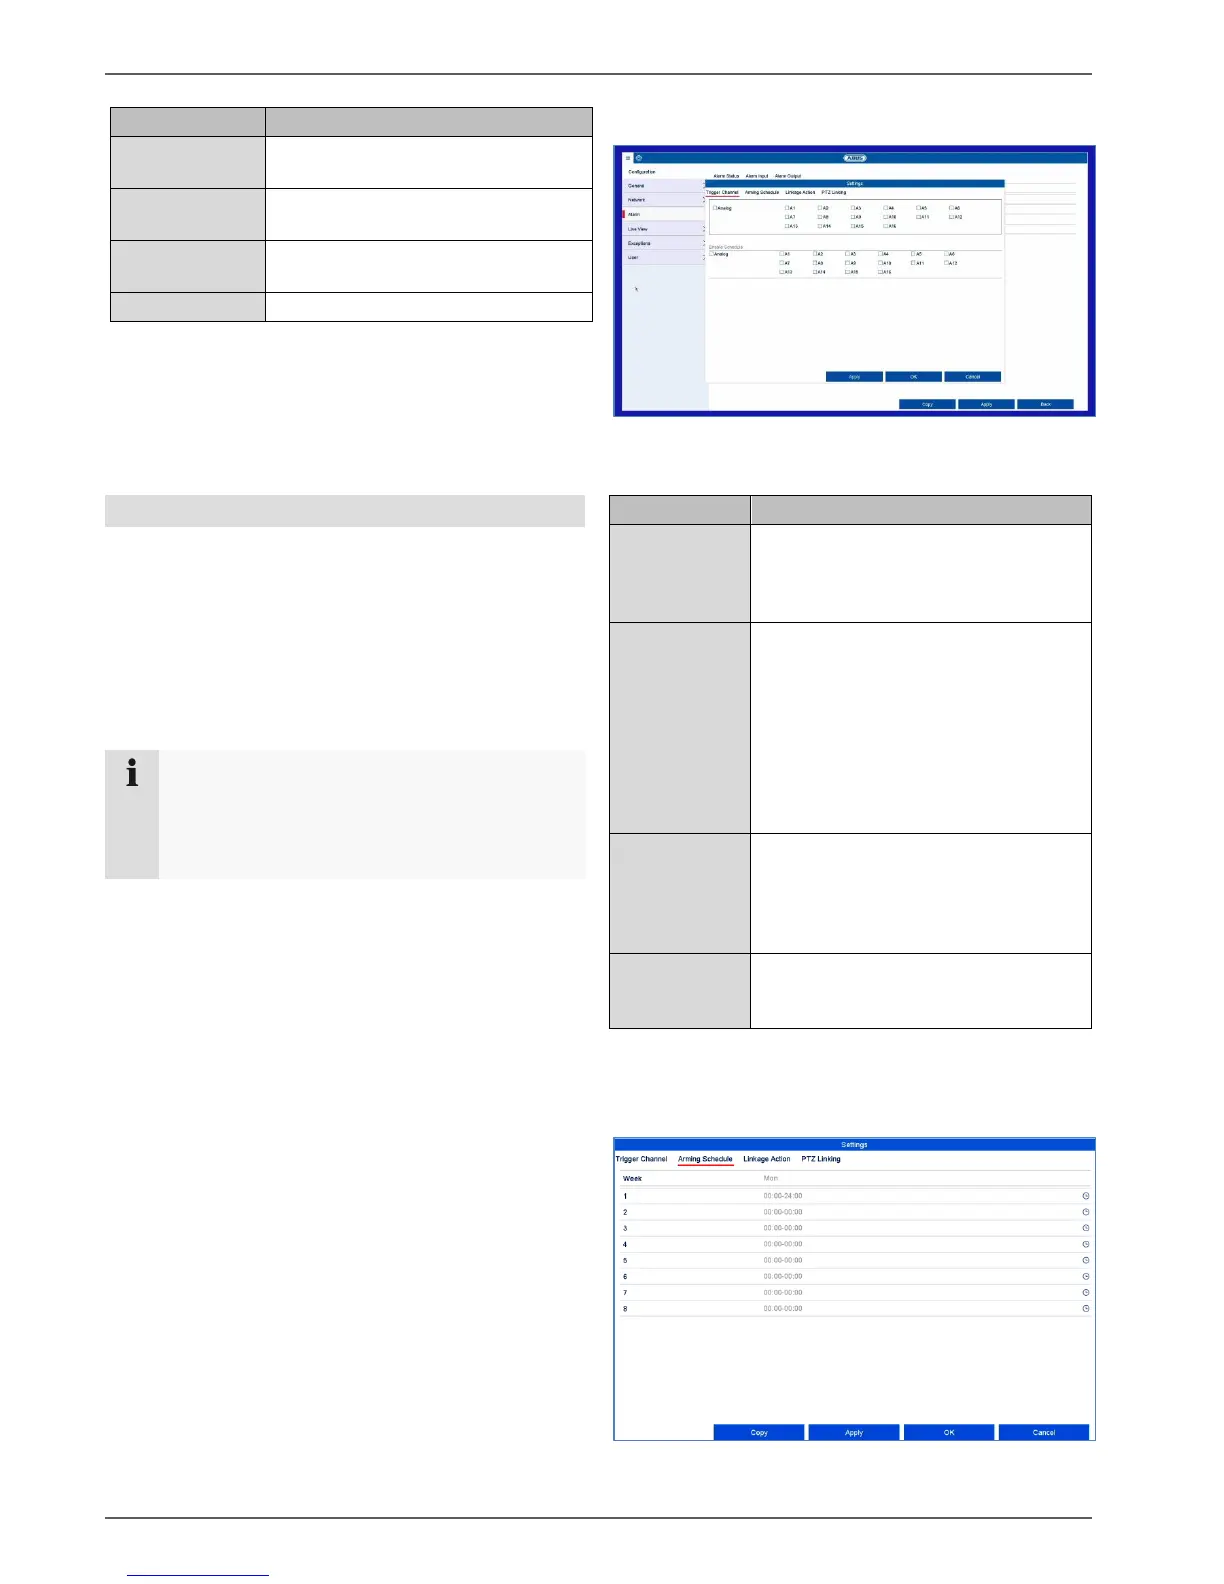
Arming Schedule tab
Note
If not further defined, use this section as a
reference for the configuration of Linkage Action
and as a substitution for all relevant menus in the
recorder.
Select which camera should be
triggered in case of an alarm/incident.
A trigger signal normally causes an
alarm recording.
If you wish, you can decide whether
the schedule of a camera should be
activated in the event of an incident.
This setting is only practical if the time
schedule of a camera was explicitly
deactivated beforehand (see
“Recordings” menu). Normally, the
time schedule of a camera is always
enabled.
Here. you can configure the response
of the recorder in the event of an alarm
by ticking the corresponding box.
All actions can be enabled
simultaneously.
Here you can control specific
PTZ presets, patrols or patterns for a
taught-in camera.