Live view
15
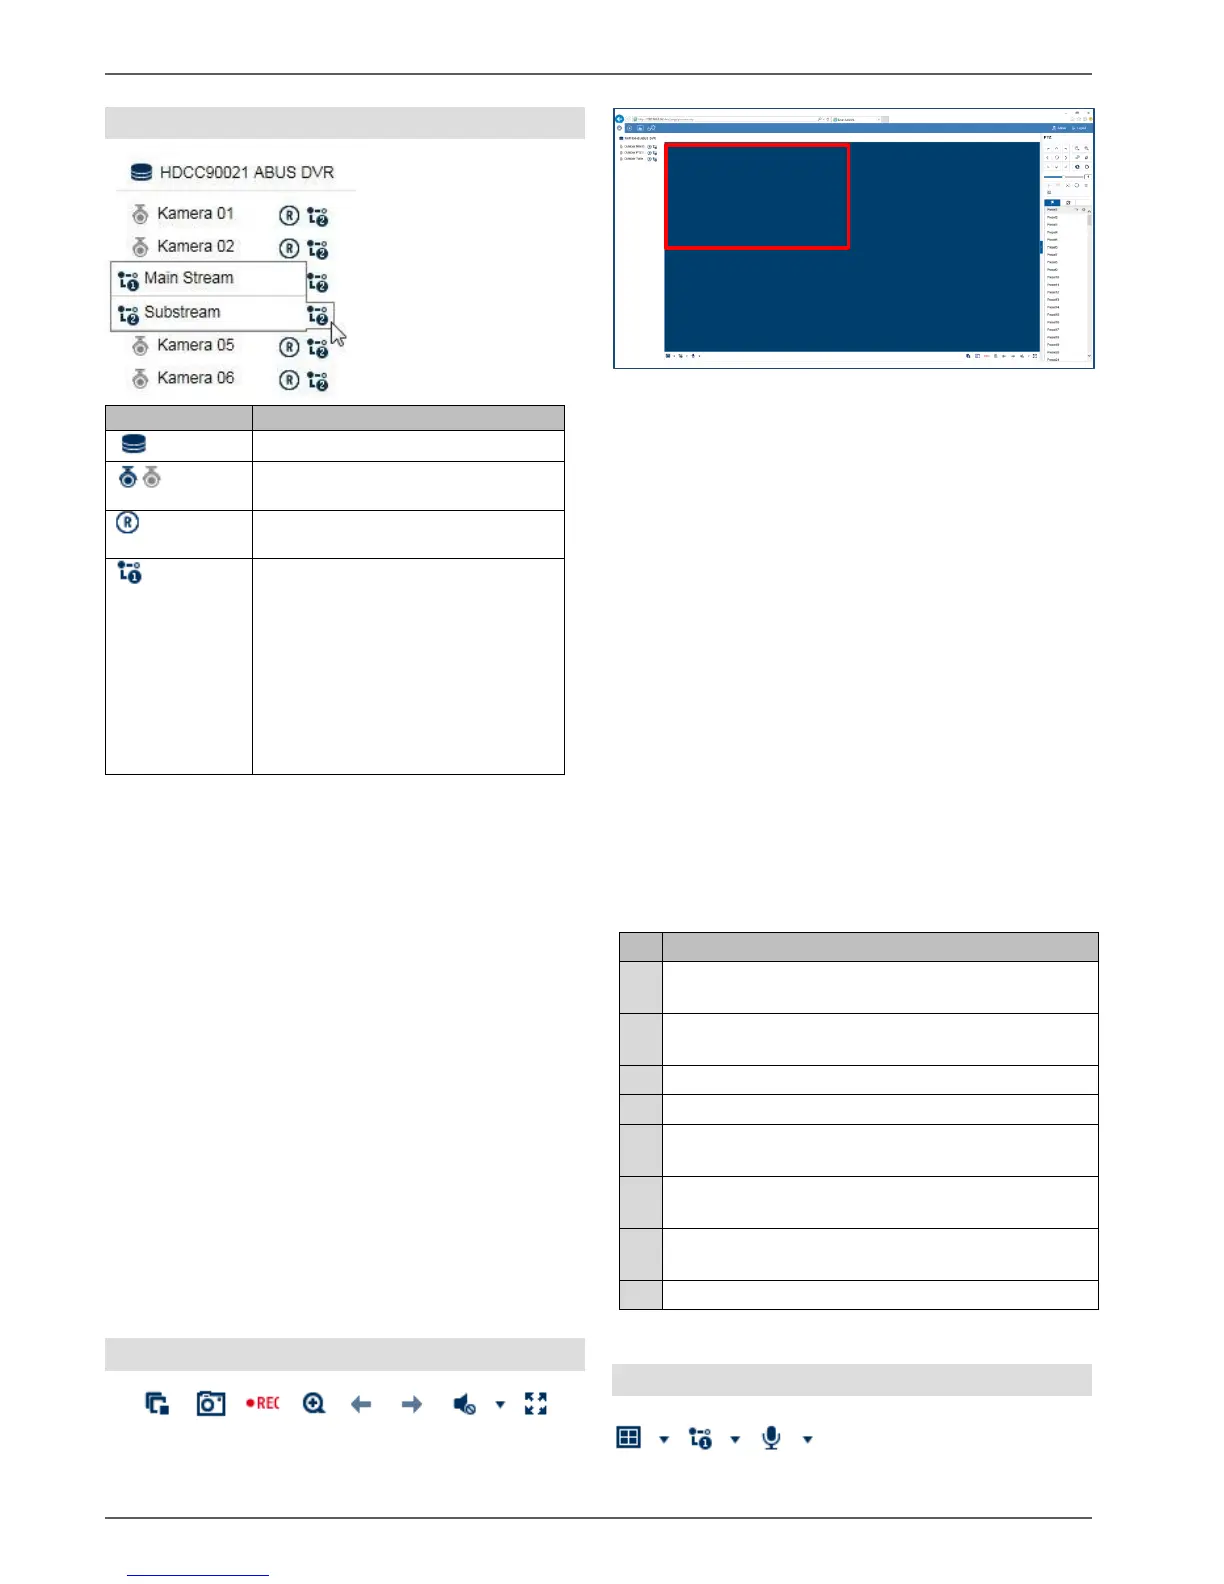
Using the camera list
The camera list contains all cameras connected to
the recorder. Double-clicking a camera name displays
the corresponding camera in the live image.
To display the camera at a specific position in the live
image (multi-view), proceed as follows:
1. Select the position in the live cast (red frame).
2. Double-click the desired camera in the
camera list.
3. The camera is displayed at the desired position.
The following functions/status displays are available in
the camera list:
The default setting for manual stream selection is "1".
This means that the high-resolution "main stream" of the
camera is displayed. This is the best option in most
cases. It is only practical to adjust the manual stream
selection if there is a risk of a performance bottleneck
during transmission:
If you wish to display lots of cameras at the same
time (nine or more), the processing power of your
PC may not be sufficient to decode all video
streams. Change the setting to sub-stream "2".
If you are accessing the web interface via the
internet and wish to display multiple cameras at
the same time, the upload of the receiving point
must be of a sufficient size. At the same time, the
download on the receiver side must also provide
sufficient bandwidth. Change the setting to sub-
stream "2" if one of the two sides does not have
enough bandwidth.
If you are intentionally accessing the recorder via
the internet with very low bandwidth, you can
activate transcoded stream "3" to request an
image transfer with very low resolution and bit
rate (e.g. QCIF/64 Kbit). The selected video
stream is then scaled down by the recorder.
Using the action bar
(1) (2) (3) (4) (5) (6) (7) (8)
Manually select the video stream
of the desired camera. Hover the
mouse cursor over the symbol to
select the desired stream.
The configuration for
main/sub/transcoded streams can
be adjusted in the settings under
"Audio & video" in the "Stream
type" section.