Select the camera and tick the Enable Schedule box.
Click on a trigger and use your mouse to highlight
the time period within the schedule.
Alternatively, click on Edit to configure the type and
duration of the schedule down to the minute.
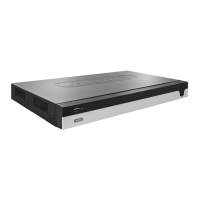
1. In the drop-down menu for “Schedule”, select the day
to be set.
2. Activate/deactivate “All Day”. If “All Day” is activated,
you cannot enter specific times as the setting now
applies to the whole day.
3. If you wish to enter specific time settings, deactivate
“All Day”.
4. Specify the recording type in the drop-down menu
for “Type”:
Duration
Event
Motion
Alarm
Motion or alarm
Motion and alarm
5. If you are entering time-dependent settings, you can
define up to eight time slots, between 00:00 and 00:00
in each case, but the individual time slots must not
overlap.
Click on Copy to apply these settings to other days or
the entire week.
Finalise your settings on the record screen by clicking on
Apply and then OK.
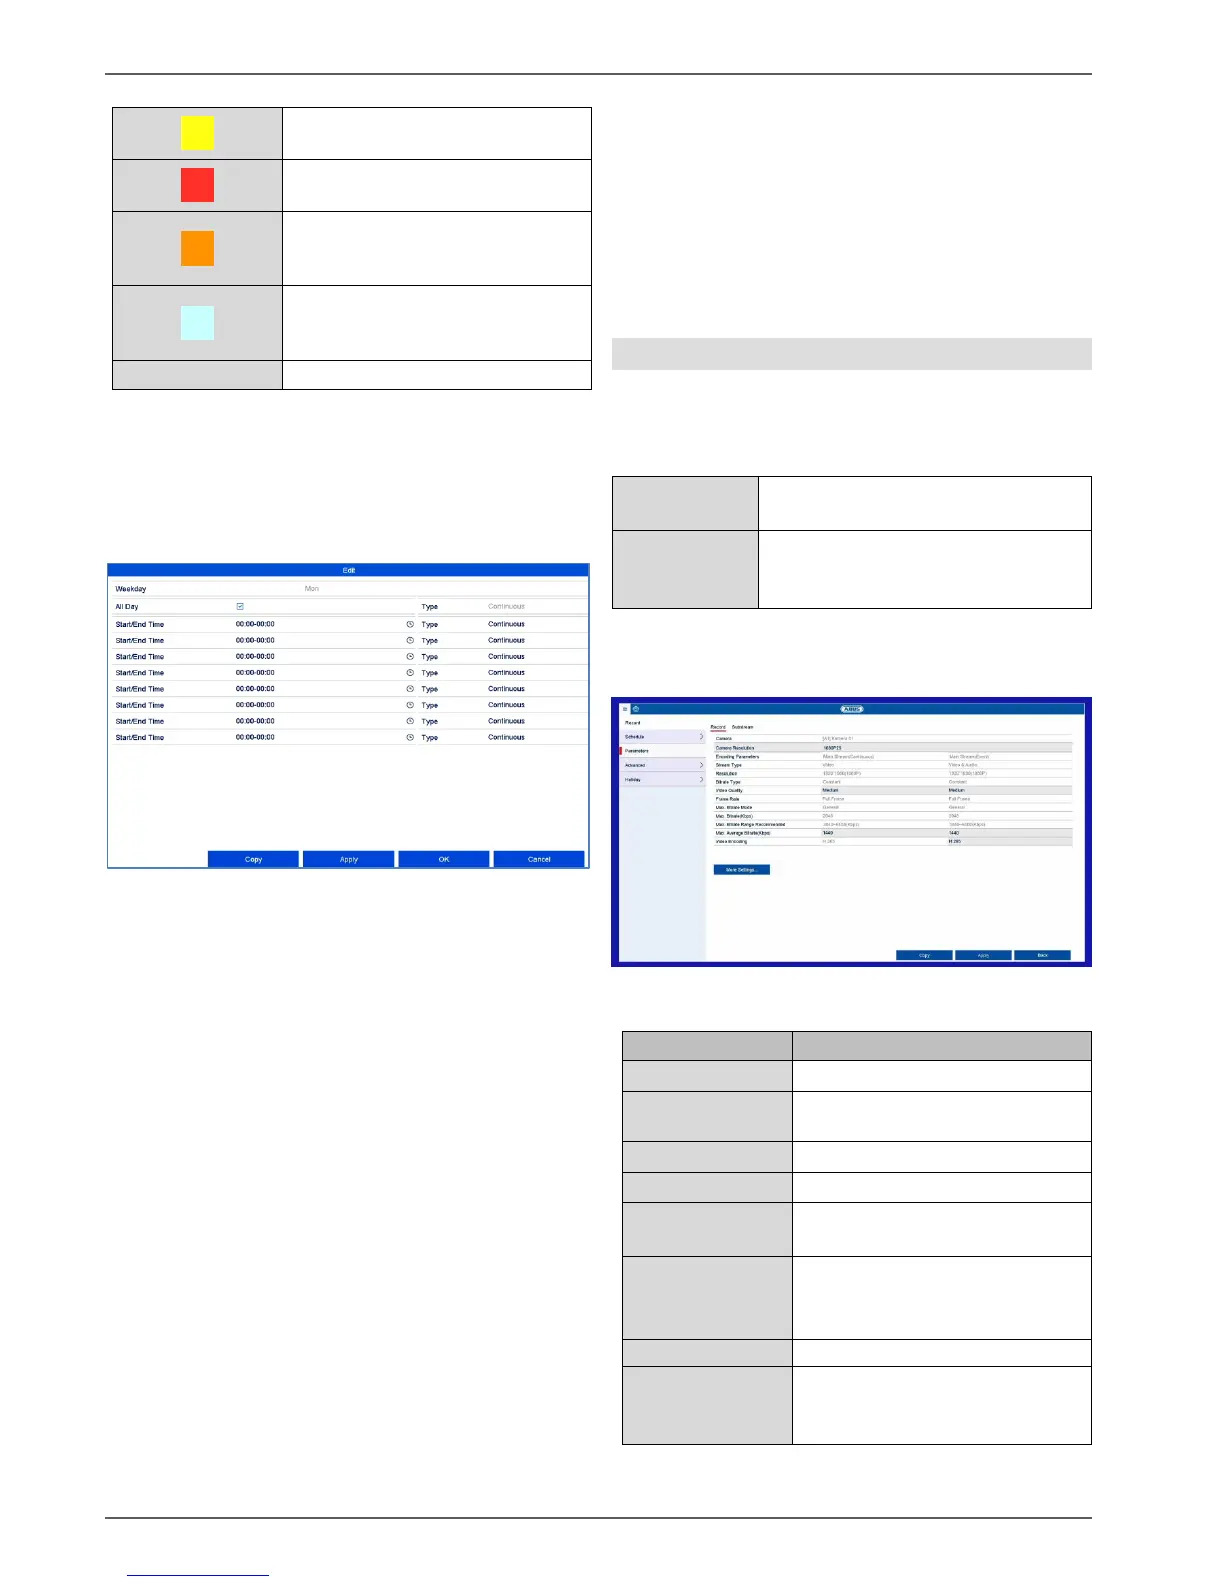
Parameter
“Parameters” is where the quality settings for the
individual video streams are set up on the recorder.
There are three types of configuration available: