LOCAL OPERATION GETTING STARTED
3-18
Using the
x10
and
10
keys
When you have entered a value using the numeric keypad, you can adjust its value either in single
or continuous steps.
As an example, we shall adjust the carrier frequency using the rotary control for continuous
adjustment as well as in selected increments/decrements using single steps.
Touch
Freq
...
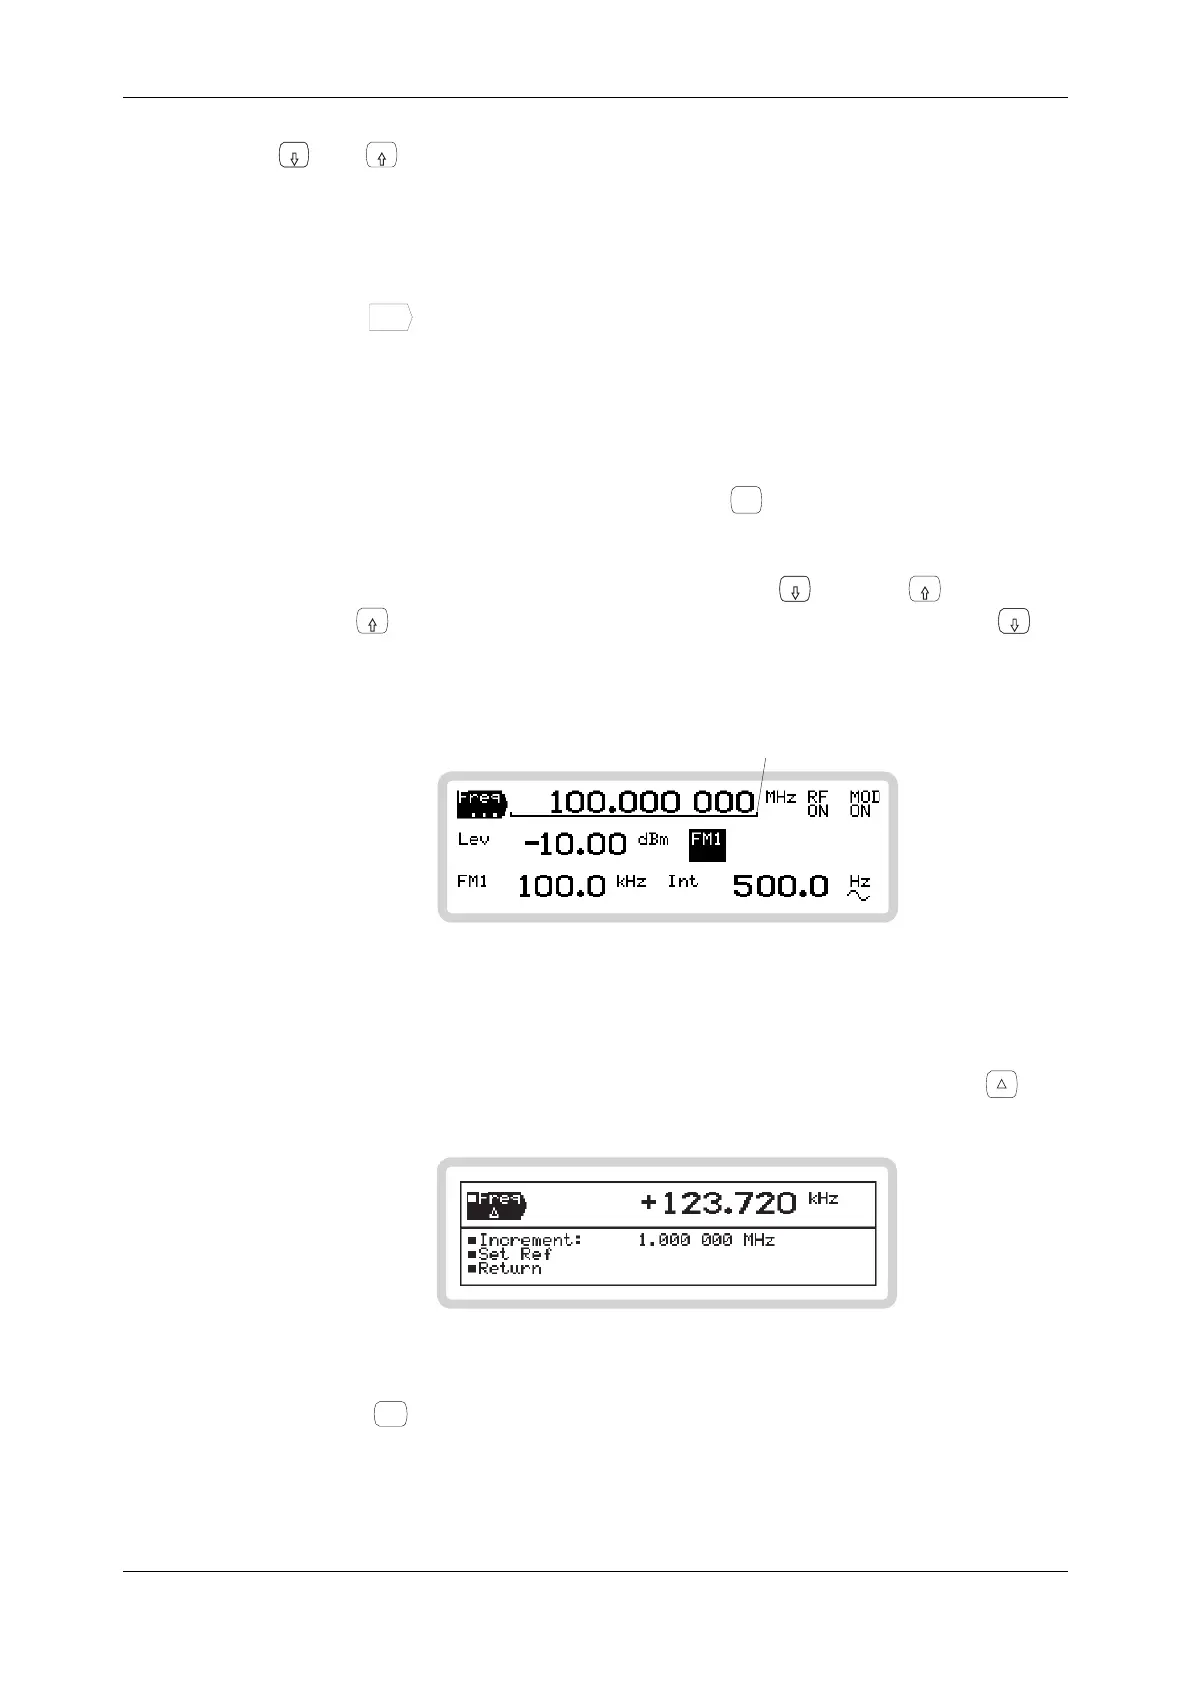
to select carrier frequency as the current function. The frequency is displayed as
100.000 000 MHz. The number of digits behind the decimal point shows the maximum
resolution: the frequency can be changed in 1 Hz steps.
Using rotary control
1 Select rotary control adjustment by toggling the
KNOB/
STEP
key so that a bracket underlines the
carrier frequency. With the bracket displayed, the control knob is enabled and its
sensitivity can be set.
2 Adjust rotary control sensitivity by pressing either the
x10
key or the
10
key. Pressing
the
10
key increases the length of the bracket by one decimal place. Pressing the
x10
key
shortens the length by one decimal place. In this way, rotary control resolution decreases or
increases by a factor of ten.
B5351
Bracket shortens as
resolution decreases
Fig. 3-15 Resolution of the rotary control
3 Move the control knob in either direction and note how the displayed carrier frequency
changes by the desired amount.
4 To check the current amount of offset from the reference carrier frequency, press
. The
offset is displayed as either a negative or positive value.
B5191
Fig. 3-16 Carrier shift and increment
5 Press
SIG
GEN
to return to the main screen.