45
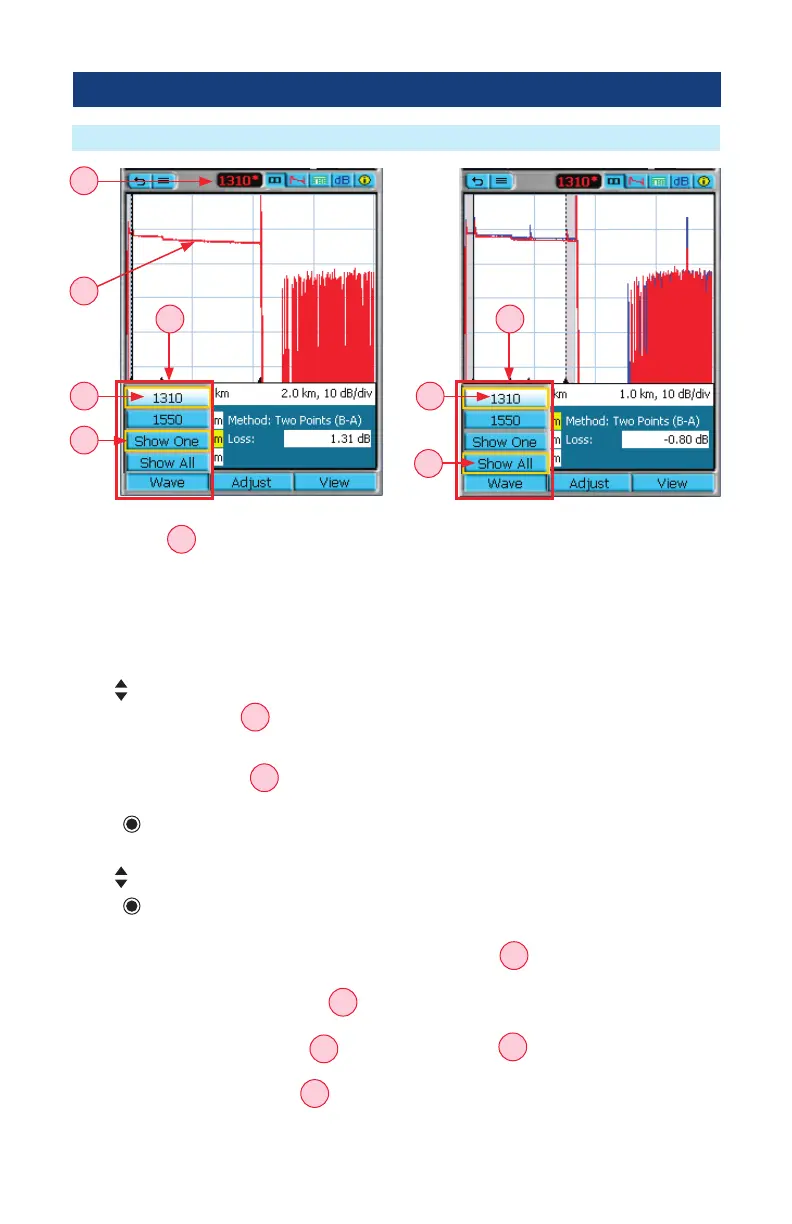
Wavelength Selection Menu In OTDR Pages
The Wave menu
A
is accessed by pressing the Wave key. This menu serves two purposes:
• Allows the user to select the active wavelength.
• Allows the user to select whether or not to show one or all wavelengths traces.
Note: Since two independent selections are accessed through the Wave menu, the selected two menu items
will be indicated by Yellow rectangle border.
To enable/disable multi or single trace display:
• Use
arrows to select the desired display option as follows:
– Select Show All option
B
to display multiple wavelength traces with the currently selected wavelength
trace on top.
Note: the selected option will indicated by the Yellow rectangle border.
– Select Show One option
C
to display a single wavelength trace at the indicated wavelength. Note:
the selected option will indicated by the Yellow rectangle border.
• Press key to conrm selection and exit the Wavelength Selection menu.
To select the active wavelength:
• Use arrows to select from the available wavelengths.
• Press key to conrm selection and exit the Wavelength Selection menu.
As shown in the example screens above:
– Screen #1 and #2: The 1310 is the currently selected wavelength
D
;
it is highlighted and indicated by the Yellow border.
– Screen #1 and #2: The 1310* label
E
is displayed in the top menu bar to indicate that the currently
selected wavelength is 1310 nm.
– Screen #1: The Show One option
C
is selected, the 1310 trace
F
is displayed as a single trace in
the trace image window.
– Screen #2: The Show All option
B
is selected; both traces (1310 and 1550, with 1310 displayed
on top) are shown in the trace image window. The cursor and loss information shown are for the active
wavelength.
A
C
E
F
D D
A
B
OTDR Test Results Viewer
Screen #1 Screen #2