EasyManuals Logo
Home>Agilent Technologies>Laboratory Equipment>1200 series

Agilent Technologies 1200 series Reference Manual

Agilent Technologies 1200 series
278 pages
To Next Page IconTo Next Page
To Previous Page IconTo Previous Page
Page #144 background imageLoading...
Page #144 background image
144 Agilent 1200 Series Autosampler Reference Manual
4 Repairing the Autosampler
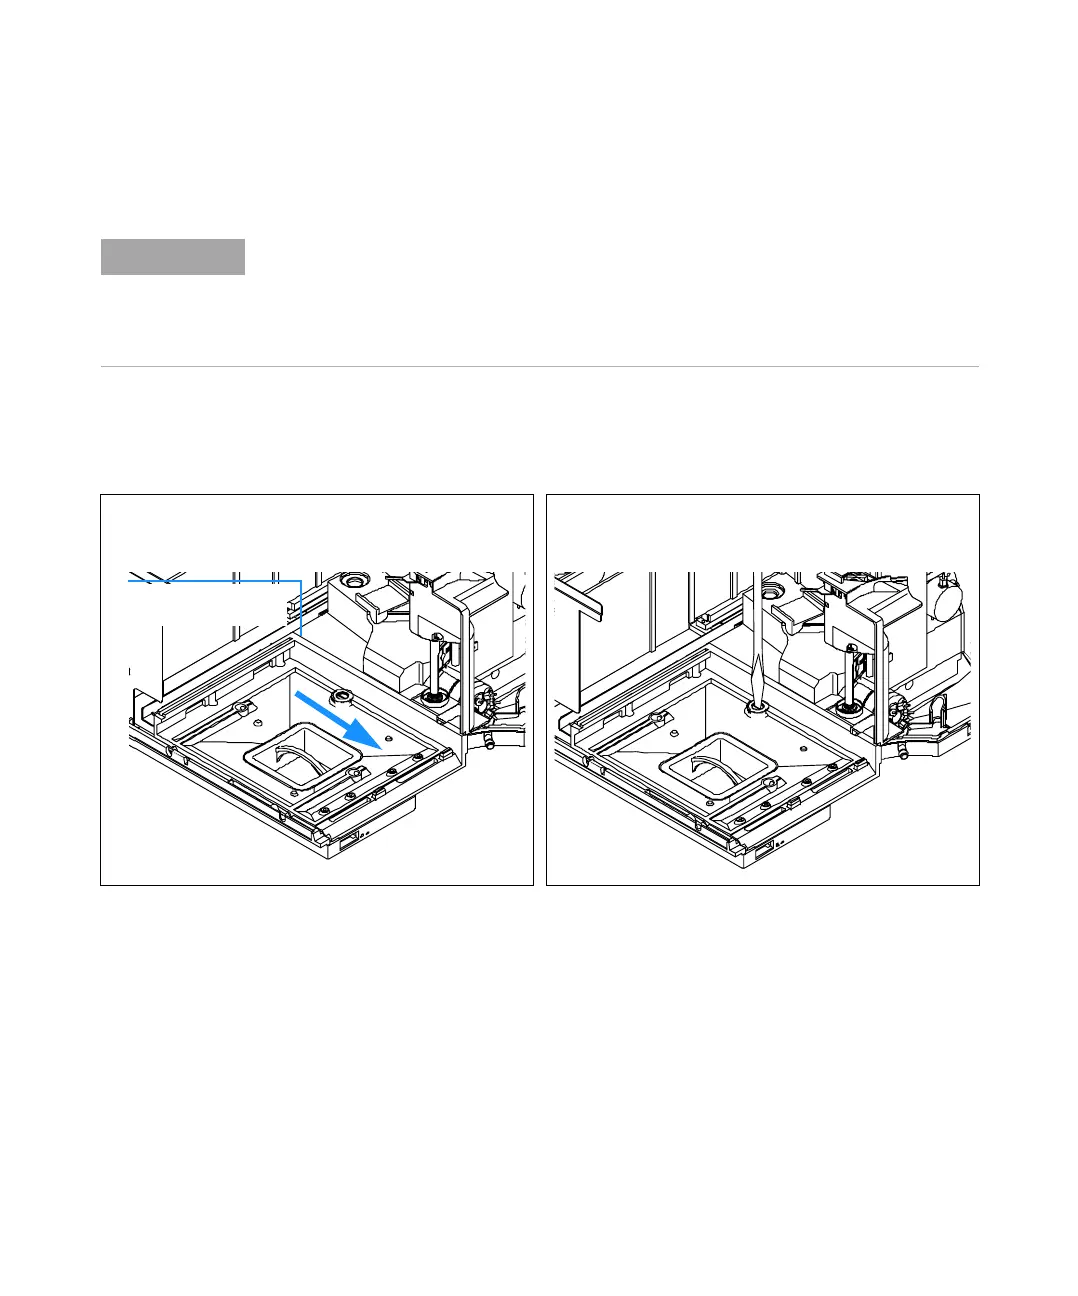
Installing the Sampling Unit
NOTE
The replacement sampling unit is supplied without injection valve and metering head
assembly. If you are exchanging the complete sampling unit, remove the injection valve and
metering head from the defective sampling unit. Install the valve and metering head in the
new sampling unit. See “Injection-Valve Assembly” on page 147 and “Gripper Arm” on
page 128.
1 Mount the tray base onto the sampling unit. Ensure the
tray base is positioned flush against the sampling unit.
2 Tighten the locking screw ¼-turn clockwise.
Correct positioning of
the tray base

Table of Contents

Other manuals for Agilent Technologies 1200 series

Questions and Answers:

Question and Answer IconNeed help?

Do you have a question about the Agilent Technologies 1200 series and is the answer not in the manual?

Agilent Technologies 1200 series Specifications

General IconGeneral
BrandAgilent Technologies
Model1200 series
CategoryLaboratory Equipment
LanguageEnglish

Related product manuals