105
Part 1. Capillary columns Columns and Traps
Procedure: Installing capillary columns in the cool on-column inlet
Procedure: Installing capillary columns in the cool on-column inlet
Before installing the column, be certain you have the correct hardware installed
for the column and type of injection you are doing. See the Inlets volume for
detailed information.
Materials required
Column nut and ferrule
Column cutter
1/4-inch wrench
1. Prepare the column. See page 101 for instructions.
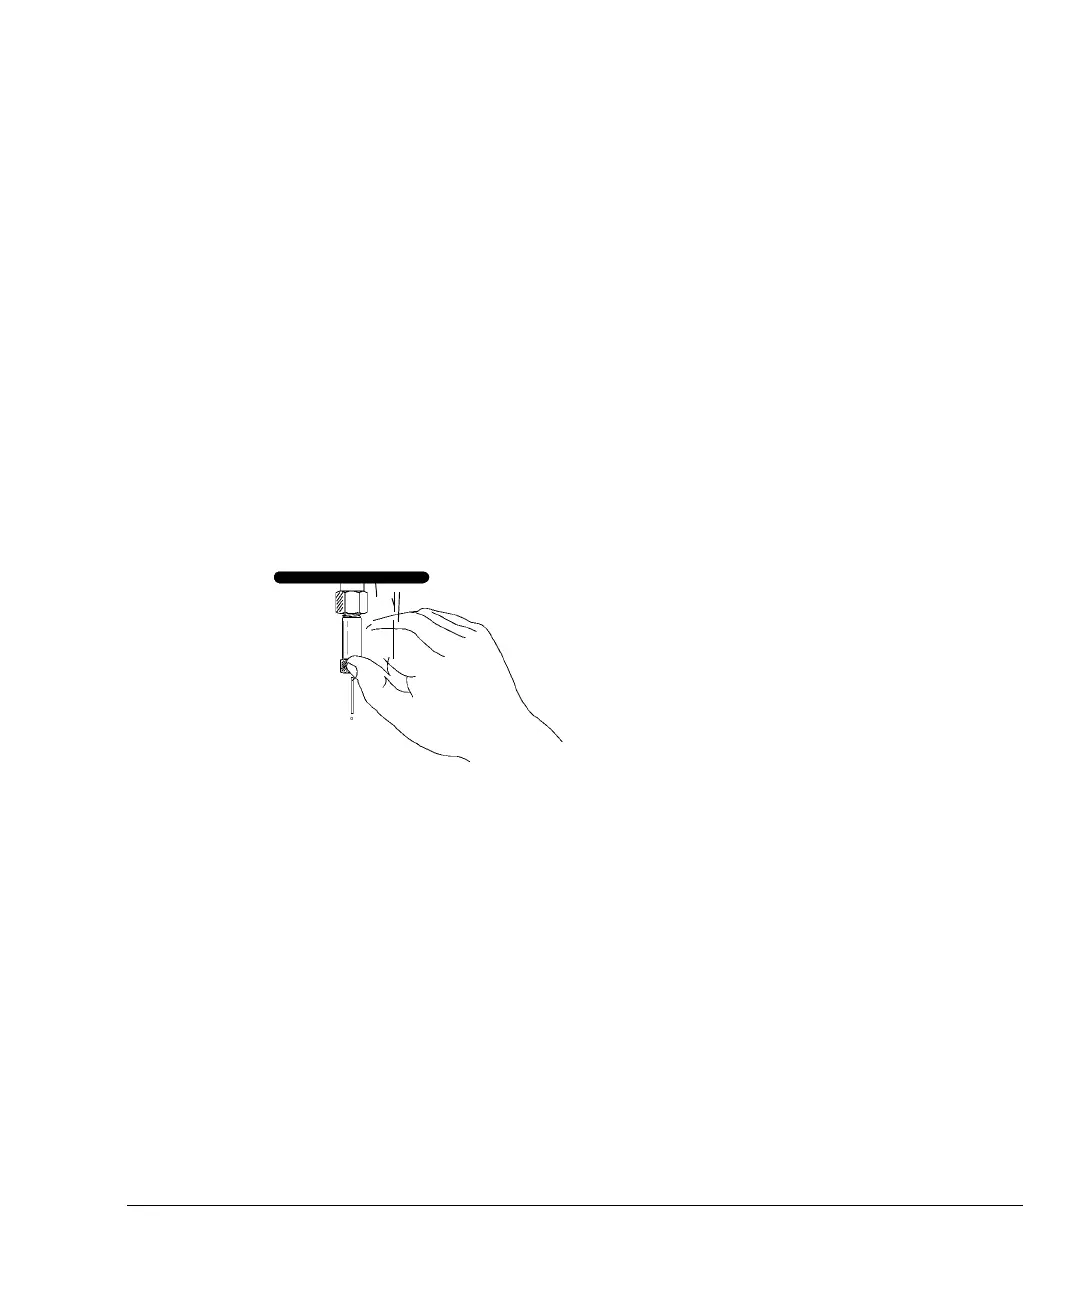
2. Gently insert the column into the inlet until it bottoms. Insert the column
nut into the inlet fitting and tighten the nut finger tight.
3. Tighten an additional 1/4-turn with a wrench or until the column does not
move.
4. If you are using an automatic injection system with 250 µm or 320 µm
columns, verify the installation by pushing the syringe manually into the
inlet.
5. After the column is installed at both inlet and detector, establish a flow of
carrier gas through the inlet. Heat the oven, inlet, and detector to operating
temperatures. Allow them to cool, and then retighten the fittings.

 Loading...