8AL90608USAGed01 17 / 77
The result can be sorted by acsending or desending by clicking at one of the column
headers.
Columns can be excluded from the result list if preferred. When a right click is made
at the header, a menu is displayed with all the searchable columns. Untick or tick the
prefferred columns.
3. Search results – The selected result is displayed in a blue color. To bring up the detail
view click [Enter] or double click with the mouse. To navigate in the list use the up
and down arrow.
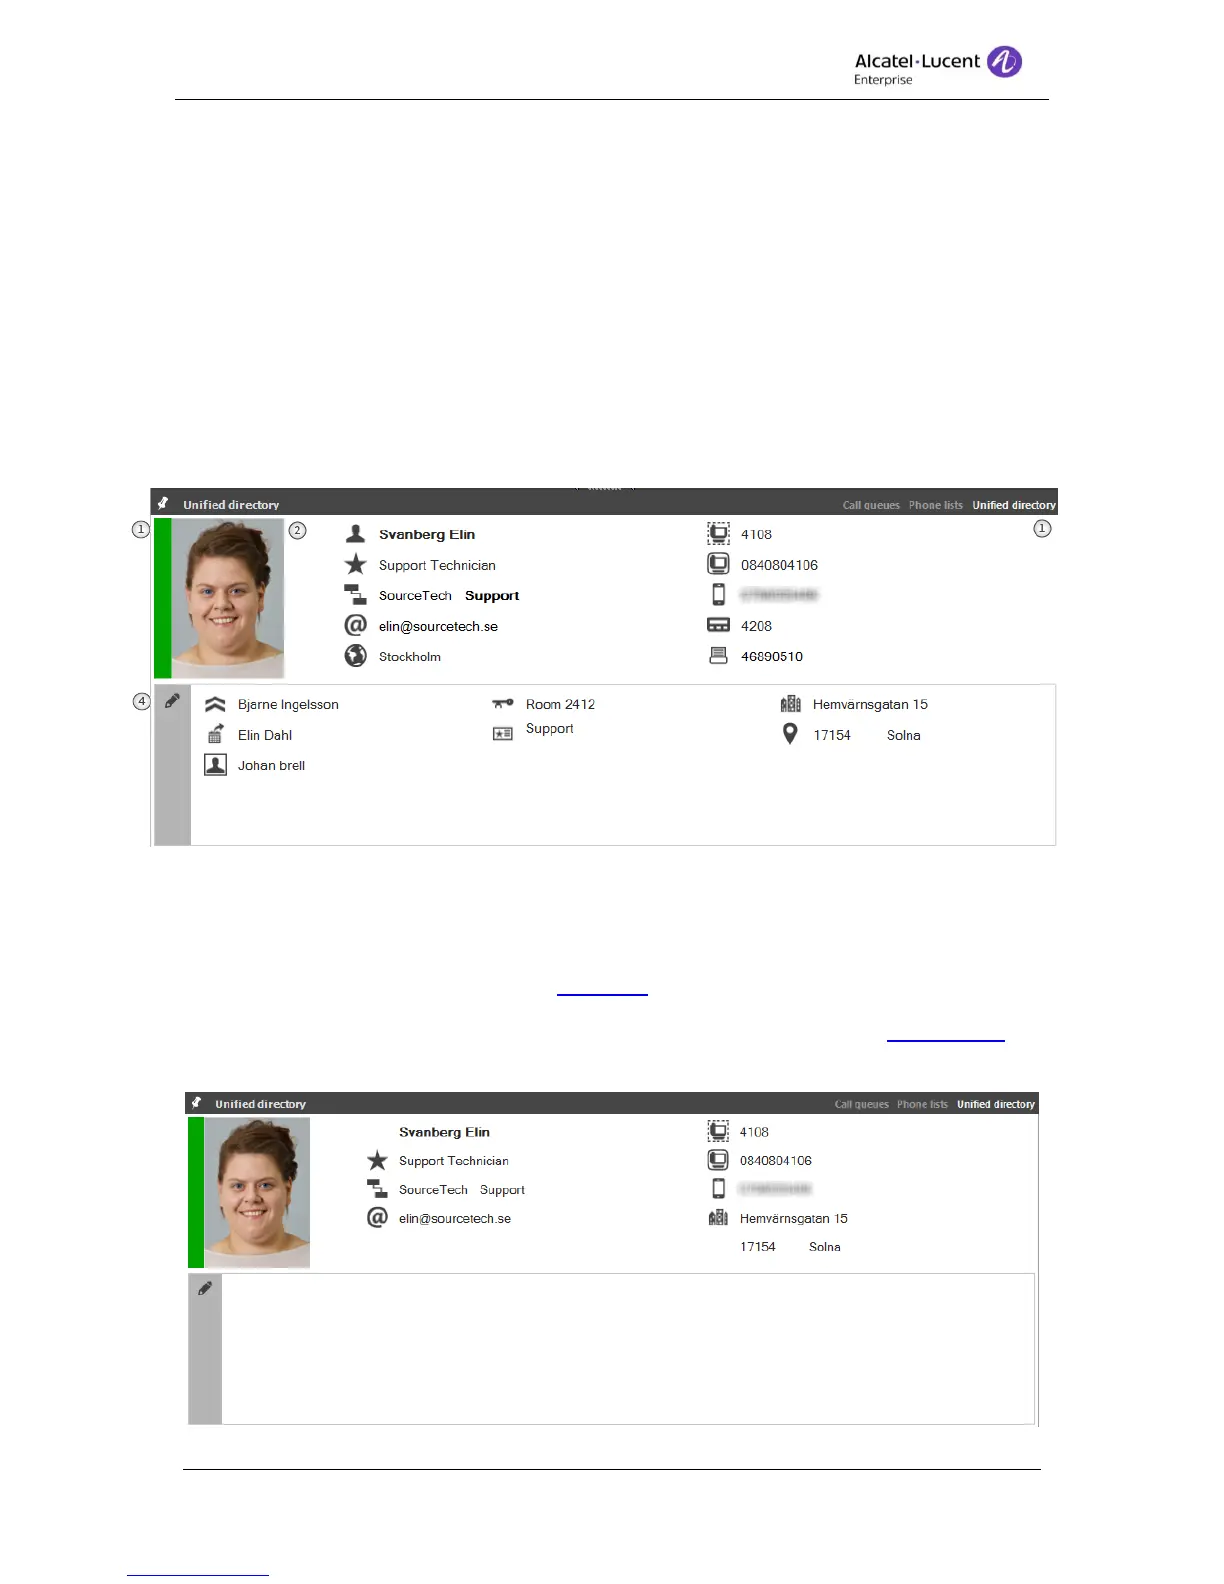
6.3 Detailed view
The detailed view is displayed when a search result is a single result or when a result is
selected from the result list. All of the columns can be configured to suite the operator.
1. Presence – Here the user’s current presence is displayed.
2. Photo – If a photo is returned from the Ldap it is always displayed at the left side.
3. Fields – The detailed view has 30 fields, divided on five columns. Two columns at the
top part and three columns at the bottom part.
4. Edit – Click on the pen to go into edit mode.
The detailed view has a default layout, this is default is set in settings for the Contact card.
When the default layout is set the detailed view is displayed like this;