IV-10
12 Push the saw blade
into between the
guide rollers and then
the left-hand and
right-hand saw blade
inserts.
Where the back of the
saw blade is pushed
against the backup
rollers, pull up the left-
hand and right-hand
saw blade insert
clamp levers to close
the saw blade inserts.
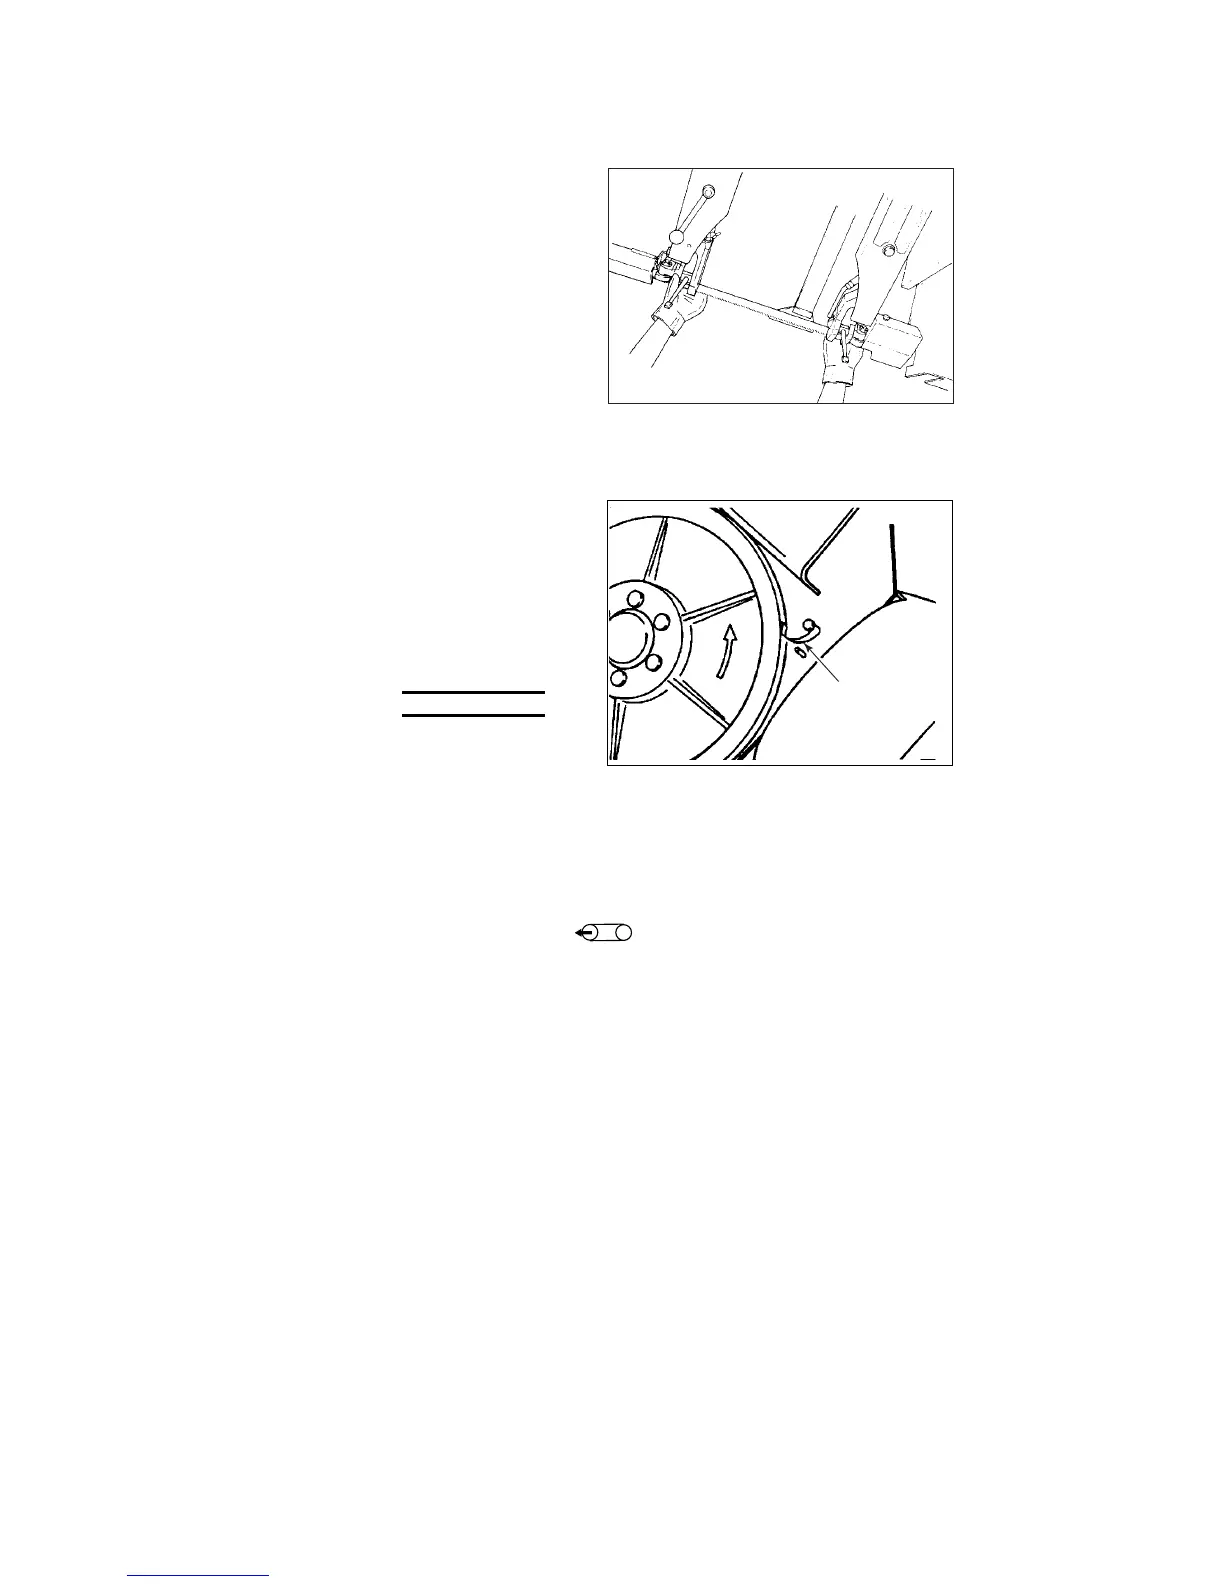
13 Push the back of the
saw blade against the
flange of the drive
wheel, and set the
saw blade holder.
This prevents the saw
blade from coming off
the drive wheel.
NOTE
O The saw blade holder
is automatically
released as soon as
the saw blade starts
running.
SAW BLADE
HOLDER
14 Check that the saw blade is securely installed on the drive wheel,
hold the saw blade with one hand so that its back is pushed
against the flange of the driven wheel, and turn the saw blade
tension lever to the “
” position.
The saw blade is hydraulically tensioned to a proper degree.
15 First pull down and then pull up the left-hand and right-hand saw
blade insert clamp levers to close the saw blade inserts again.
This operation is designed to ensure or check that the saw blade is
securely clamped with the saw blade inserts.
16 Adjust the position of the wire brush as described on the next page.
17 Close the saw blade cover, and gently close the wheel cover.