CHAPTER 5: MAINTENANCE
LW500A/LW600A PULSED Nd:YAG LASER
990-539 5-23
5. Loosen the bolts at both ends of the
flashlamp.
6. Using two hands, hold both ends of the
flowtube (glass tube) and lift it up together
with the flashlamp.
7. Place the flashlamp on a clean lint-free
cloth.
8. Carefully pull the flashlamp out of the
flowtube. Straighten the flashlamp leads
as necessary.
9. Clean the new flashlamp with alcohol and pass the cleaned flashlamp through the flowtube.
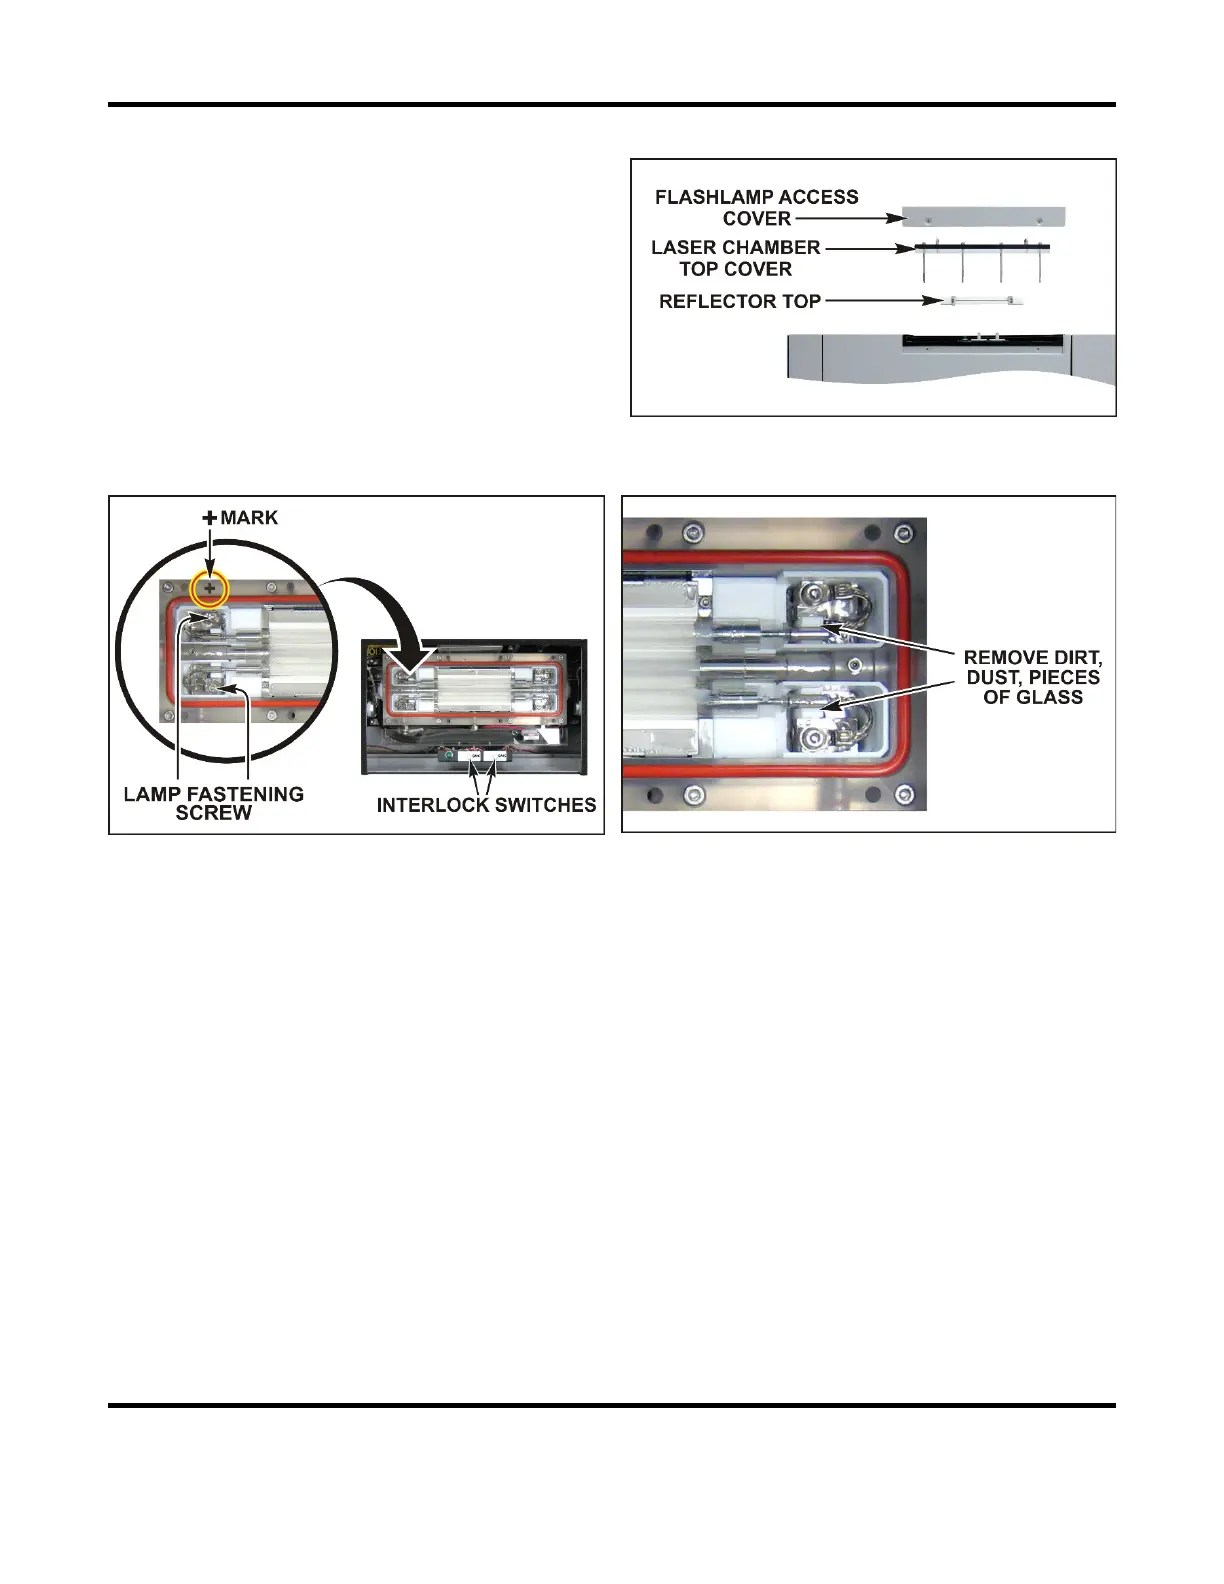
10. Carefully place the flashlamp so that it’s "+" aligns with the "+" in the chamber. Make sure that
the flashlamp is securely placed inside the guide groove of the chamber.
11. Center the flowtube inside the chamber.
12. Secure the flashlamp tightly with the bolts.
13. Carefully replace the top portion of the reflector.
14. Install the top cover on the chamber and tighten the bolts.
NOTE: Make sure that the O-ring between the top cover and chamber is pressed evenly.
16. Pull up on the end of the flashlamp access cover interlock switches to bypass them and then turn
on the power.
17. Turn the CONTROL key switch ON.
18. Verify that there are no water leaks and the Laser operates normally, then turn the power OFF.
NOTE: If you detect a leak, turn the CONTROL key switch and the MAIN SWITCH OFF
immediately. Wait for 5 minutes, then wipe off the leaking water and fix the cause of leak.
20. Install the flashlamp access cover.
 Loading...


