CHAPTER 2: INSTALLATION AND SETUP
LW500A/LW600A PULSED Nd:YAG LASER
2-8 990-539
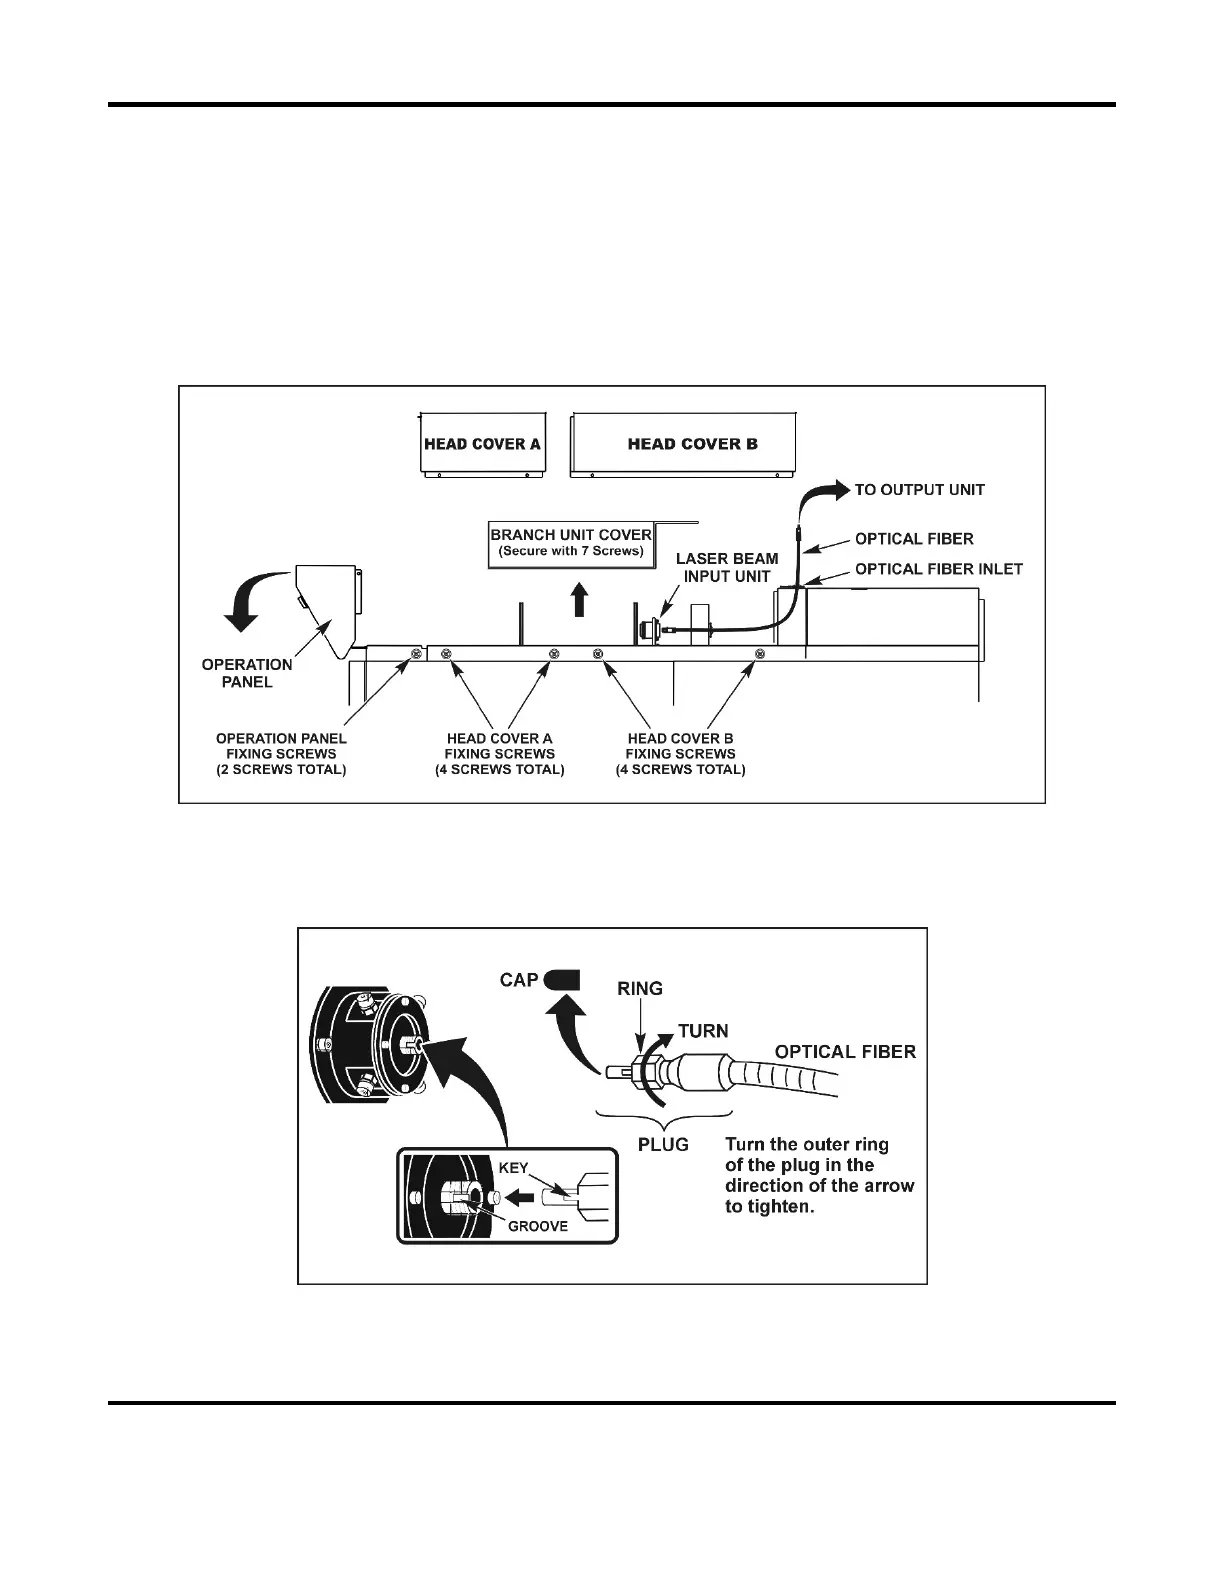
Connecting to the Laser Beam Input Unit (inside the Laser)
1. Remove the Operation Panel holding screws on both sides of the Laser, then tilt the Operation
Panel forward.
2. Remove all Head Cover holding screws, then pull both Head Covers up to remove.
3. Remove the Branch Unit Cover.
4. Pass the optical fiber with its protective rubber cap into the Laser through one of the optical fiber
inlets located on the top of the Laser.
5. Remove the protective cap from the end of the passed fiber and blow off any dust using an air
blower, then connect the fiber(s) to the laser beam input unit(s). Align the key of the fiber plug
with the groove of the Input Unit. Do not over-tighten the fiber plug, hand-tighten only.
6. Re-attach the Branch Unit Cover and Head Covers, then return the Operation Panel to its original
position and tighten the holding screws.