CHAPTER 3: PROGRAMMING FUNCTIONS
LW500A/LW600A PULSED Nd:YAG LASER
990-539 3-13
5. FIBER – This function prevents excessive power from being applied to the optical fiber. Input
the fiber type (SI/GI) and the core diameter of the optical fiber being used. The maximum output
power for any given optical fiber is automatically computed and limited to prevent fiber damage.
Setting range of core diameter:
LW500A(E)/ML-2651B(-CE) – φ 0.3mm to 1mm
LW600A(E)/ML-2650B(-CE) – φ 0.4mm to 1mm
The factory default setting is SI φ 1.0mm. When a beam expander and/or internal aperture
are used, set the fiber diameter to one setting larger.
If the schedule settings for PEAK (W), FLASH (mS) and REPEAT (pps) do not match the
fiber type and core diameter, an E51: SET ERROR FIBER or E48: OVER RATE FIBER
warning will appear. In these cases change the input setting.
If the end face surface of the optical fiber is stained, broken damaged, or covered with dust,
a warning message will not necessarily appear on the screen. Be sure to put the cap back
on the optical fiber when it is not in use or unprotected.
If the end face of the optical fiber is broken, check the lenses on both the input and output
units for damage. If the lenses are stained, clean them with the method described in Chapter
5, Section IV, Maintenance, Cleaning Optical Parts – Fogging and Staining.
Do not remove the Laser Beam Input Unit unless absolutely necessary. Doing so will
require that the input unit be re-aligned to the laser beam.
6. RESET COUNT – Resets the total SHOT COUNT and the GOOD COUNT. Move the cursor to the
counter you want to reset, then press the ENTER key. The count will be set back to 000000000.
7. ROM VERSION
– Displays the firmware revisions inside the Laser.
8. PRESET COUNT
– Sets the desired number of laser outputs for the total shot count and the good
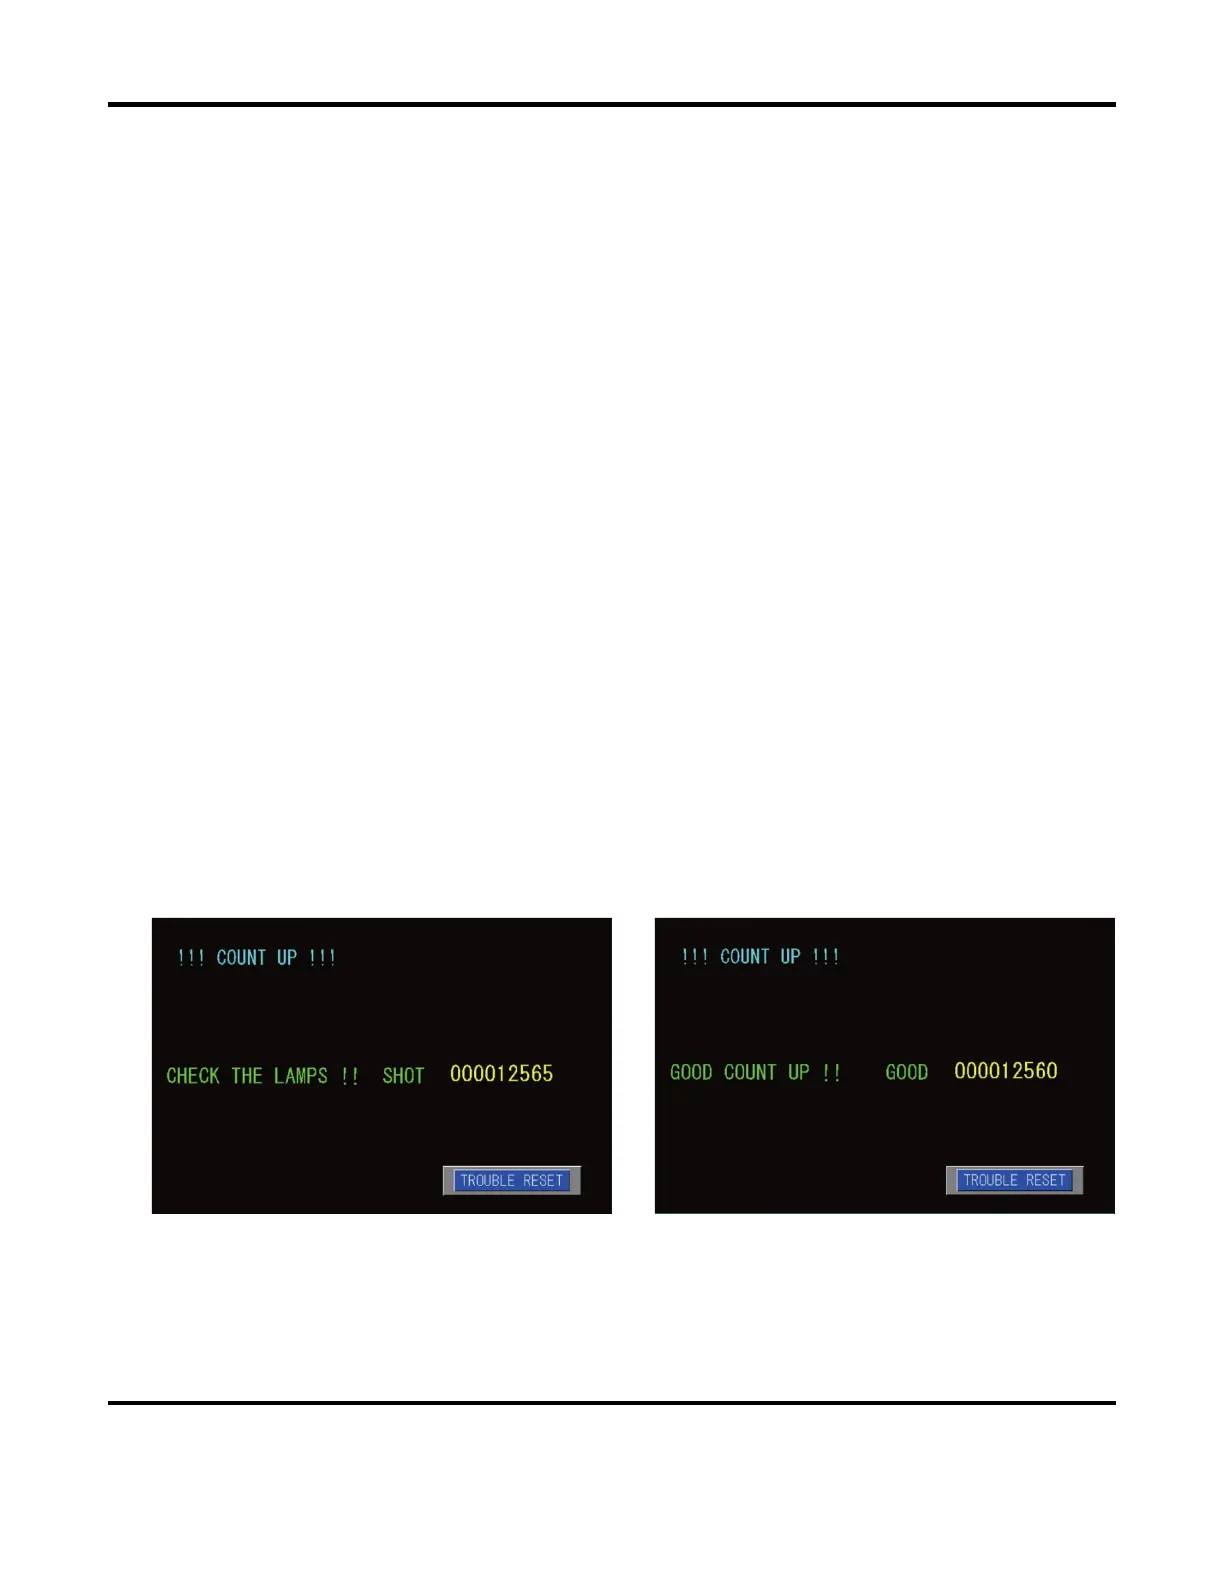
shot count. When the count reaches the set number, the following messages will appear:
When SHOT count has reached the set number. When GOOD count has reached the set number.
Press the TROUBLE RESET key to return to the previous screen.
 Loading...


