CHAPTER 4: OPERATING INSTRUCTIONS
LW500A/LW600A PULSED Nd:YAG LASER
4-4 990-539
Section II. Welding using the Touch-Screen Controller
Prepare Processing Point and Set Weld Schedule (by example)
1. Turn the High Voltage
OFF
so the laser cannot produce a Laser output.
(The high voltage is automatically initialized during power-up).
2. Adjust the position of the laser beam output unit (focus head). Set the proper working distance
for each installed laser beam output unit (focus head).
3. Select
SCHED
button on the Laser Controller to access the
SCHEDULE
screen.
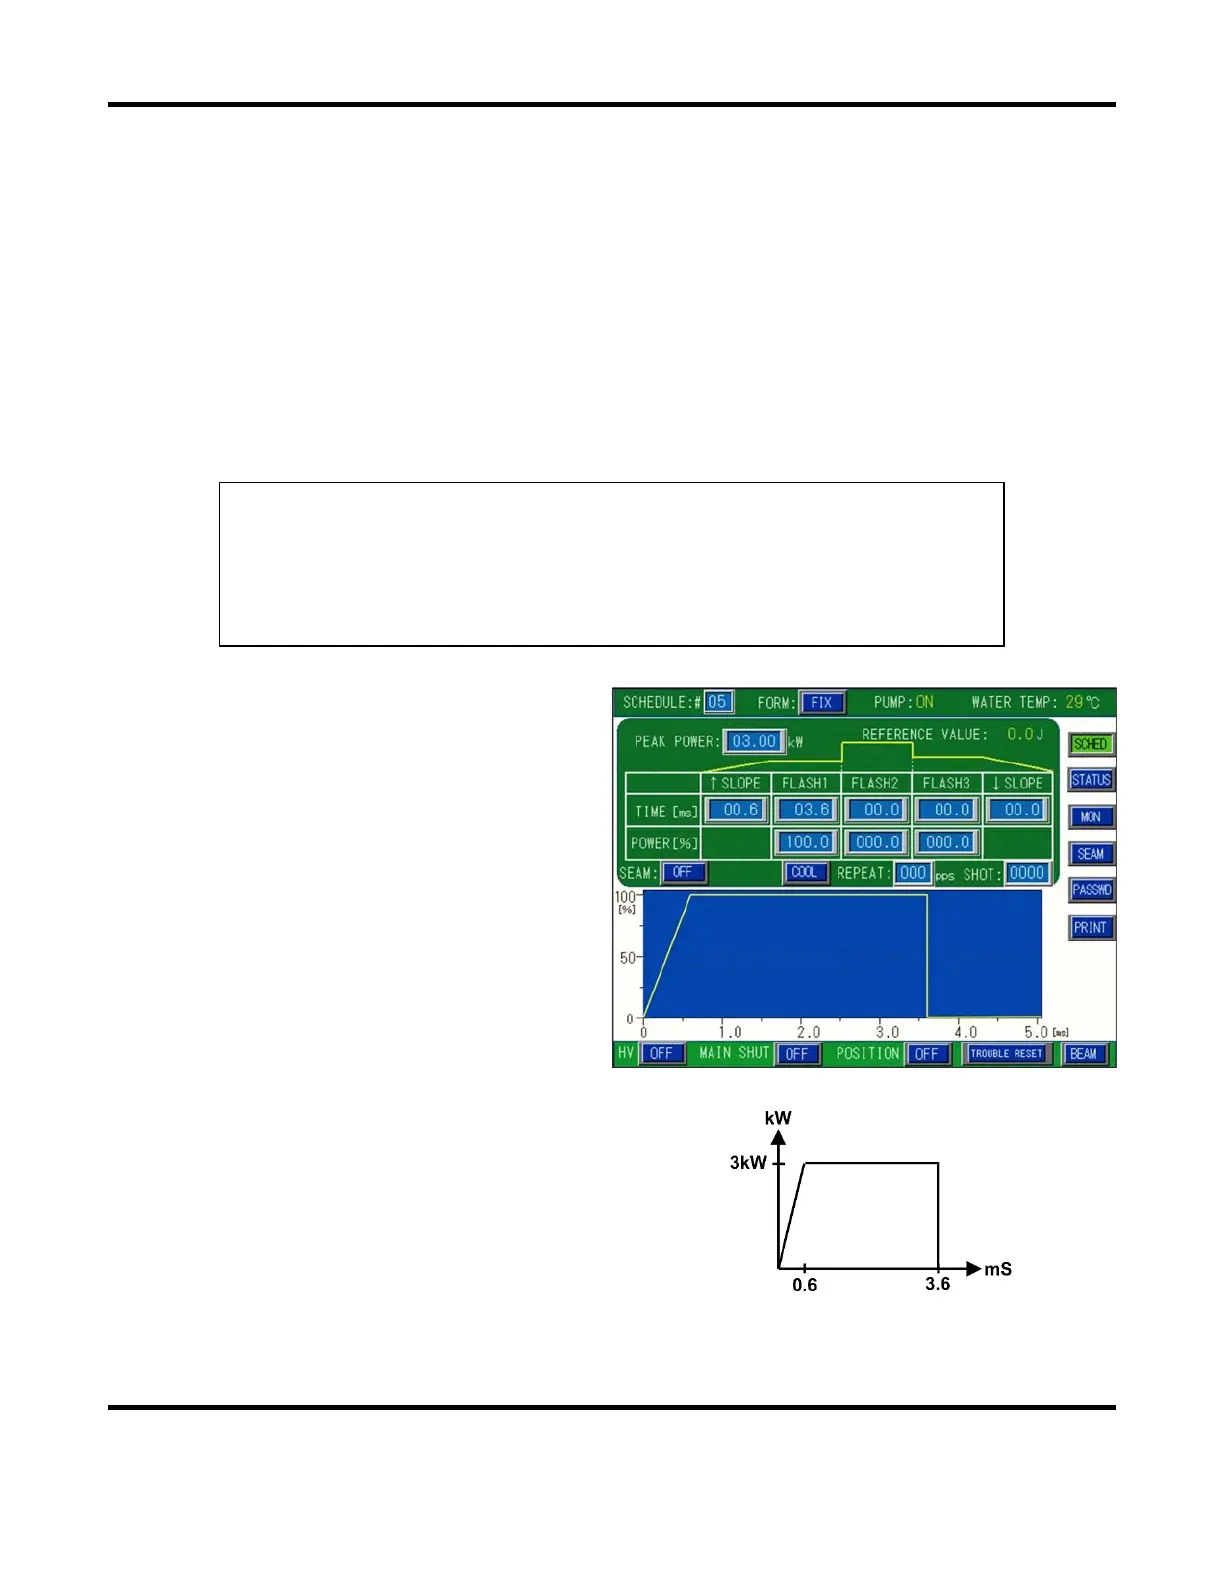
4. For this example, enter the following weld parameters in the
FORM: FIX
Screen.
Example Settings:
FORM: FIX
SCH to #05
SLOPE to 00.6ms
FLASH1 to 03.6ms
FLASH2 to 00.0ms
FLASH3 to 00.0ms
SLOPE to 00.0ms
REPEAT = 00pps
PEAK = 3.00kW
OUTPUT VALUE = 100%
5. Select the
SCHEDULE:#
field. Enter
05
using the keypad, followed by
ENT
.
6. Select the
PEAK POWER
field. Enter
3.00
using the keypad, followed by
ENT
.
7. Select the
TIME [ms]
field under
FLASH1
.
Enter
3.6
using the keypad, followed by
ENT
.
8. Select the
POWER [%]
field under
FLASH1
. Enter
100.0
using the keypad,
followed by
ENT
.
9. Select the
TIME [ms]
field under
SLOPE
. Enter
0.6
using the keypad,
followed by
ENT
.
When the above data is programmed in
the Schedule screen, the output pulse
waveform will appear as shown on the
right.
Now we’re ready to weld!