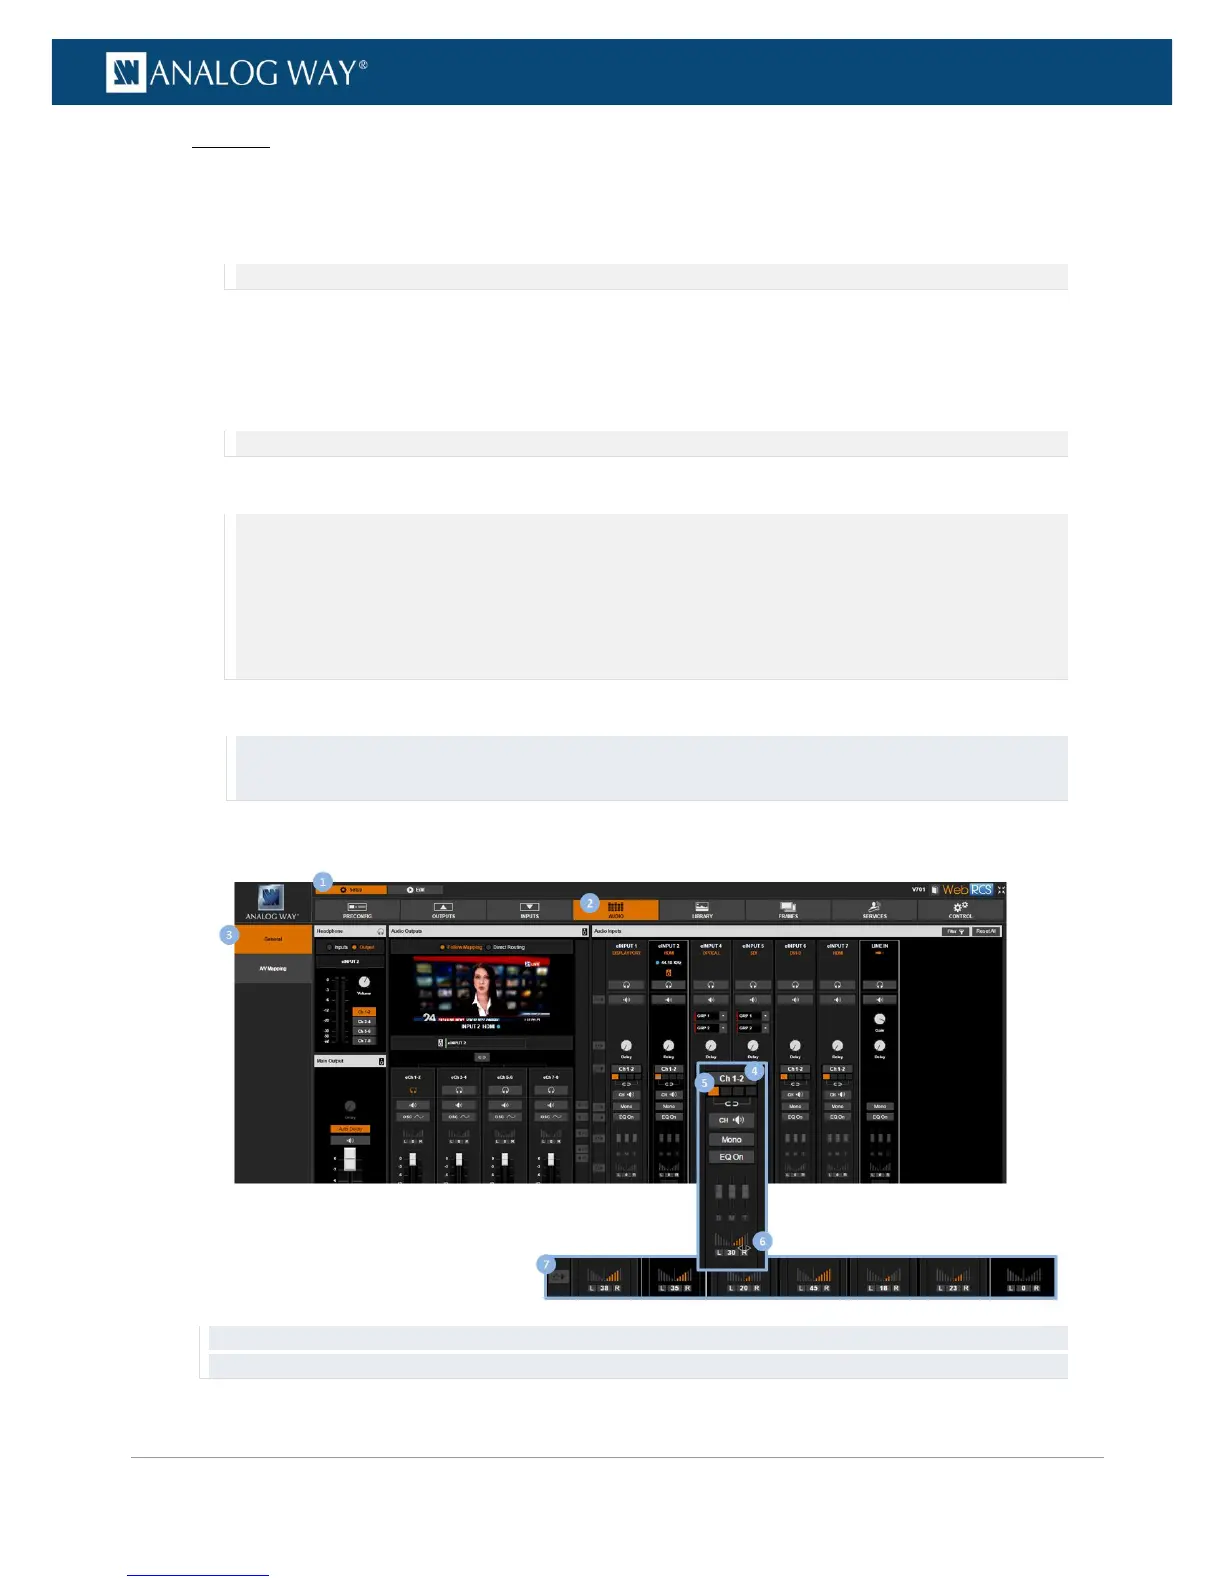
Web RCS
1. Go to the Setup menu on the Web RCS interface.
2. Click on the AUDIO tab to access the audio management page.
3. In the left side toolbar, select General to access the audio inputs and outputs setup page.
NOTE: You can also access the audio outputs setup page via the A/V Mapping tab.
4. Under Audio Inputs (right side window), locate the input to adjust and click on the Ch 1-2/Ch linked
button if required to link/unlink channel pairs:
• Click on the Ch 1-2 button to link channel pairs and use the first channel pair settings for all pairs;
• Click on the Ch linked button to unlink channel pairs and set up channel pairs individually.
NOTE: On the Line In input, there is only one single channel pair and the link option is not available.
5. Select a channel pair if required to set up the channel pair.
NOTE:
• When channel pairs are linked, only the first channel pair settings are available and there is no need to select a channel
pair.
• When channel pairs are not linked, you can select a channel pair to access the channel pair settings.
• On the Line In input, there is only one single channel pair and there is no need to select a channel pair either to access
the channel pair settings.
6. Click and drag the Balance control bar to adjust the balance of the audio pair.
Remember: If channel pairs are linked, the first channel pair setting will be used for all pairs.
TIP: Toggle the Listen on the Headphone box if required to prelisten to the audio pair on the headphone output.
7. TIP: Use the Reset All shortcut button to reset all inputs and channel pairs at once.
TIP: Click on the Headphone button if required (located under the input) to prelisten to the selected audio pair on
the headphone output.
 Loading...
