To add a delay to the audio:
Front Panel
1. Enter the AUDIO menu on the Front Panel interface.
2. Select Output Settings to set up the audio output.
3. If required, uncheck the Auto Delay check-box to disable the automatic computation of the audio
delay.
4. Select Delay to adjust the audio delay.
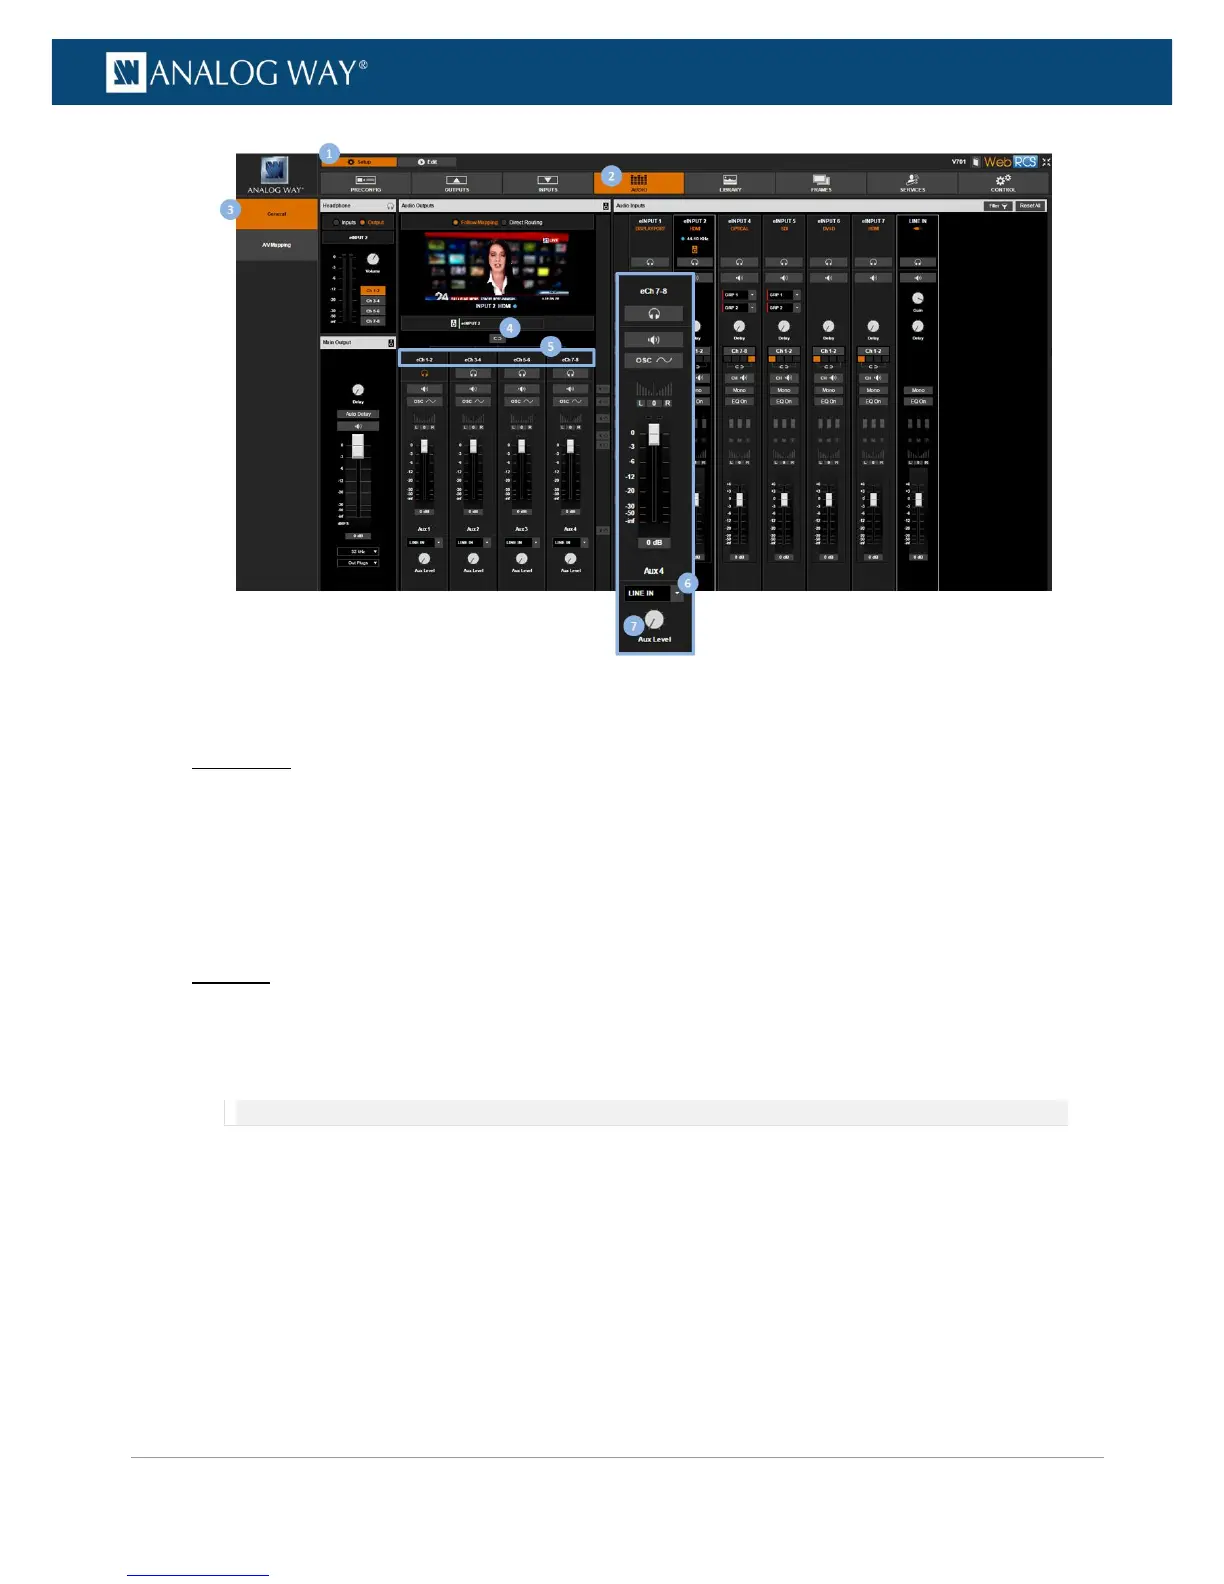
Web RCS
1. Go to the Setup menu on the Web RCS interface.
2. Click on the AUDIO tab to access the audio management page.
3. In the left side toolbar, select General to access the audio inputs and outputs setup page.
NOTE: You can also access the audio outputs setup page via the A/V Mapping tab.
4. Under Main Audio (bottom left side window), click on the Auto Delay button if required to disable
the automatic computation of the audio delay.
5. Click and drag the Delay control knob to manually adjust the audio delay.
 Loading...
