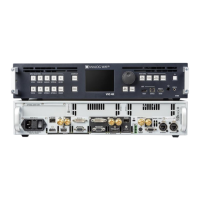
2. Plug-in the USB type A connector to your computer USB port.
(2) Enable the Ethernet over USB device connection:
1. Go to the CONTROL > USB Device menu on the front panel interface.
2. Select Connection Mode > ETHERNET to enabled the Ethernet over USB connection.
(3) Connect to the Web RCS:
1. Open a web browser.
2. In this web browser, type in the VIO 4K virtual IP address (available from the CONTROL > USB
Device menu).
The Web RCS interface should load into your web browser.
WINDOWS XP USERS
(1) Enable the mass storage USB device connection:
1. Go to the CONTROL > USB Device menu on the front panel interface.
2. Select Connection Mode > MASS STORAGE to enable the mass storage device mode connection.
(2) Connect your computer to the VIO 4K:
1. Plug-in the USB type B connector to the front panel USB device port.
2. Plug-in the USB type A connector to your computer USB port.
(3) Copy the Ethernet over USB driver to your computer:
1. Open the VIO 4K_USB driver.
2. Go to the Drivers/Windows folder and select XP.
3. Copy the file AW_VIO4K_EtherOverUsb.inf to your computer.
(4) Enable the Ethernet over USB device connection:
1. Go to the CONTROL > USB Device menu on the front panel interface.
2. Select Connection Mode > ETHERNET to enabled the Ethernet over USB connection.
The Add New Hardware assistant should pop up.
(5) Add the new hardware:
The Add new hardware assistant automatically pops up when enabling the Ethernet over USB device
connection with the VIO 4K unit connected to your Windows computer:
1. Uncheck the Use Windows Update box and click next.
2. Select Install from folder and browse for the AW_VIO4K_EtherOverUsb.inf file.
NOTE: The driver will work even if not certified for Windows XP.
(6) Connect to the Web RCS:
1. Open a web browser.

 Loading...