Basic Installation 3-31MN1902
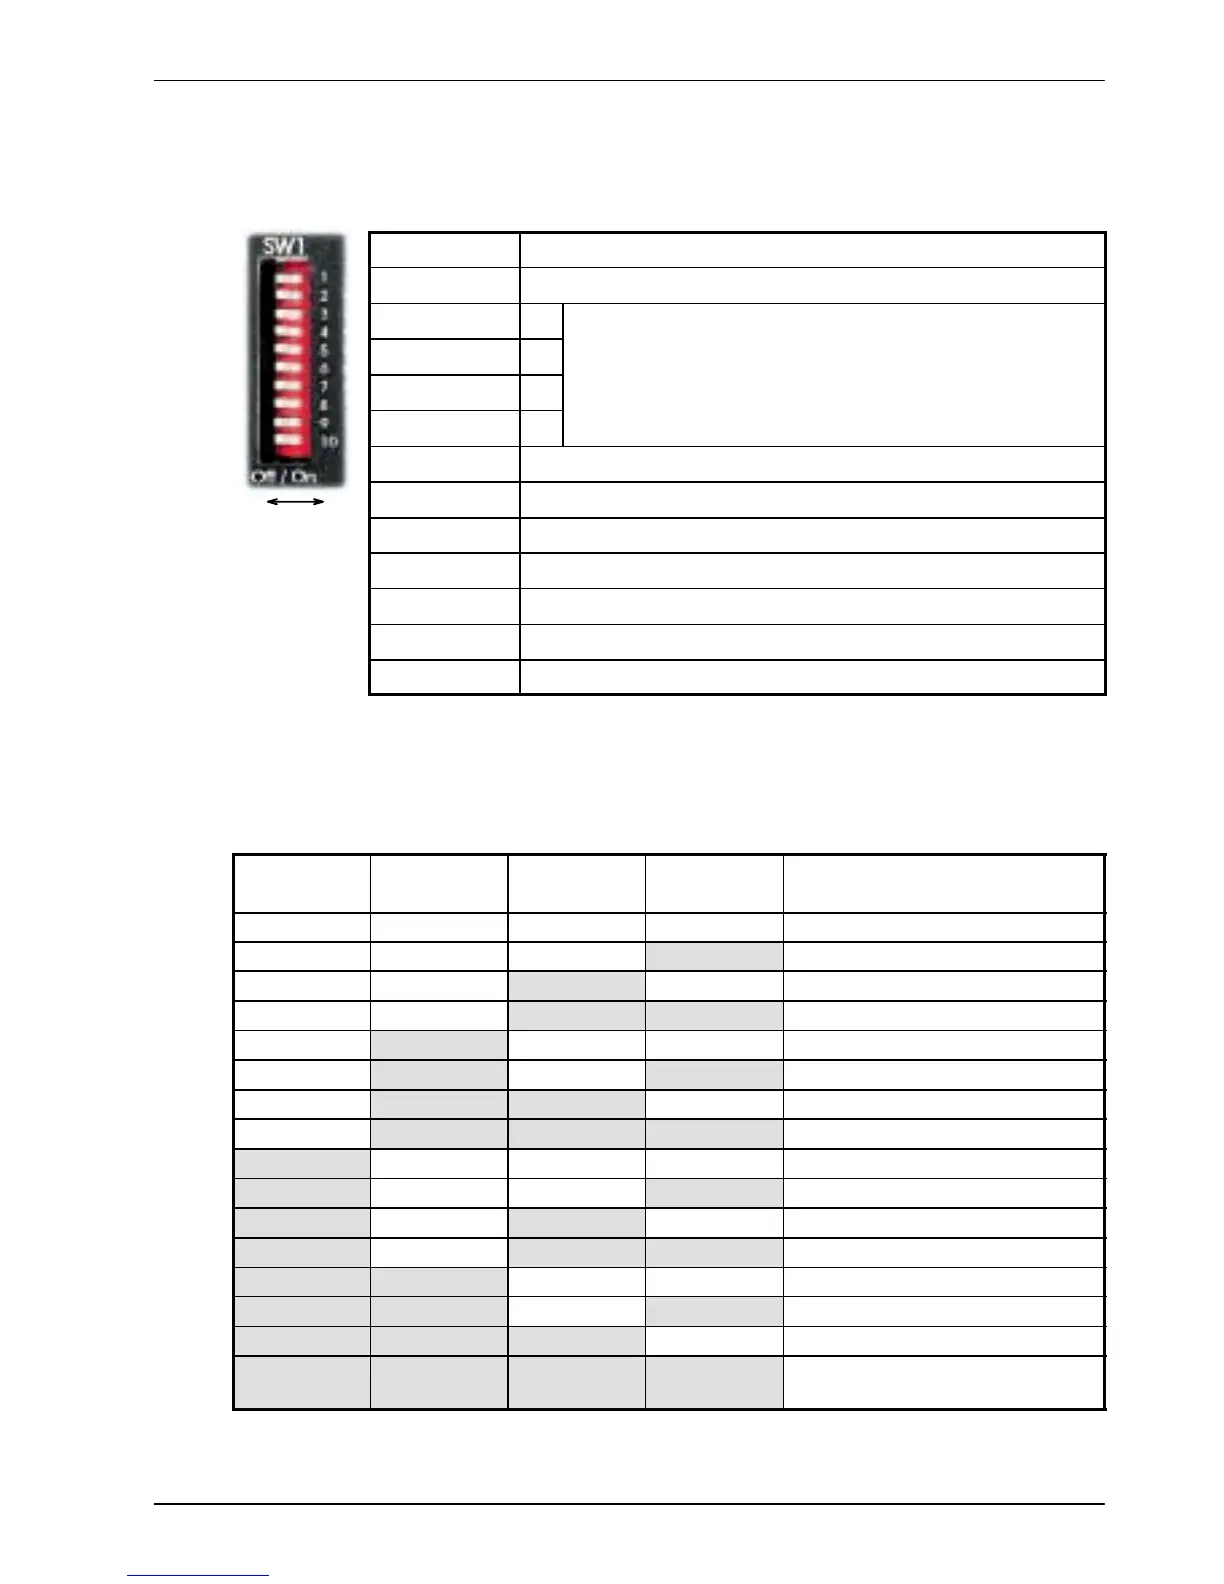
3.9 DIP switches - SW1
Various functions of the FlexDrive
II
can be controlled by the front panel SW1 DIP switches.
Location
Switch block SW1
Switch Function
1 8
2 4
Node number selection (serial and fieldbus networks)
3 2
Bit pattern values shown in italics
4 1
5 Hold
6 RS485 terminator
7 Of fset tuning
8 Enable
9 (Reserved)
10 RS232/RS485 select
Description 10-way DIP switch module for major functions
3.9.1 Switches 1-4
Switches 1-4 set the network node number (address) after the next power of f/on cycle.
The switches can be used to select any node number from 1 to 14, as shown in Figure 18.
Switch
1
Switch
2
Switch
3
Switch
4
Node number
(address)
Off Off Off Off Set by Mint NODE keyword
Off Off Off On 1
Off Off On Off 2
Off Off On On 3
Off On Off Off 4
Off On Off On 5
Off On On Off 6
Off On On On 7
On Off Off Off 8
On Off Off On 9
On Off On Off 10
On Off On On 11
On On Off Off 12
On On Off On 13
On On On Off 14
On On On On Do not use!
See section 3.9.7
Figure 18 - Node number (address) switch settings
OnOff
 Loading...