3-30 Basic Installation MN1902
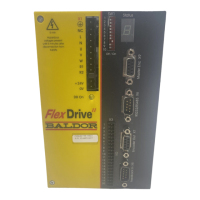
3.8.2 Drive enable - SW1 DIP switch
To enable the FlexDrive
II
the front panel DIP switch 8 must be set to On.
This switch provides a local enable/disable switch that can be useful
during testing.
The state of the drive enable DIP switch is displayed in the WorkBench v5
Spy window. It can also be checked (but not set) using the Mint keyword
ENABLESWITCH. See the Mint help file for details.
See section 3.9 for full details of other DIP switch functions.
3.8.3 Drive enable command
The other action required to enable the FlexDrive
II
can be controlled either by software or
hardware.
Note: This method is explained here for your information, but cannot be completed until
you have installed the software and are ready to turn on AC power to the drive.
Please continue to read all sections in sequence. Do not turn on AC power until
you reach the appropriate instructions.
In software, a drive enable command must be issued. The easiest way to do this is by clicking
the Drive enable button
in W orkBench v5. Alternatively, the Mint commands RESET or
DRIVEENABLE=1 can be used. See the Mint help file for details.
In hardware, a digital input can be used to create the drive enable command. This can be
configured in WorkBench v5 using the Digital inputs tab of the Digital I/O tool. Alternatively , the
Mint keyword RESETINPUT can be used to select the required digital input. See the Mint help
file for details.
Another method is to use the Mint keyword DRIVEENABLEMODE. This allows the combination
of DIP switch 8 and the Enable input to create the drive enable command. Both inputs must
become active. Provided one input is already on, as soon as the other input changes from off
to on (active), the drive will be enabled. See the Mint help file for details.
On
8
 Loading...