4. Lamp & lamp house
2.5 Nm
Image 4-14
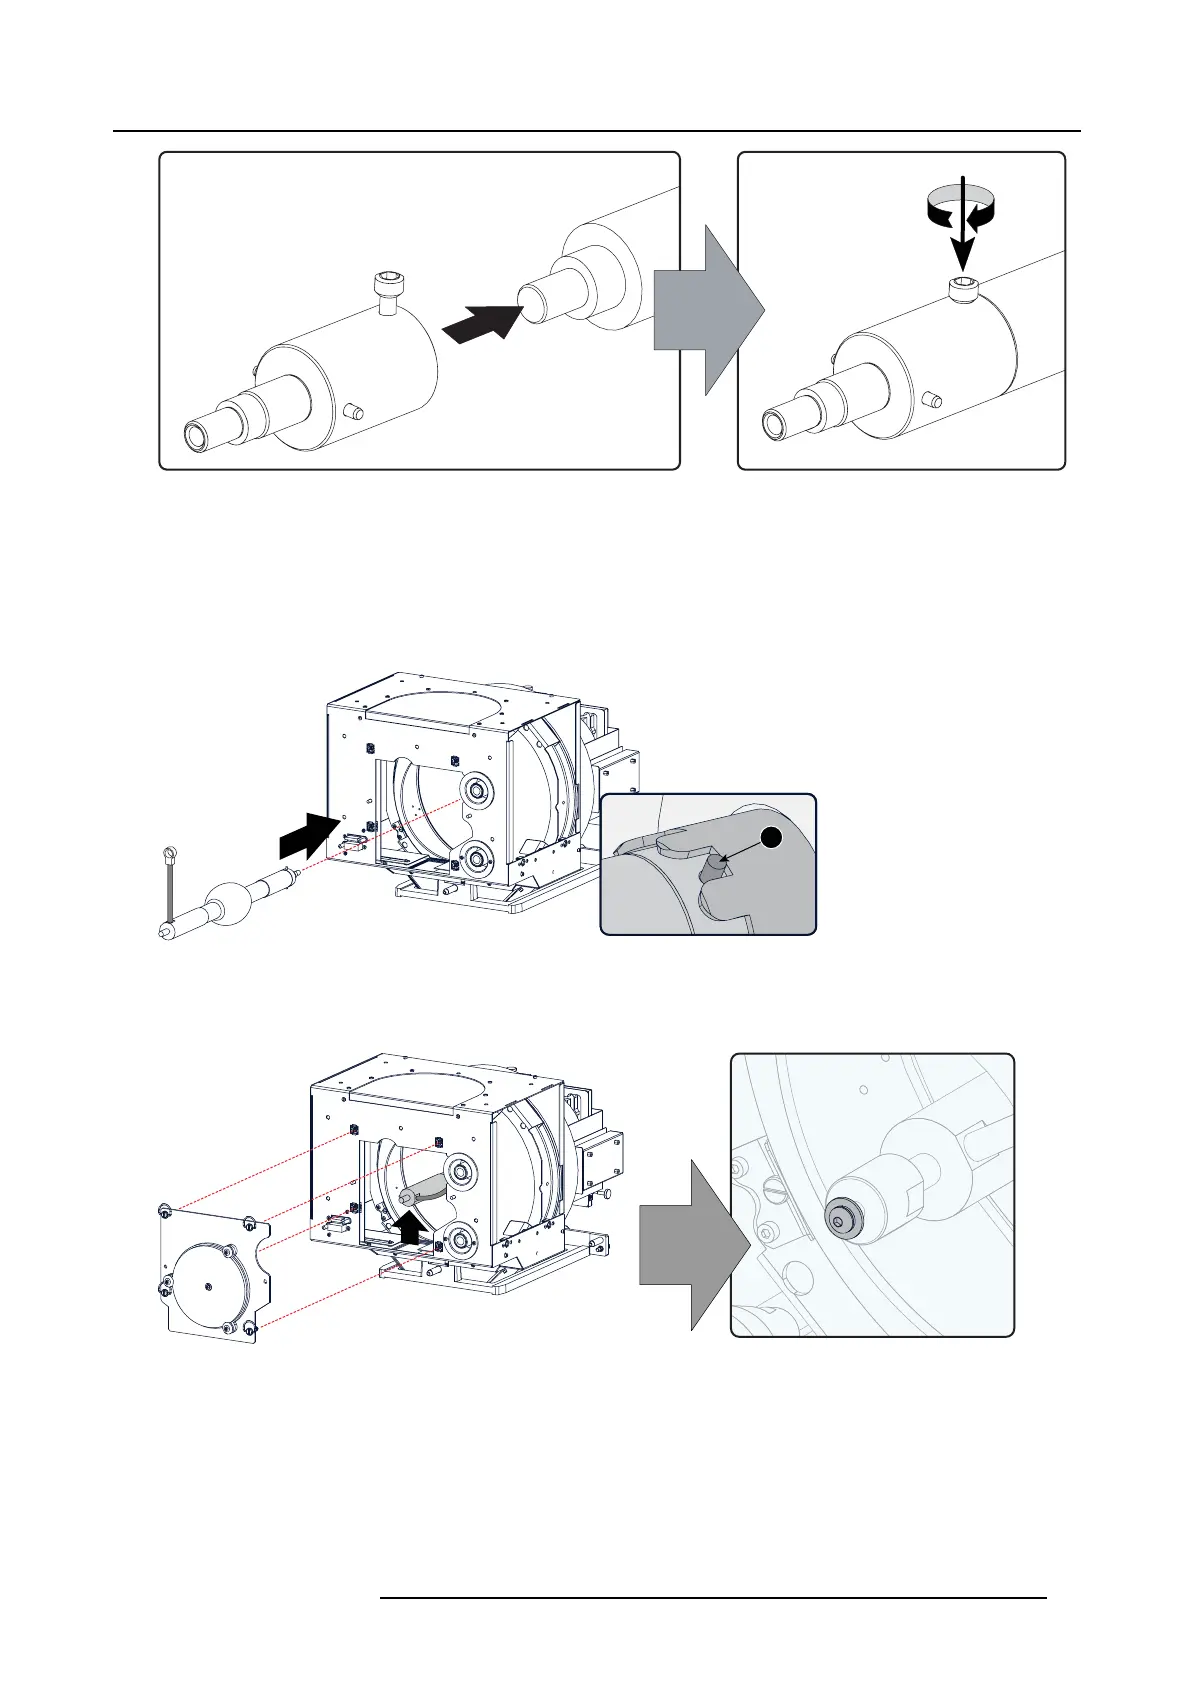
Mount lamp adapter
2. R emove the protective packing from the xenon lamp and gently insert the xenon lam p into the Lamp Hous e as illustrated. Lam p
cathode first, M ake sure that the w ire of the lamp anode is upwards oriented. While inserting the lam p, ro tate it slightly, engaging
the pins (reference 11) of the cathode ada pter in the foreseen s lots. This is to ensure the lamp cathode is c ompletely inserted.
Keep supporting the anode of the lamp with one hand once the xenon lamp is in position.
Caution: Ensure that you w ear protective clothing, a full face shield and protective gloves.
Tip: Write do wn the serial num ber of the xenon lamp. You will need this w hile updating the lam p parameters after installation
of the xenon lamp. The s erial num ber of the xen on lamp is engr aved in the ne ck of the xenon lam p.
11
Image 4-15
Insert lamp
3. Install the UV bloc ker assembly as illustrated. Use the opening at the side of the Lamp House to guide the anode pin of the
xenon lamp into the anode suppo rting mec hanism of the UV blocker. Make sur e that the tick wire of the lamp anod e is upwards
oriented.
Image 4-16
Install UV blocker
4. Secure the UV bloc ker by fastening the four quarter turn screws (reference 2) a s illustrated.
Note: Ensure that the quarter turn screws turning wires are flus h with t he cover o r interference will occur while inserting the
Lamp House into the projector.
R59770495 DP2K-23B 30/04/2010
37

 Loading...


