73
Practical Stitches
Darning foot No. 9 (optional accessory)
Straight stitch No. 1
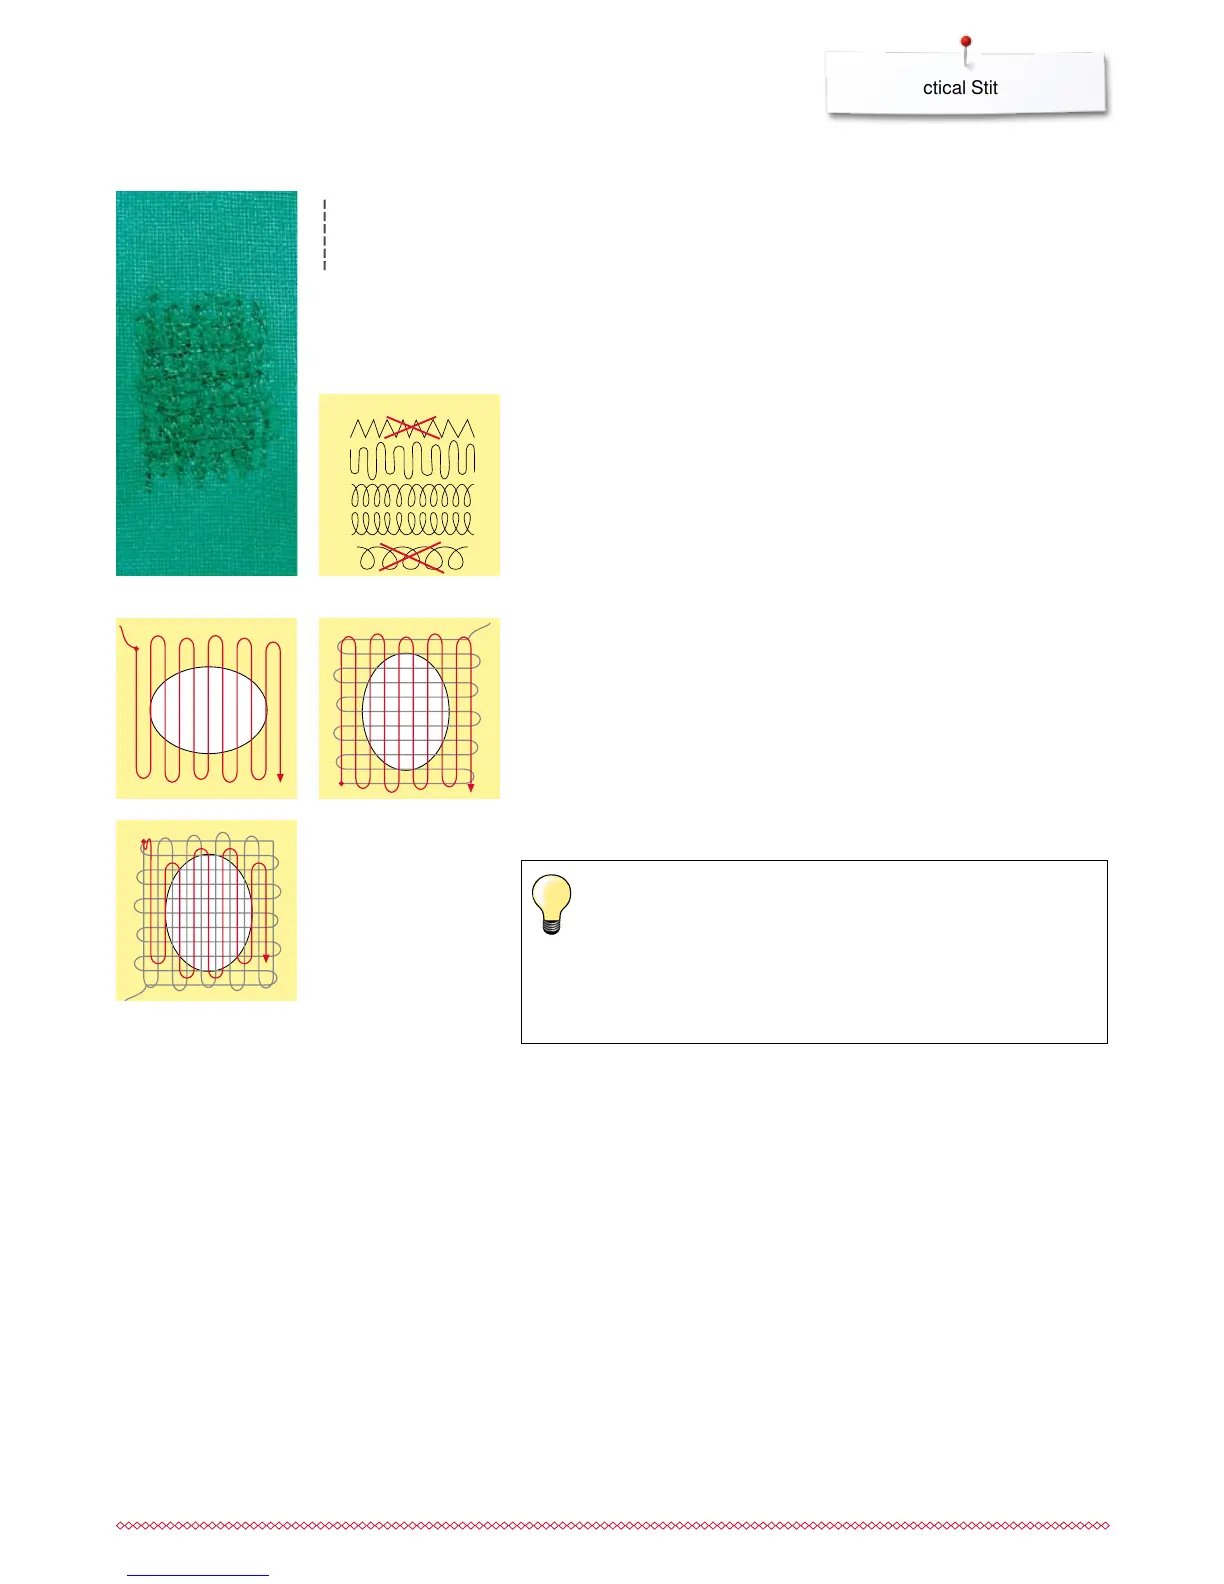
Holes or worn areas
«Replacing» threads along the lengthside and crosswise in every material.
Preparation
⦁
lower the feed dog
⦁
attach the Slide-on table
⦁
hoop the fabric into the round embroidery hoop (optional accessory)
►
the darning area stays evenly taut and cannot be distorted
Sewing
work from the left to the right, guide the fabric evenly without using
pressure
move in curves when changing direction on top and on bottom. Avoid
points as this can cause holes and thread breakage
work the rows in irregular lengths. The thread is better spread over the
fabric
Poor stitch formation
if the thread is lying on top, slow down the fabric movement
if there are knots on the wrong side of the fabric, move the fabric
more quickly
Thread breaks
Guide the fabric more consistently.
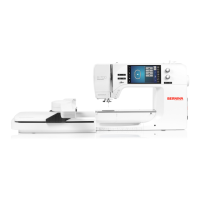
Manual darning
1 Sew the first rows to cover the hole
⦁
first rows just beyond the worn area and not too close together
⦁
work the rows in irregular lengths
⦁
turn work by a quarter turn -90
2 Sew over the first rows
⦁
first rows not too close
⦁
turn fabric by half turn -180°
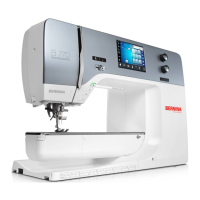
3 Finish darning the hole
⦁
sew another loose row
3
1 2