46
Setup Program
⦁
turn the stitch width or stitch length knob or
⦁
touch «+»/«-»-icon
⦁
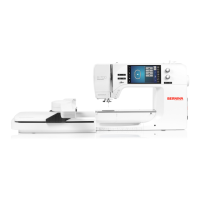
the margin of lifting can be adjusted from 0 mm to 7 mm
►
Standard = 2 mm
►
the set value = the distance between material and presser foot, is displayed
in the icon 7
Back to basic settings
⦁
touch the yellow-framed icon
►
basic setting is restored
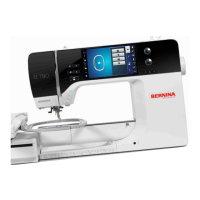
The number and type of the securing stitches of the external «Pattern end/
Securing»-button can be programmed.
►
standard = four securing stitches sew in place
⦁
select function 8 to secure with small stitches sewn in a forward direction
⦁
via «+»/«-»-icons three to six securing stitches can be programmed
Automatic thread cutter
►
if function 9 is activated, the upper and lower thread are automatically cut
after sewing the securing stitches
Raising the presser foot
►
if function 10 is activated the presser foot is raised after securing
►
if function is not activated, the presser foot remains down
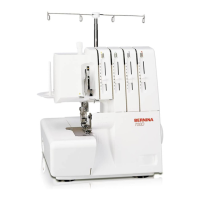
The number and type of the securing stitches before the thread is cut can be
programmed.
►
standard = no securing stitches programmed
⦁
touch icon 11
►
icon 12 is activated
►
four securing stitches are sewn at the place
⦁
select icon 13 to secure with small stitches sewn in a forward direction
⦁
via «+»/«-»-icons two to six securing stitches can be programmed
Hover position of the presser foot
⦁
touch the «Hover position»-icon
Automatic securing program
⦁
touch «Securing program»-icon
Automatic thread cutter and securing stitches
⦁
touch «Thread cutter»-icon
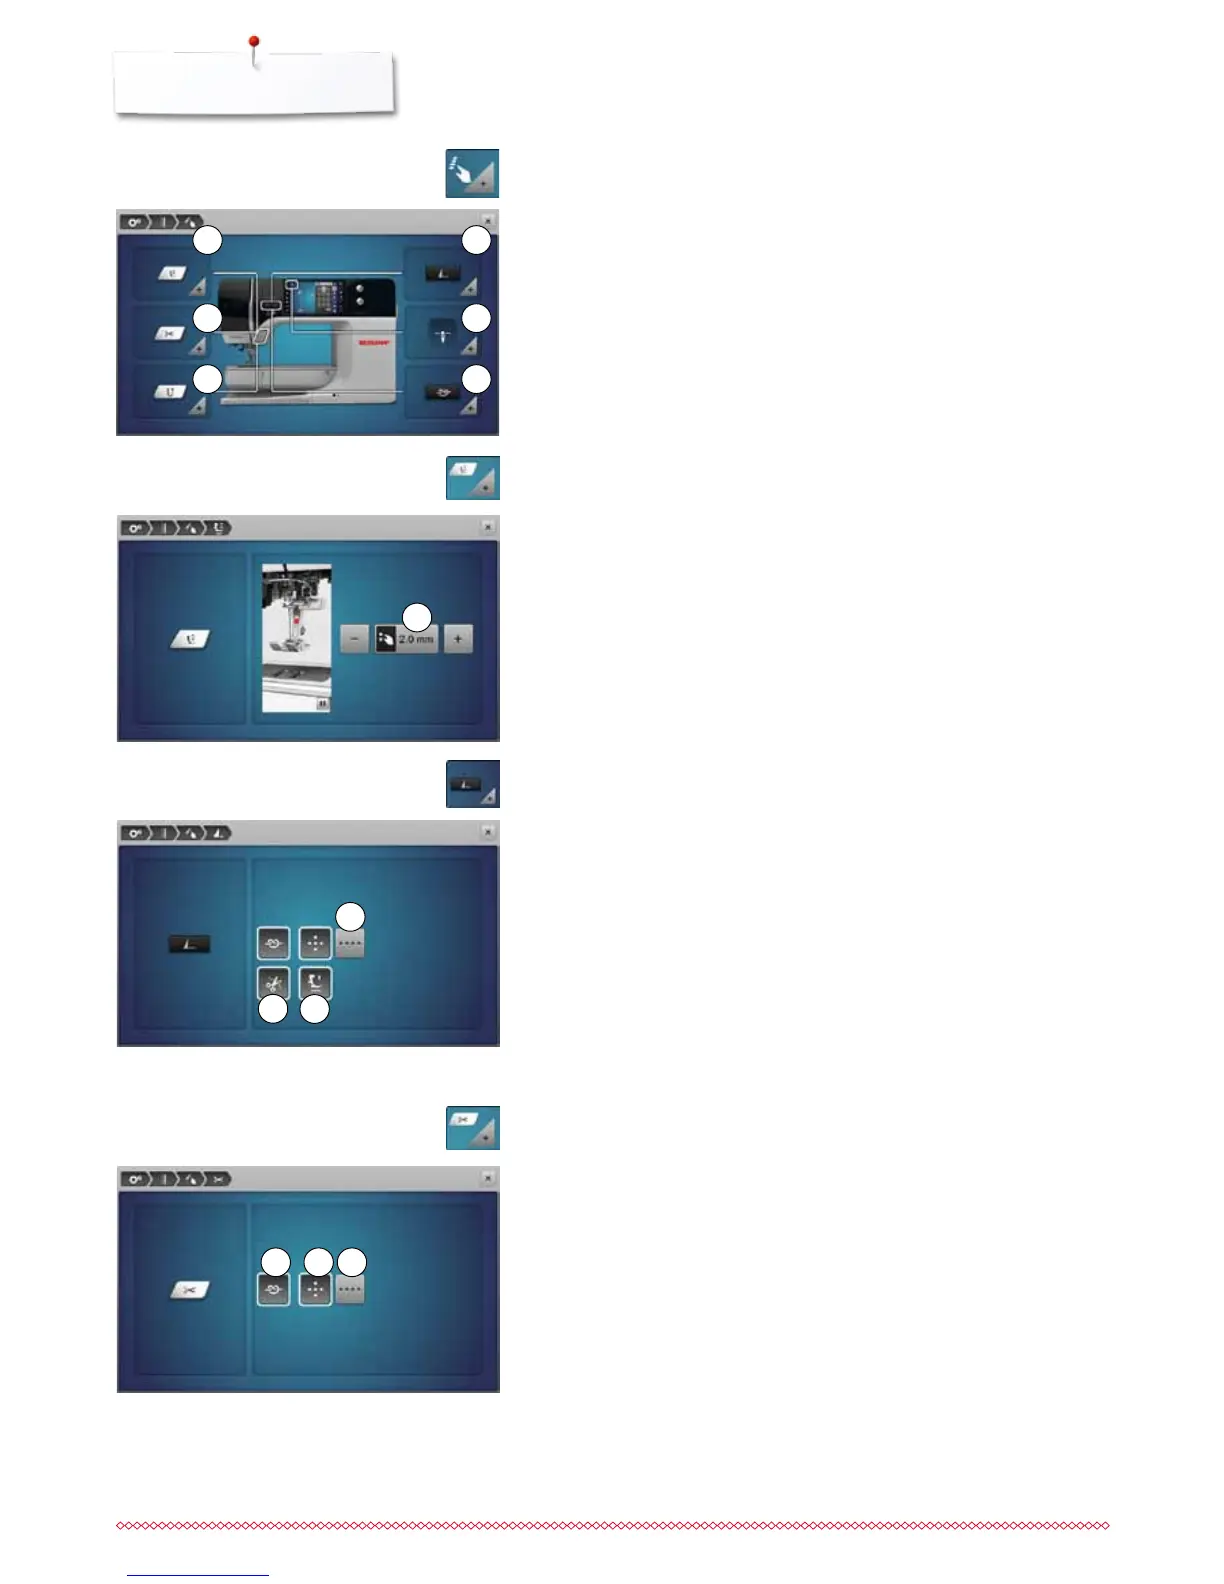
Programming «Function»-buttons/«Function»-icon
⦁
touch «Function»-icon
1 Hover position of the presser foot
2 Automatic securing program
3 Automatic thread cutter and securing stitches
4 Presser foot position with needle stop down
5 Programming «Quick reverse»-button
6 Programming «Securing»-button
⦁
select desired icon
7
8
11
9
12
10
13
1
3
5
2
4
6


 To Next Page