20
Sewing preparation
⦁
turn power switch to «I»
⦁
place empty bobbin on spindle 1
⦁
push engaging lever 4 towards bobbin
►
the winder works automatically
►
the Display to wind the bobbin appears
⦁
move the round knob in the Display using the Touchscreen pen or the
finger to the left/right or
⦁
turn the stitch width knob (see page 12)
►
the winding speed is altered
►
the motor will stop automatically when the bobbin is full
►
the Display is closed
⦁
remove bobbin and pull the thread over thread cutter 5 to cut it
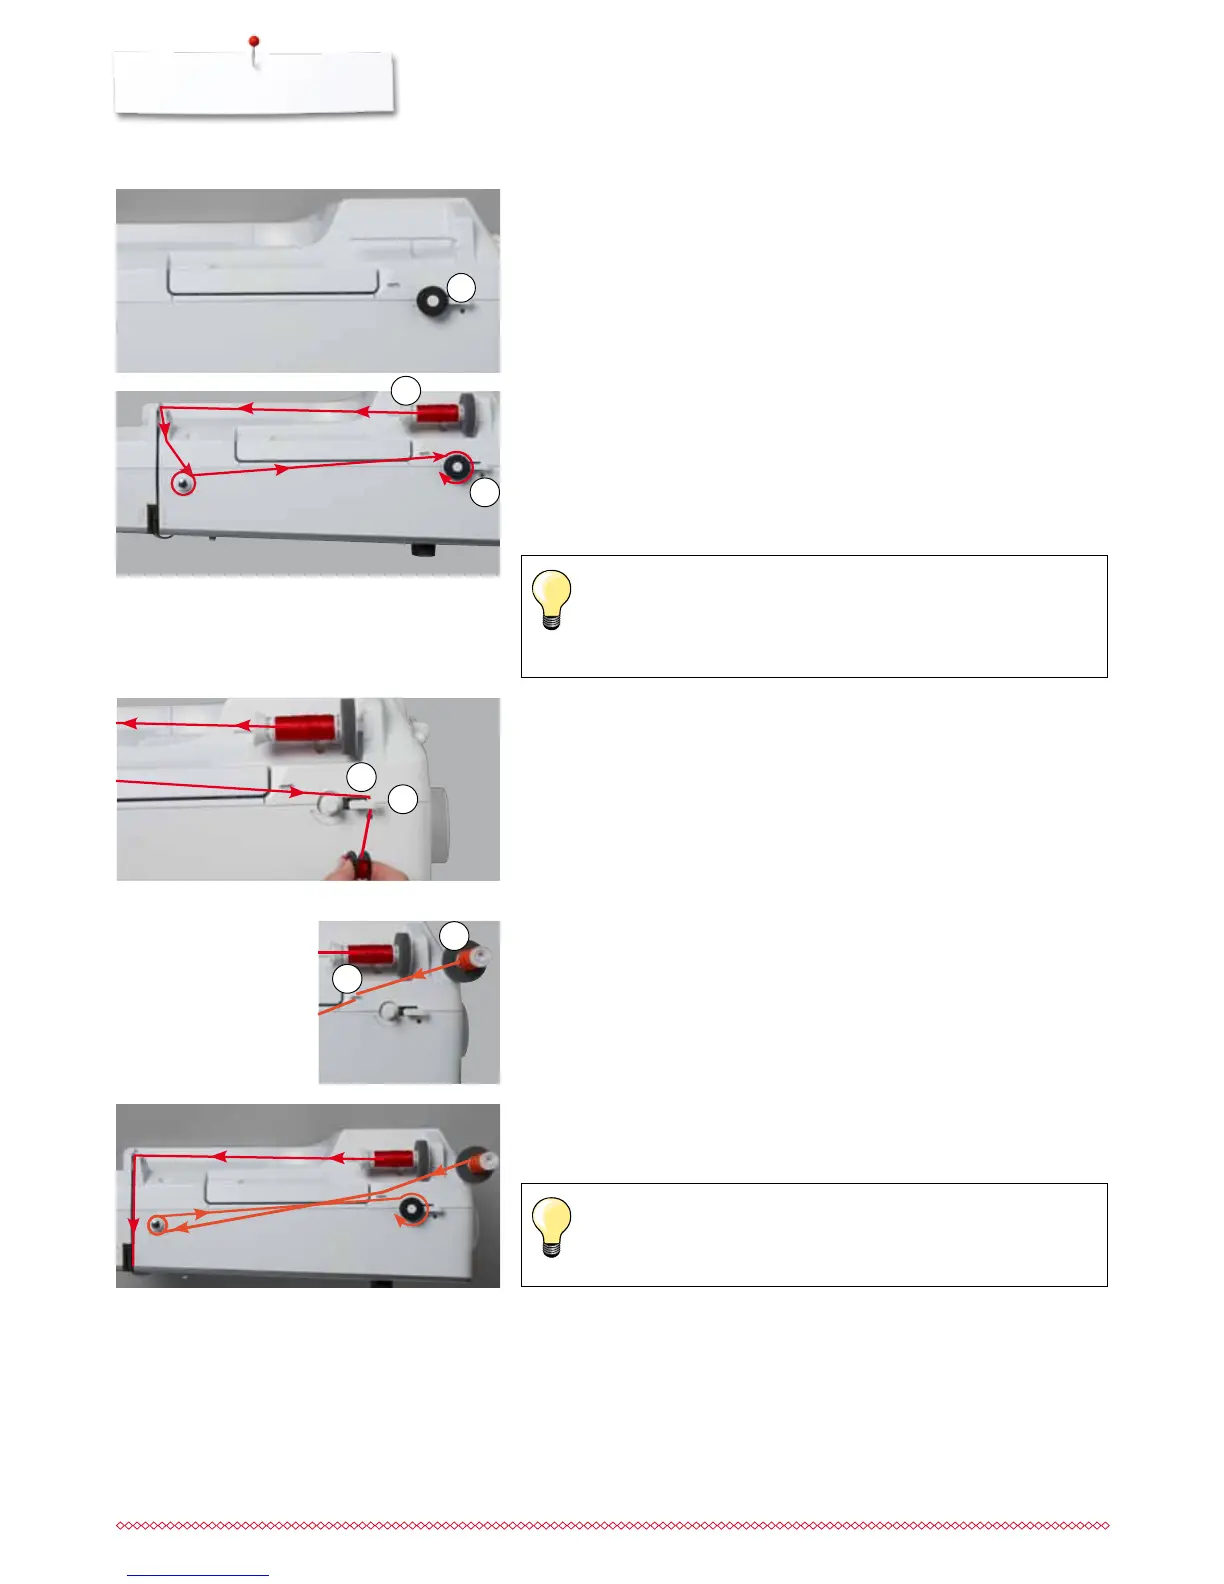
Winding the lower thread
Bobbin winding while sewing
⦁
attach foam pad on the vertical spool pin 6
⦁
place thread on the vertical spool pin
⦁
following the direction of the arrow, take the thread through the thread
guide 7 and
⦁
place foam pad on the spool pin
⦁
place thread on the spool pin
⦁
attach appropriate spool disc 2
⦁
following the direction of the arrow, take the thread through the rear guide
and around the pre-tension stud
⦁
wind the thread two to three times around the empty bobbin
⦁
cut off any excess thread on the thread cutter 3
Appropriate spool disc
Diameter of thread spool determines disc size. There must be no
gap between the disc and the spool.
⦁
guide around the pre-tension stud
Then proceed as mentioned above.
It is recommended to reduce the winding speed when winding from
the vertical spool pin.
5
3
1
4
2
7
6