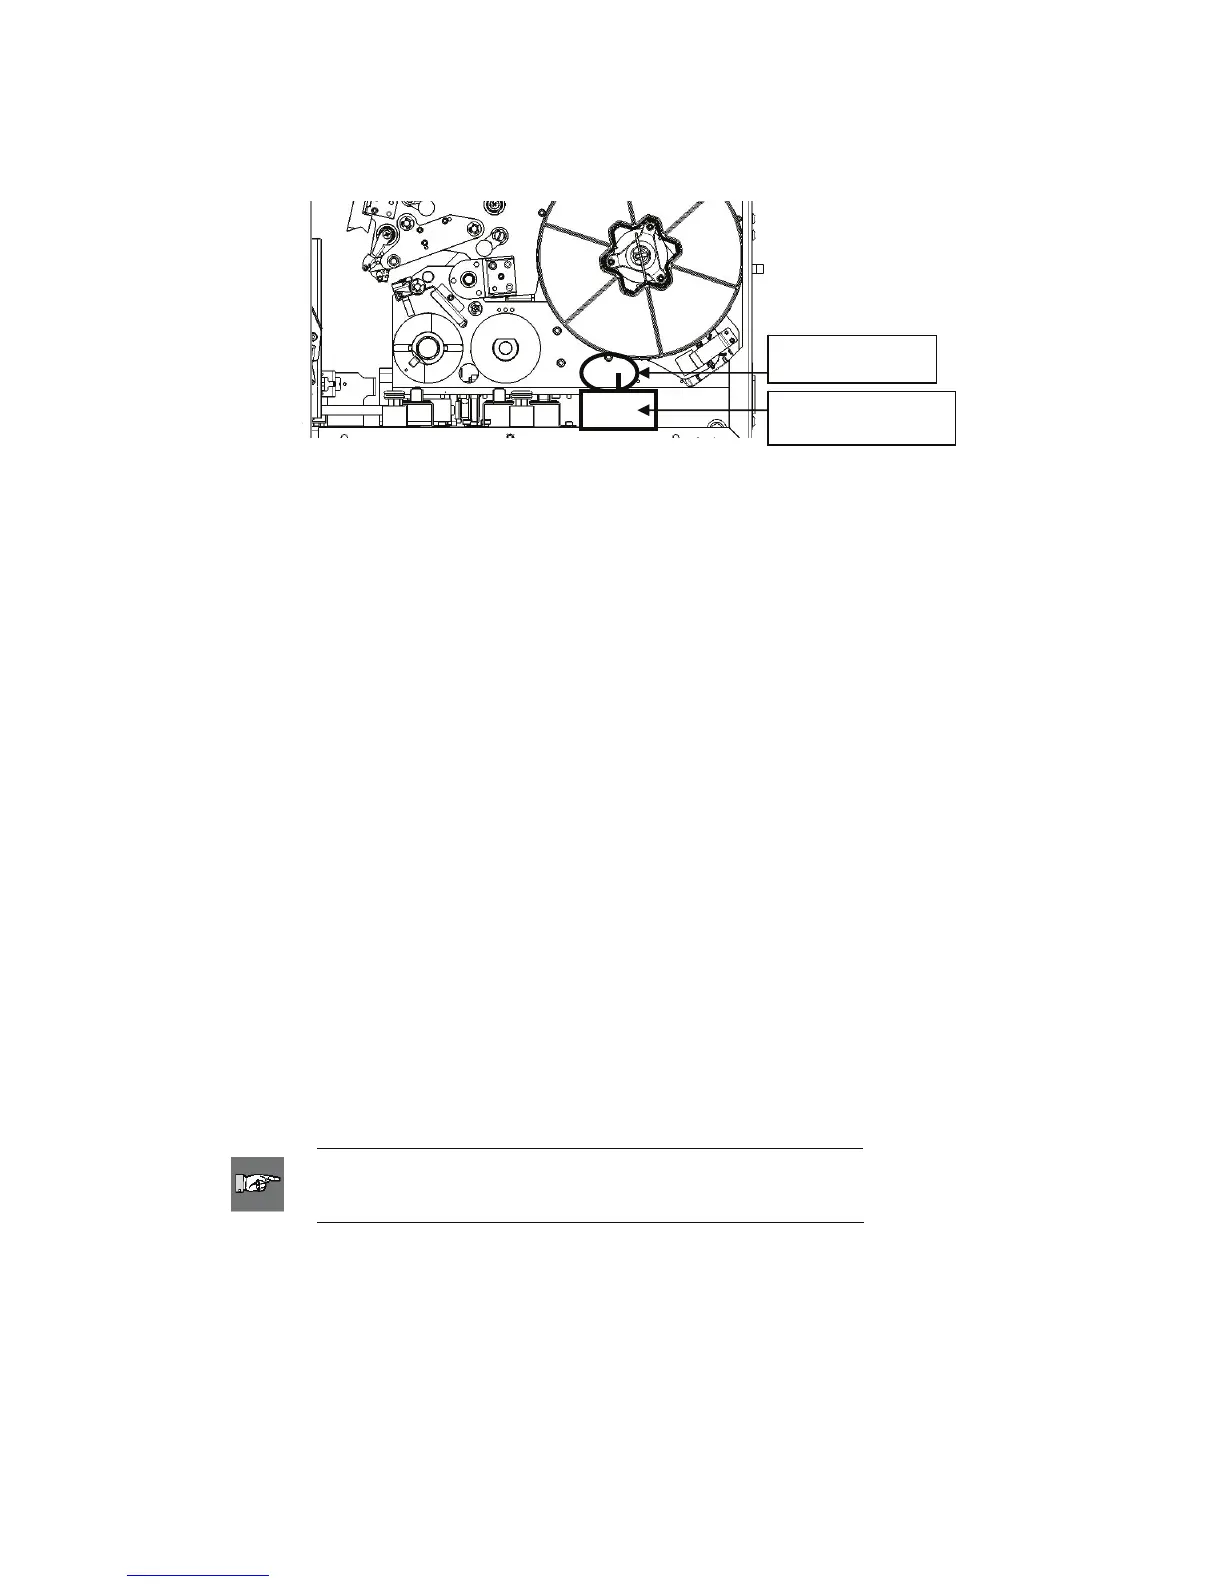
4. Remove the stabilizer block from underneath shuttle (slide) base plate. To do this:
Remove the ribbon from the feed spool. See
Load the Printer Ribbon on page 27
of this guide for instructions.
Remove the stabilizer block bolt and washer.
Remove the stabilizer (white) block from underneath shuttle (slide) base plate.
Replace the ribbon onto the feed spool.
Close the side door.
4.1.2 Load Software on the Computer and Connect Wraptor
The Wraptor Utilities CD-ROM and LabelMark CD contain the applications necessary to create,
print and manage your labels and label files:
¾ LabelMark—LabelMark allows you to create and format labels for a variety of industrial
applications.
¾ File Management Utility—This application allows you to transfer label files between your
computer, the Wraptor and the Wraptor’s CompactFlash Memory Card.
¾ Wraptor Printer Driver—The printer driver allows your computer to print labels to the
Wraptor unit.
Step 1. Install LabelMark on Your Computer
1. Insert the LabelMark CD into your CD drive. The install screen appears.
If the install does not start automatically, select Start Æ Run, type D:\setup.exe and click OK
(replace D: with your CD drive.)
2. Click Install LabelMark.
3. Follow the prompts on your screen.
NOTE: Refer to the LabelMark User’s Guide for more
information.
Stabilizer Block
Bolt/Washer
10 Wraptor™ User’s Guide