6. ASSEMBLY
SL-710A
31
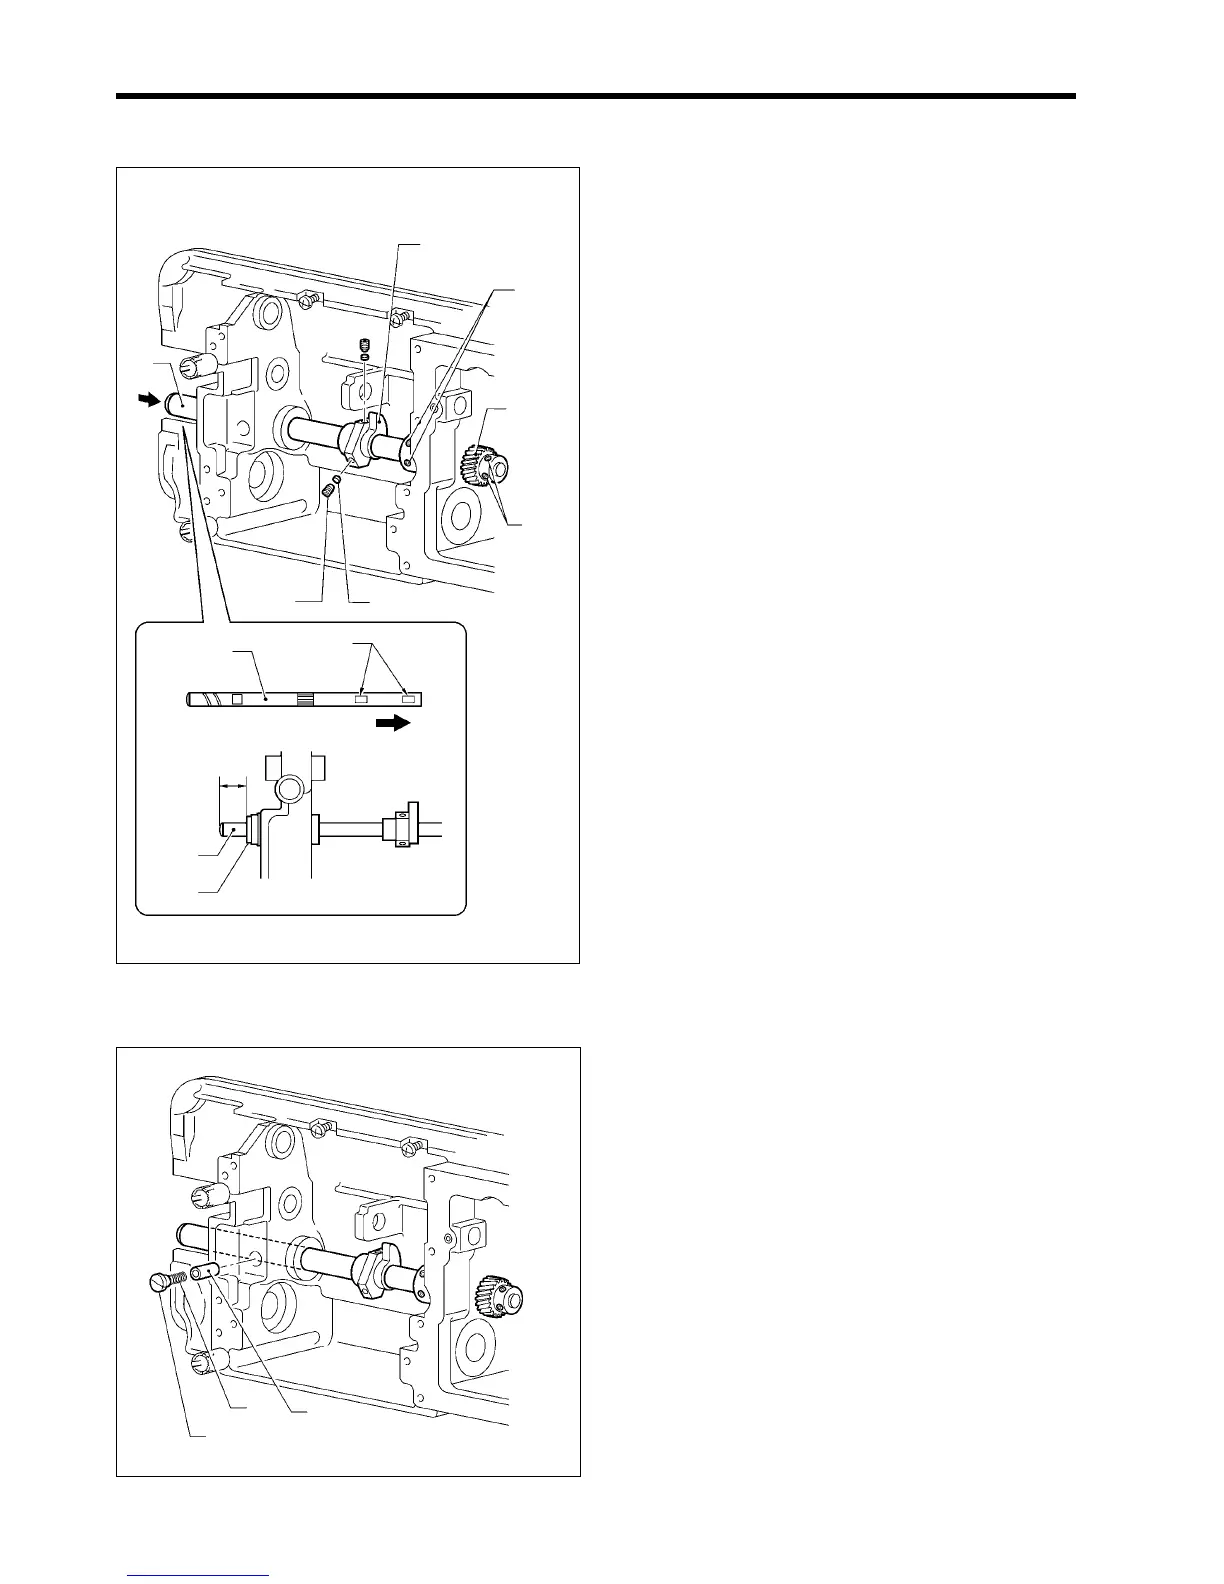
6-2. Rotary hook shaft, thread trimmer cam and gear
1. Insert the rotary hook shaft (1) into the arm so that the
screw stops are at the right, and then place the thread
trimmer cam (2) onto the rotary hook shaft (1) so that it
faces as shown in the illustration.
2. Push the rotary hook shaft (1) all the way to the right,
and then install the gear (3).
3. Insert the spacers (4) into the holes in the thread
trimmer cam (2), and then tighten the set screws (5)
(two places).
4. Push the rotary hook shaft (1) 16.25 mm to the left of
the edge of the bush (6), and then tighten the two set
screws (7) and the two set screws (8).
* Align the screw stops of the rotary hook shaft (1)
with the set screw above the set screws (7) and (8).
* Check that the rotary hook shaft (1) turns smoothly
with no play in the axial (left-right) direction.
6-3. Plunger
1. Insert the plunger (1) into the mounting hole as far as it
will go.
2. Tighten the cap screw (3) that is attached to the spring
(2).
1715M
(2)
(7)
(8)
(3)
(4)
(5)
(1)
(1)
Screw stops
(1)
(6)
16.25mm
1716M
(1)
(2)
(3)