12. FUNCTION SETTING METHODS
SL-710A
82
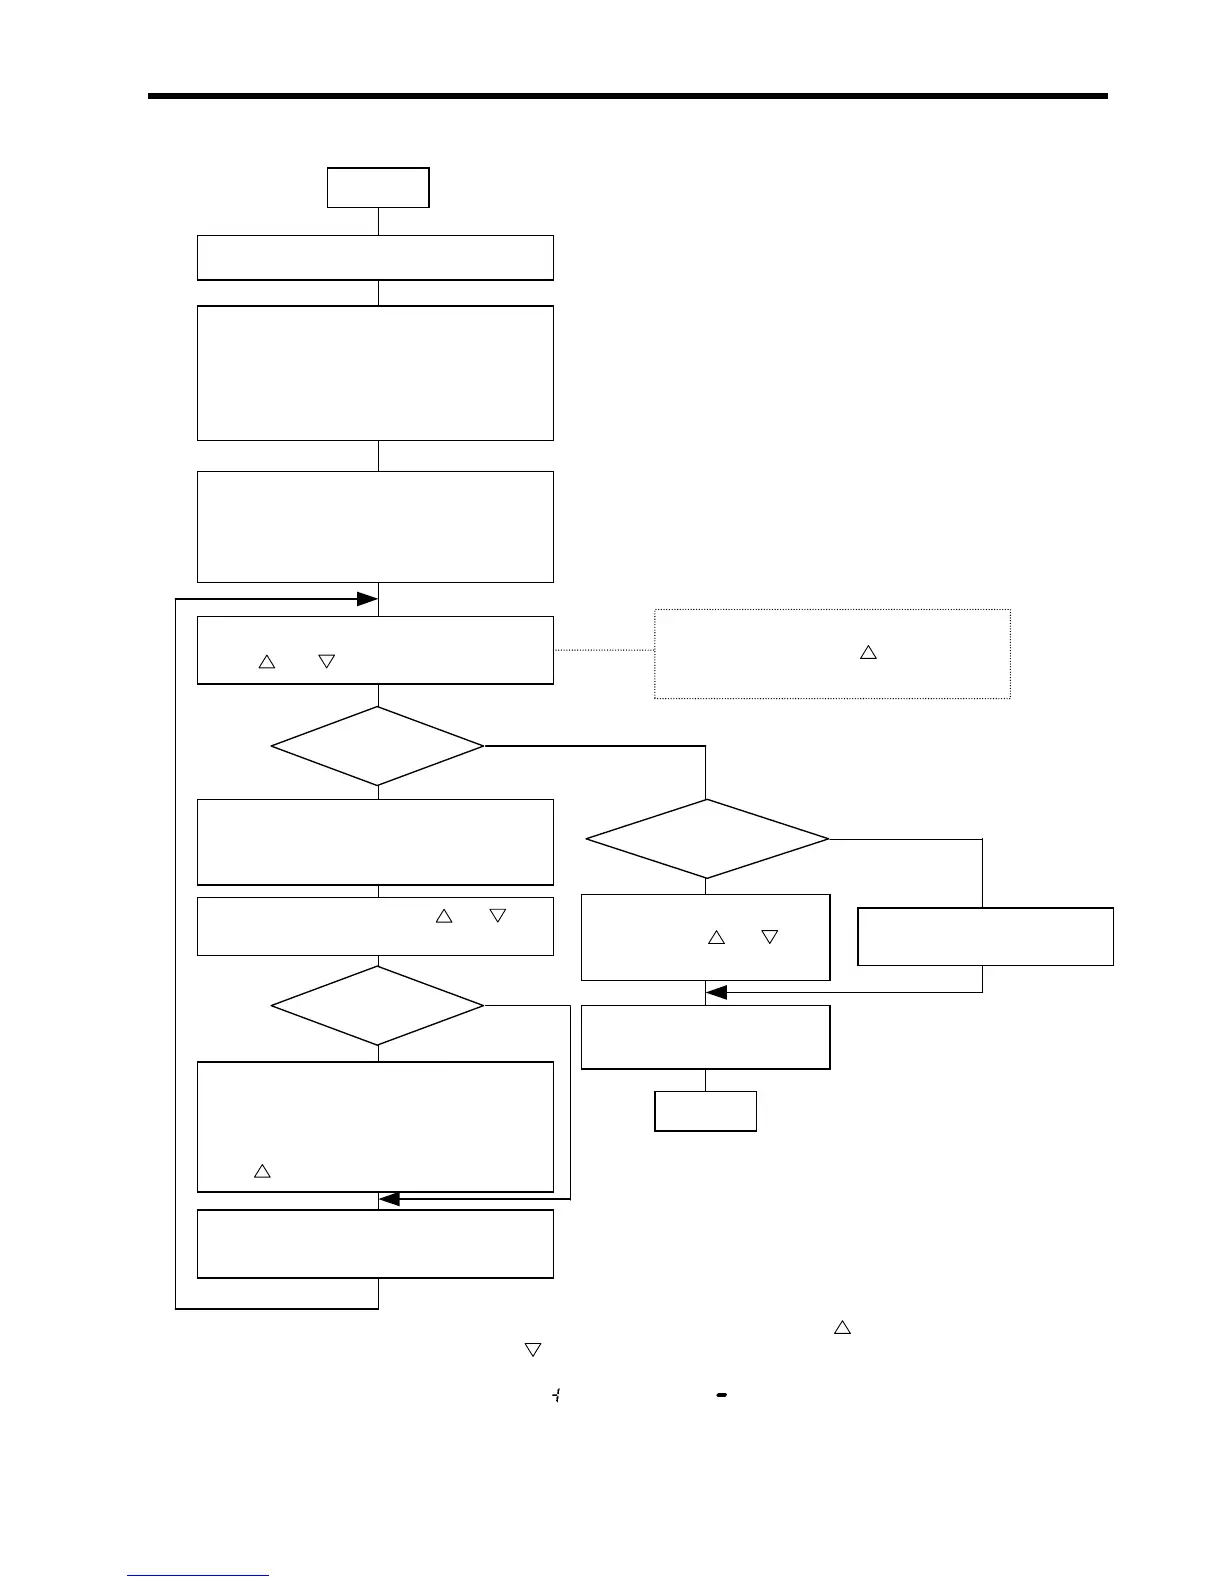
12-2. Parameter setting flowchart
• Turn off all LEDs.
For the B-100 operation panel, selec
pattern 1.
• Leave the machine stopped after thread
trimming.
• Press the thread trimming and AUTO
keys. (The LED of the thread trimming
key will blink, and a parameter numbe
will appear on the AB displays.)
• Set memory switch 01 to ON. *1
Start
• Select the desired parameter number using
the and keys below the B display.
Change
other parameter setting
or finish setting?
• Press the thread trimming key. (The
value corresponding to the currently se
parameter number will blink.)
• Change the value using the and keys
below the AB dis
s. *3
Related to
backtacking?
• Press the thread trimming keys. (The
plus or minus symbol currently selected
will blink.)
• Select the plus or minus symbol using
the
key below the B display. *4
• Press the thread trimming key.
(Parameter number will reappear.)
Changing
Completely?
• Indicate parameter numbe
99 using the and keys
below the B display.
• Indicate parameter numbe
90.
• Press the thread trimming
key.
End
The data currently set for the parameter can
be checked only while the key below the
display is kept pressed. *2
Finish
Change
No
Yes
No more changes
Further changes
*1: Refer to the memory switch setting flowchart.
*2: As to the data related to backtacking, press the
key to indicate the timing angle
(X15
°) and key to indicate a plus or minus symbol.
*3: As to backtacking information, the timing angle (X15
°) will appear.
*4: Select a plus <
> or minus symbol < > for the value determined in *3.