6. ASSEMBLY
SL-710A
45
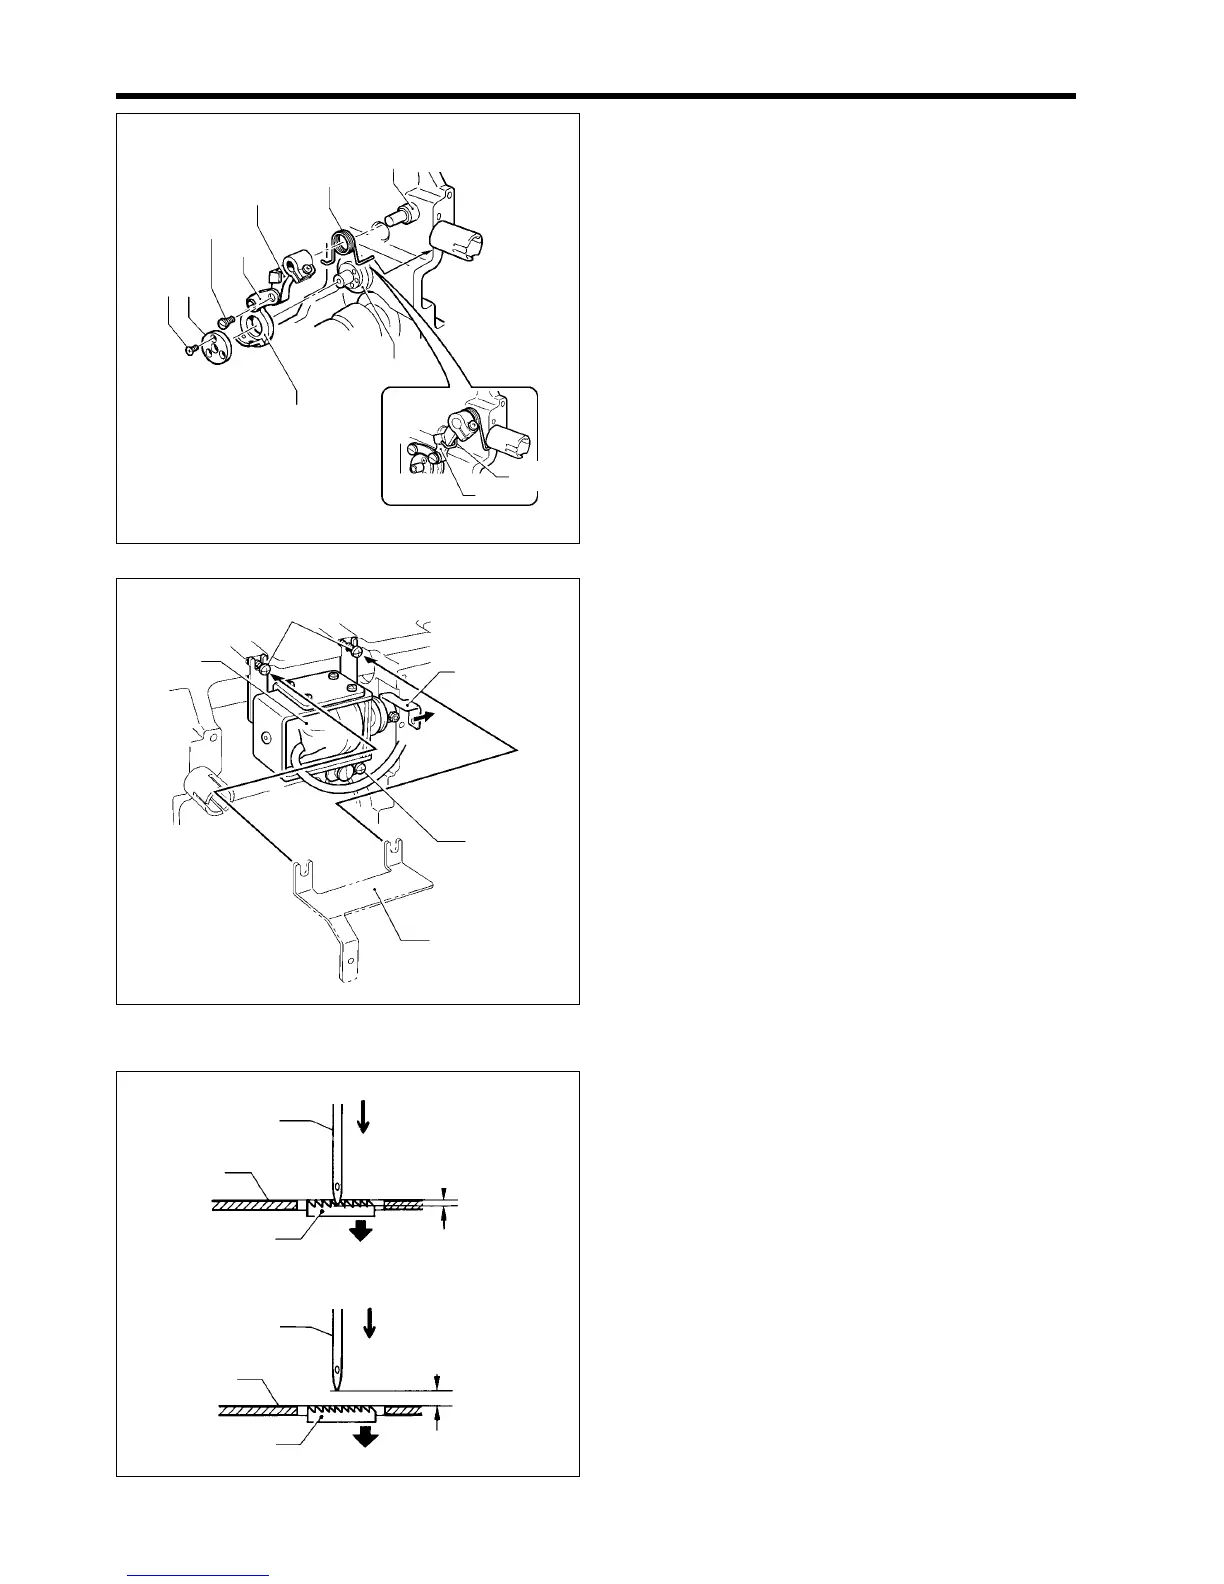
8. Place the spring (13) onto the bush (14) so that it
faces as shown in the illustration.
9. Place the thread trimmer lever (15) onto the bush (14).
* It will be easier to do this if you insert a screwdriver
or similar into the gap.
10. Hook the spring (13) onto the thread trimmer lever (15)
as shown in the illustration.
11. Place the movable knife holder (16) and the knife
holder presser plate (17) onto the pump bush (18),
and then tighten the three pan screws (19).
12. Connect the thread trimmer lever (15) and the thread
trimmer connecting rod (20) by tightening the shoulder
screw (21).
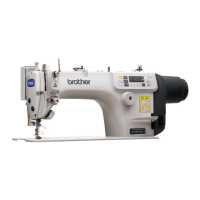
13. With the solenoid lever (22) pushed all the way to the
right, install the thread trimmer solenoid (23) with the
three screws (24).
<For DD7100A, 710A>
At this time, install the stopper bracket (25) with two of
the screws (24) also.
* Push the solenoid lever (22) to the left and check that
the solenoid lever (22) can move sideways by 5 - 6
mm.
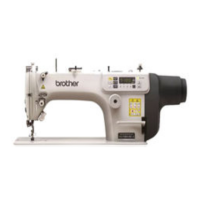
6-15-2. Adjusting the needle and feed mechanism timing
Adjust so that the needle (3) is positioned as described
below (depending on the sub-class) when the feed dog
(1) drops from its highest position until it is level with the
top of the needle plate (2).
For sub-classes -[][]1 and -[][]3
The needle (3) should move down from its highest
position until the tip of the needle (3) is approximately 1
mm below the top of the needle plate (2).
For sub-class -[][]5
The needle (3) should move down from its highest
position until the tip of the needle (3) is approximately 3
mm above the top of the needle plate (2).
1762M
(16)
(14)
(15)
(13)
(20)
(18)
(21)
(17)
(19)
(13)
(15)
1763M
(22)
(23)
(24)
(24)
(25)
[DD7100A,710A only]
<-[][]1,-[][]3>
<-[][]5>
1764M
(2)
(3)
(3)
(1)
(2)
Approx. 1 mm
(1)
Approx. 3 mm