6. ASSEMBLY
SL-710A
52
6-20. Quick reverse solenoid
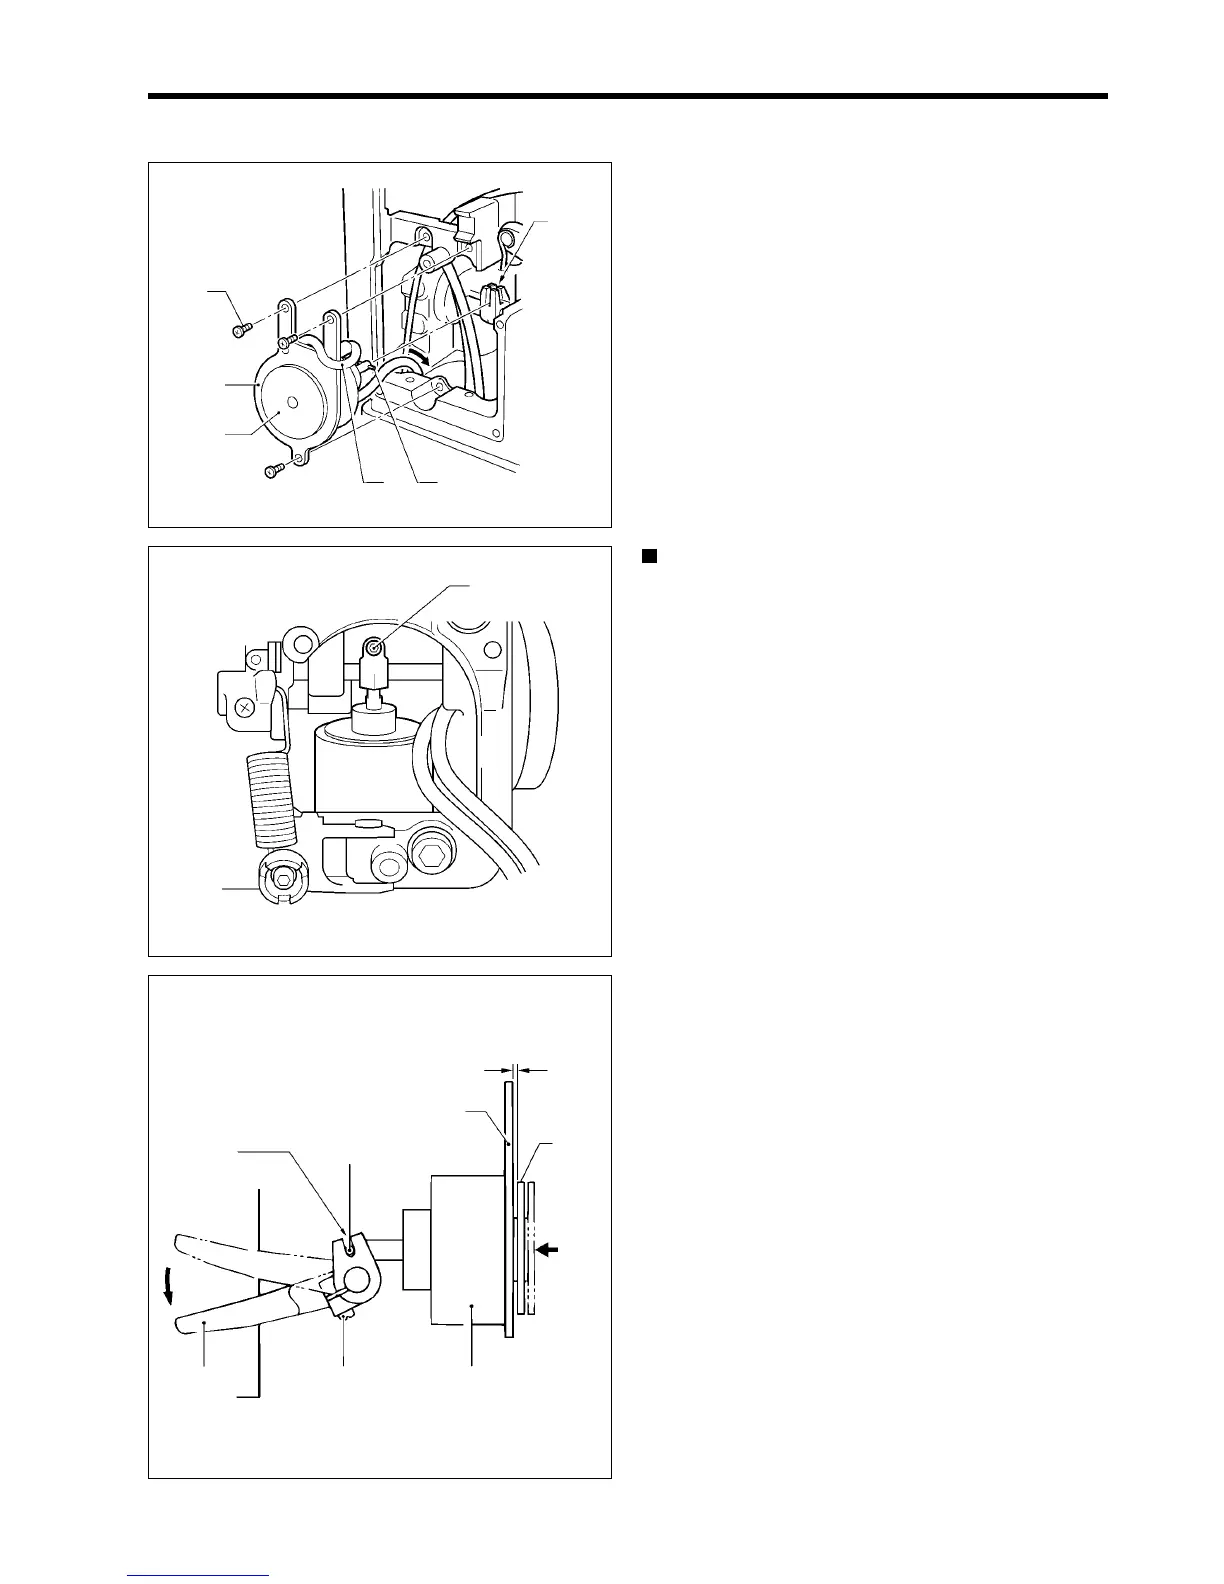
1. Pass the cord (2) of the quick reverse solenoid (1)
under the bed.
2. Install the quick reverse solenoid (1) to the arm with
the three screws (4) so that the plunger pin (3) fits into
the groove (A) in the solenoid lever.
* Pull the plunger (5) by hand and check that the
plunger pin (3) fits into the groove (A) in the
solenoid lever.
Quick reverse solenoid adjustment
1. Turn the stitch length dial to the maximum setting.
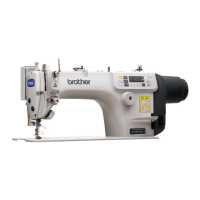
2. Tilt back the machine head.
3. Check that the position of the solenoid lever screw (6)
can be verified when the machine head is restored to
its normal position.
4. Return the machine head to its normal position, and
loosen the screw (6).
5. Check that the plunger pin (3) is in the groove (A) in
the solenoid lever.
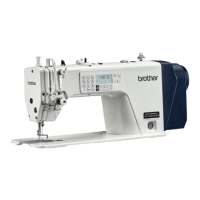
6. With the reverse stitching lever (7) lowered all the way,
push the plunger (5) until the clearance between the
setting plate (8) of the quick reverse solenoid (1) and
the plunger (5) is 0.2 - 0.5 mm.
7. Tighten the screw (6).
* If the above clearance of 0.2 - 0.5 mm is large, the
operation of the quick reverse solenoid (1) will
become slower.
In addition, if the clearance is small, the impact
noise from the quick reverse solenoid (1) will
become more apparent.
(6)
1789M
1788M
(4)
(1)
(5)
(2)
(3)
(A)
0.2 - 0.5mm
1790M
(A)
(3)
(7)
(6)
(1)
(8)
(5)
Push