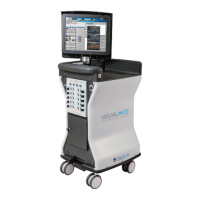
Visual-ICE™ Cryoablation System
4-1
4 SYSTEM OPERATION
Table 4-1 depicts the order and steps of the Visual-ICE™ Cryoablation System set-up and treatment
procedure. Each step is described in detail in this chapter.
Table 4-1. Cryoablation Procedure Flow
1.
Set-up Console
• Conrm availability of gas, needles, and accessories
• Position Visual-ICE System and lock brake
• Ensure Manual Vent Valve is closed and Argon
Shuto Valve is ON
• Power Visual-ICE System ON
• Login
2.
Connect Gas
Cylinders
• Connect helium gas, if applicable
• Connect argon gas
• Ensure safety cables are connected
• OPEN valve on helium, then argon
3.
Needle / MTS
Testing
• Enter patient treatment information in Registration
Button
• Prepare sterile needles for testing
• Connect needles to Visual-ICE System and lock
channels
• Perform Needle Integrity and Functionality Test
• Test Multi-Point Thermal Sensors, if applicable
4.
Conduct
Cryoablation
Procedure
• Insert needles into target tissue
• Deliver the cryoablation treatment and remove
needles
• View and save reports, if desired
• Depressurize the system and shutdown
4.1 Preparation for Use
Prior to using the Visual-ICE System, inspect the chassis, power cord, brake, safety cables, gas
supply lines, gas connections, and the monitor touch screen to ensure they are not damaged. If any
of the components are damaged, contact Galil Medical Customer Service.
CAUTION. If condensation is present on the system, allow the system to dry completely for 12
hours prior to powering up the system. Powering up the system with condensation could result in
permanent damage to the electrical boards, causing the system to be inoperable.
Before the patient is anesthetized, set up the Visual-ICE System, connect the gas cylinders, and
conduct functionality tests on each cryoablation needle and thermal sensor (reference Section 4.1.4).