Visual-ICE™ Cryoablation System
4-15
3. Position the cryoablation needles and thermal sensors in the target tissue.
CAUTION. During use, avoid damage to the needle from other surgical instruments.
OPTIONAL: Reference Section 3.3.8 for instructions on placing needles and thermal sensors on
the Organ Map.
CAUTION. Use image guidance to verify that the cryoablation needles are placed at the desired
location prior to activating a needle.
4. Select the desired Freeze Intensity using the drop-down menu.
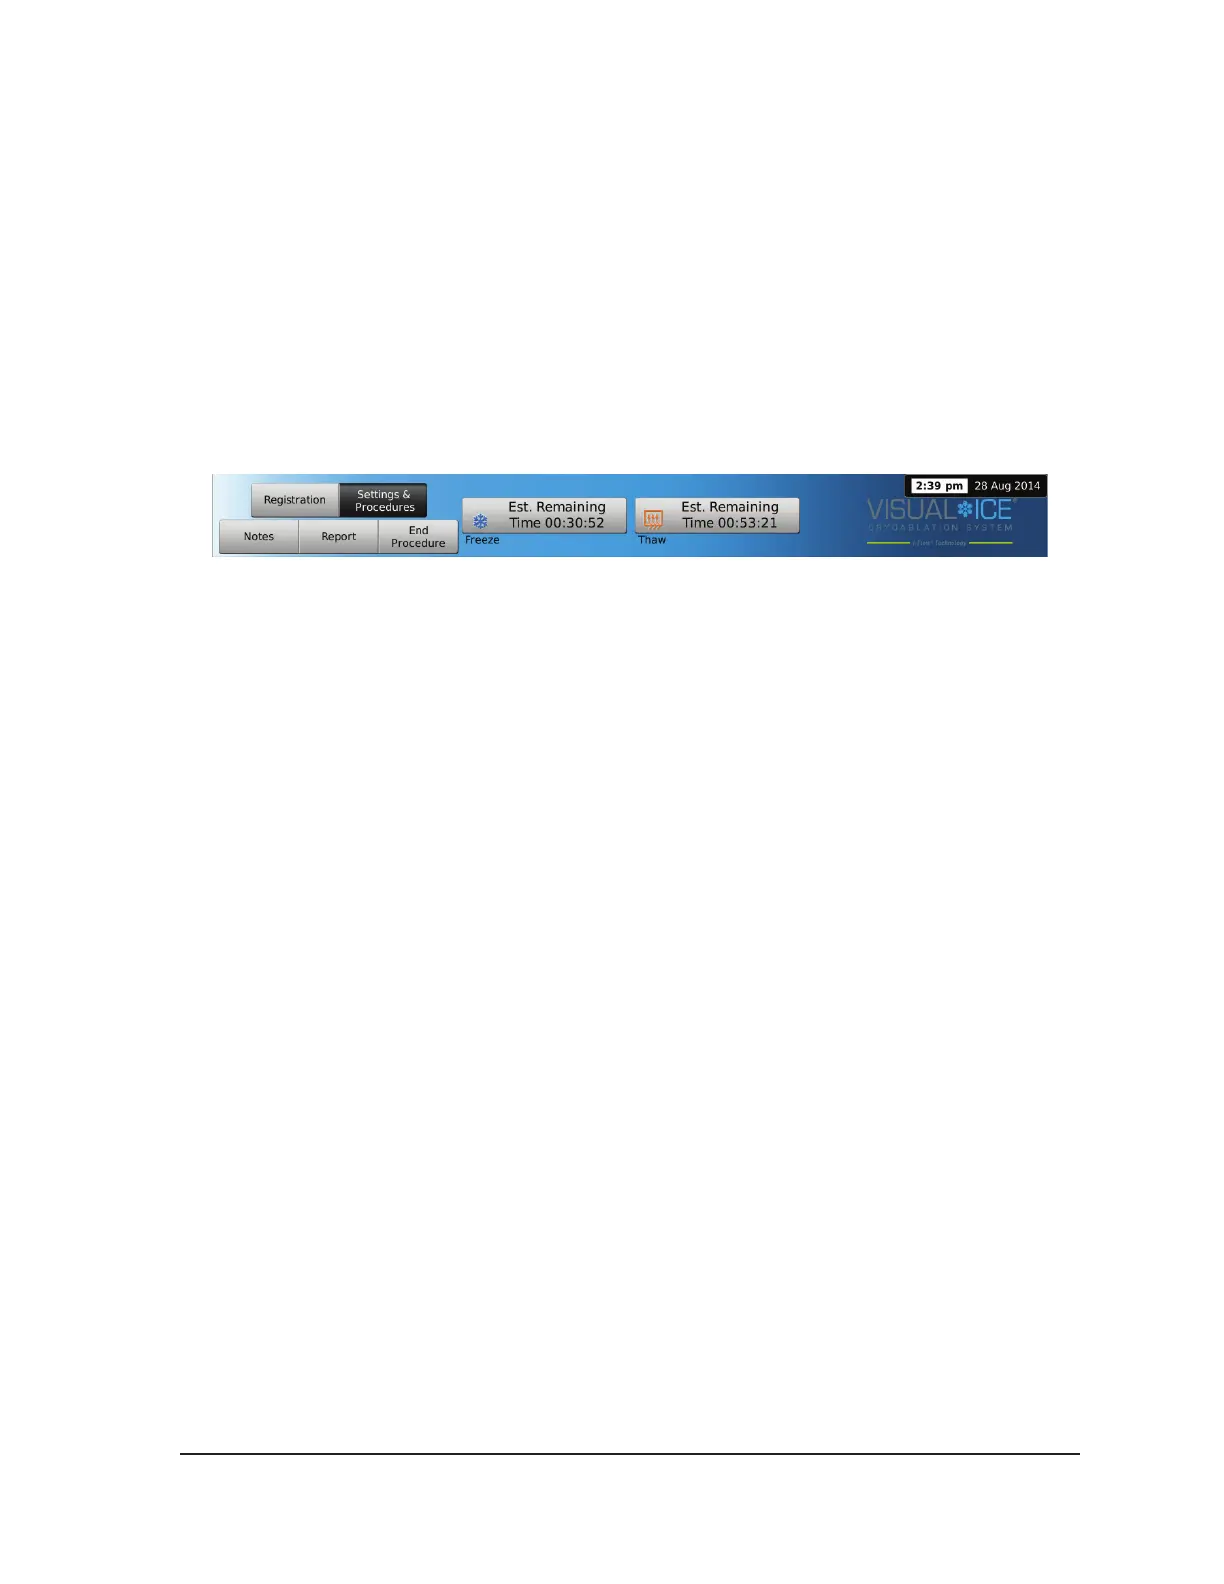
NOTE: Throughout the procedure, monitor the amount of gas time remaining in the cylinders
using the Gas Indicator on the Navigation Tool Bar (Screen 4-14). If it is necessary to change
the gas cylinders during a procedure, follow the instructions provided in Section 4.5.
Screen 4-14. Gas Time Remaining
5. Press the Freeze button on selected channels containing needles to begin the initial freeze phase
of the procedure.
To adjust the freeze intensity, press the Freeze Intensity button and select the desired intensity
from the drop-down menu. The Freeze cycle will continue at the selected freeze level until this
operation is changed or stopped.
CAUTION. Continuously monitor iceball formation using image guidance such as direct
visualization, ultrasound, or Computed Tomography (CT) to ensure adequate tissue coverage and
to avoid damage to adjacent structures.
OPTIONAL: To initiate a freeze phase on all needles simultaneously, press the Freeze button on
the channel labeled ALL. Pressing any function button on the channel labeled ALL displays a
message asking you to conrm simultaneous operation of all needles.
NOTE: Selecting ALL will initiate a Freeze phase at the intensity selected for each channel.
To conduct freezing in all active channels at the same intensity, select the intensity in the ALL
channel before pressing the Freeze button.
6. Watch the timer to monitor the freeze phase elapsed time (reference Section 3.3.5 for instructions
on enlarging the timer display). When the desired freeze duration has elapsed, press the Stop
button to enter an idle phase.
7. If thermal sensors are used, monitor the tissue temperature using the Temperature Sensors
section of the Procedure Screen (reference section 3.3.7).
8. To actively thaw the iceball, press the Thaw button on the channels containing needles to start
the thaw phase.
If the Visual-ICE System detects that helium gas is connected, the system defaults to helium thaw
mode. If needles of mixed type (some helium thaw and some i-Thaw) are connected, the system
also defaults to helium thaw mode.
NOTE: Thawing with i-Thaw is limited to a maximum of 9 needles simultaneously.