Visual-ICE™ Cryoablation System
4-11
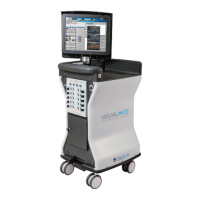
4. After a needle(s) is inserted into the desired channel, lock the channel by sliding the locking bar
away from the center of the system (Figure 4-4).
Figure 4-4. Locking Needle into Channel
5. To allow for easier identication of the needle when multiple cryoablation needles are used during
a cryoablation procedure, it is recommended to place a label on the needle tubing.
NOTE: Contact Galil Medical Customer Service to order labels for the cryoablation needles.
6. Repeat Steps 2 through 5 for each cryoablation needle that will be tested.
CAUTION. Galil Medical recommends that only needles of the same type be placed together in a
single channel. Do not combine i-Thaw capable needles with non-i-Thaw capable needles in the
same channel. Additionally, using needles of diering types in a channel may aect the accuracy of
the Gas Indicator.
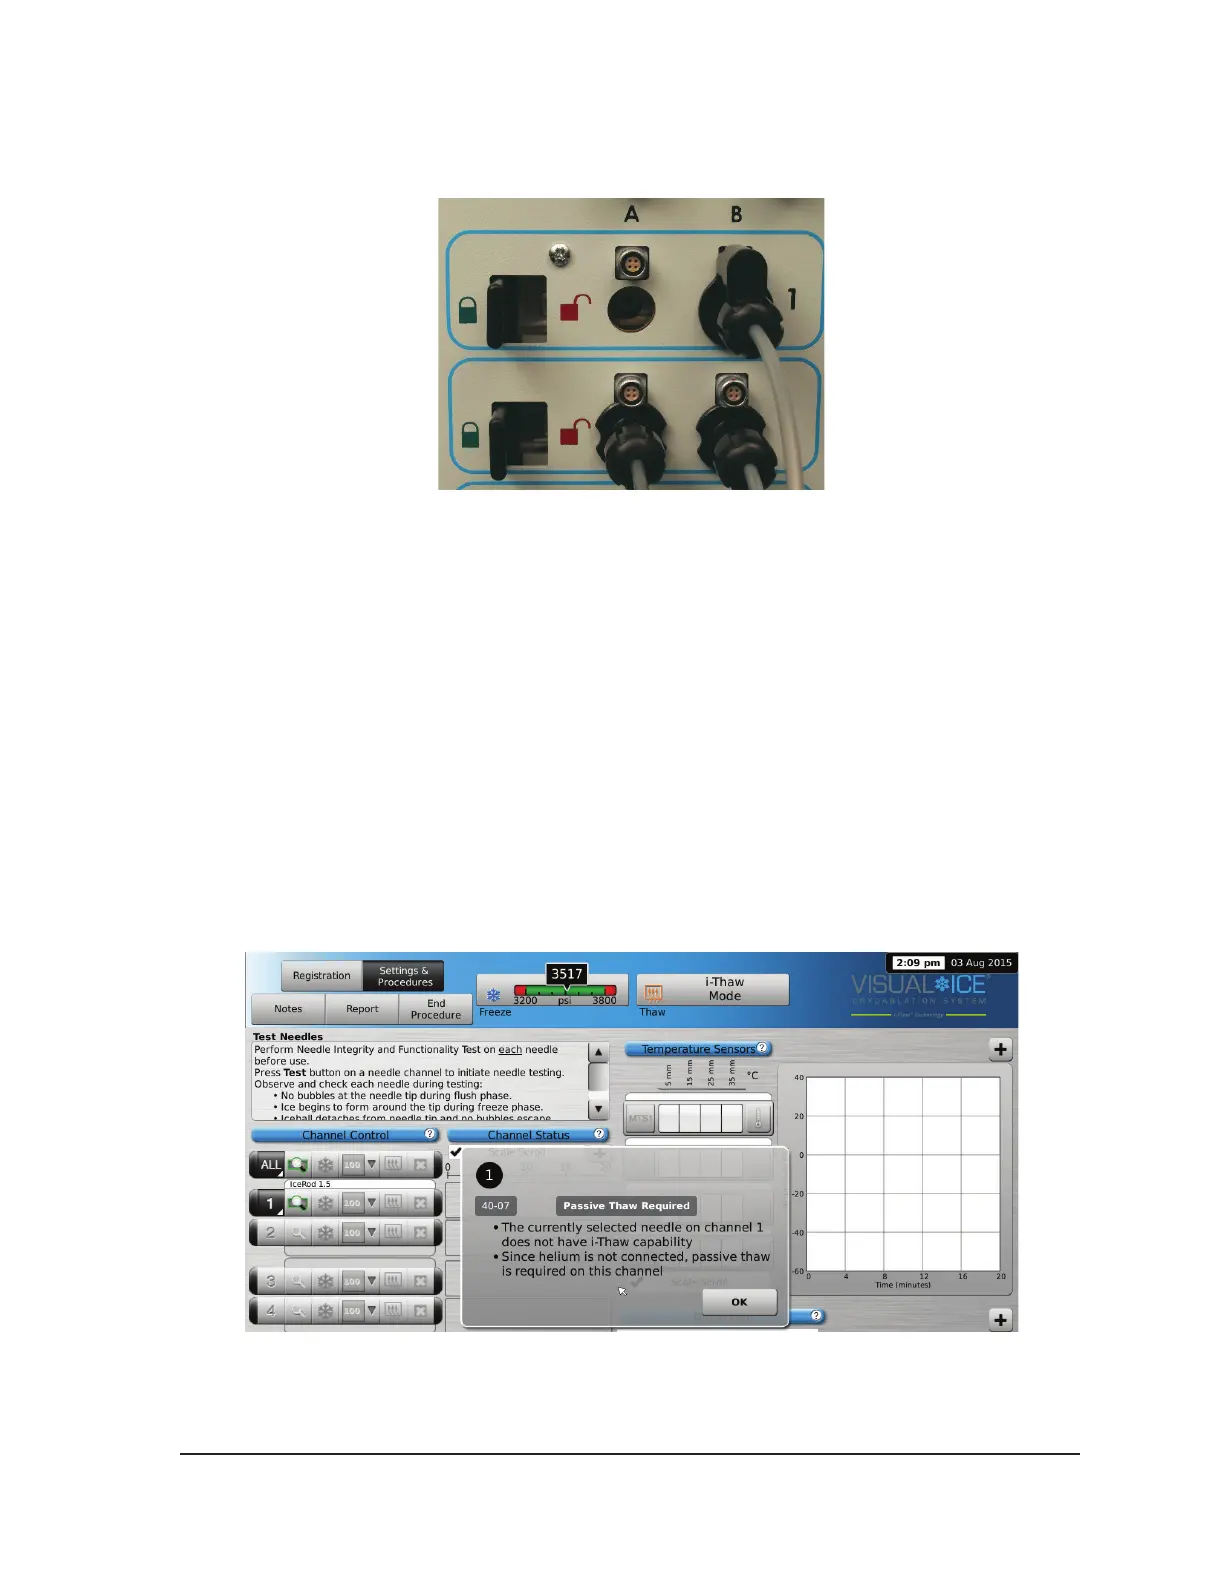
CAUTION. If the Visual-ICE System detects that helium gas is connected, the system defaults to
helium thaw mode and i-Thaw, FastThaw, and Cautery capabilities are disabled.
NOTE: The Visual-ICE System displays a message if one or more needles without i-Thaw technology
are connected and helium gas is not connected to the system. Ensure helium gas is connected to the
system to use active thaw without i-Thaw.
Screen 4-11. Thawing Mode message