1-36 2006 Buell Lightning: Maintenance
HOME
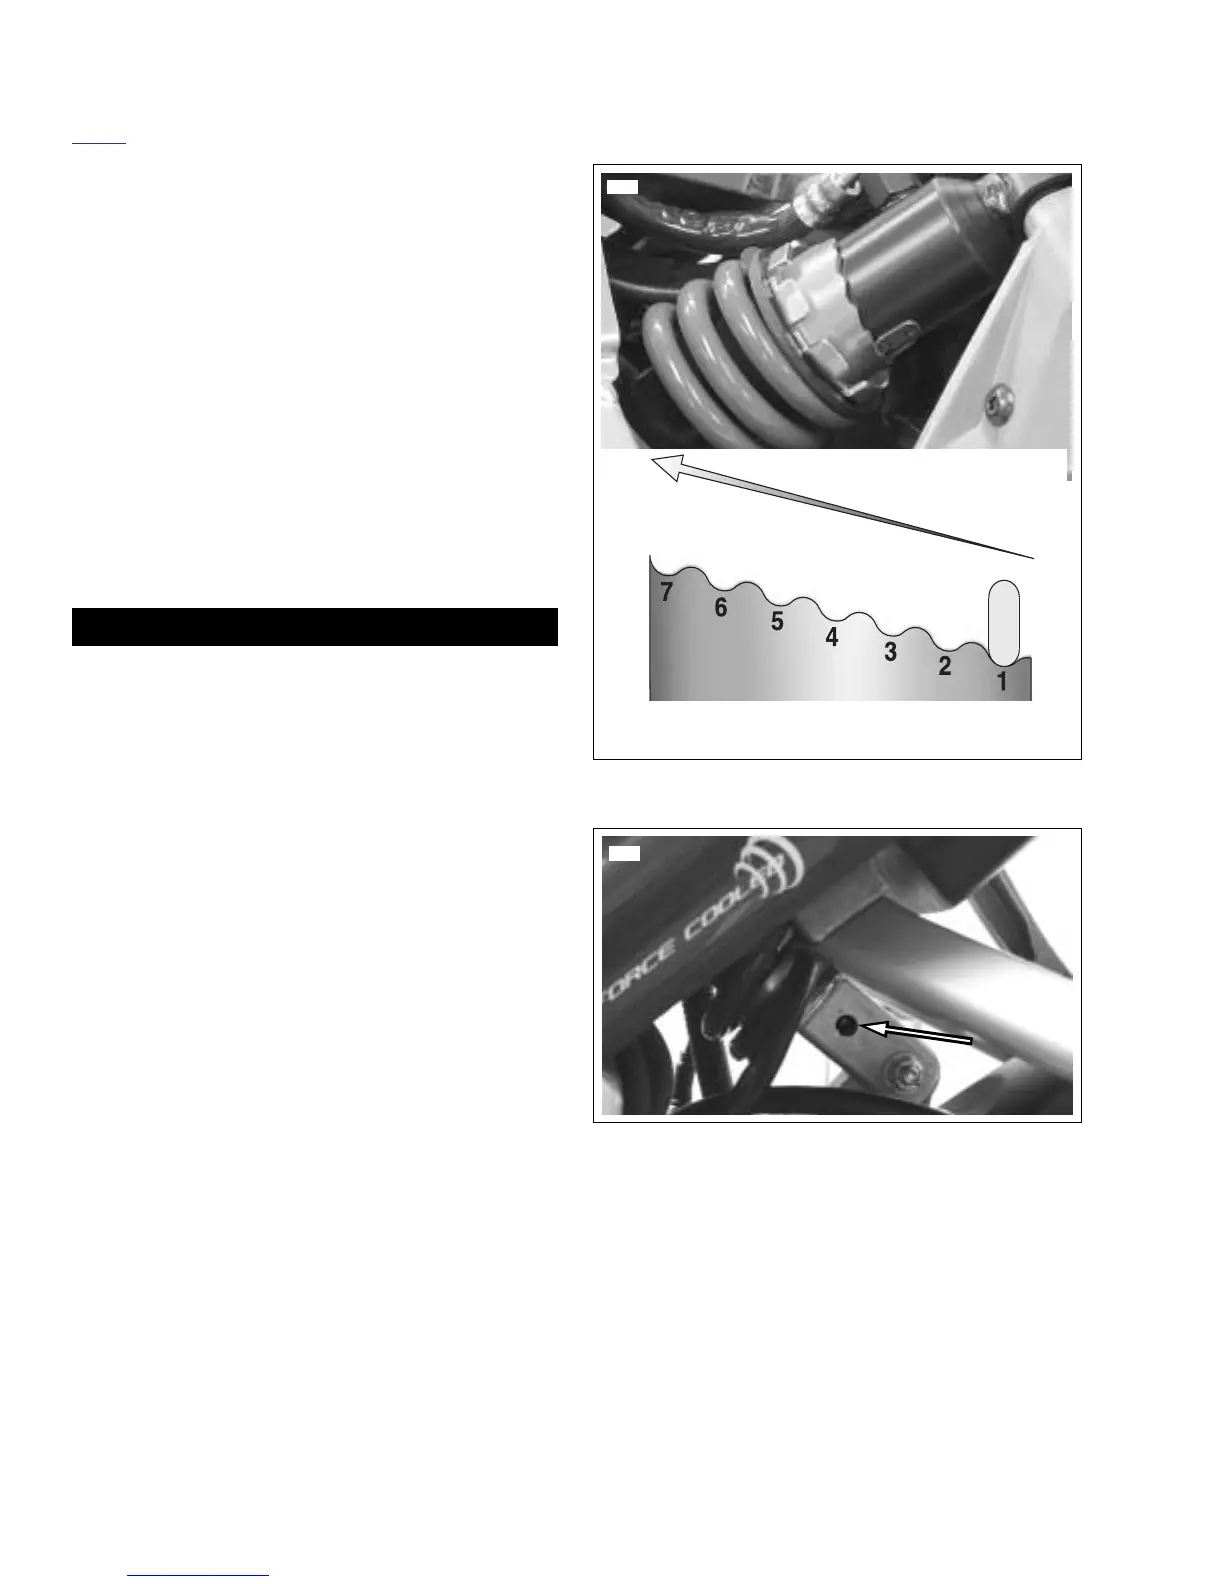
Setting Rear Shock Preload
The factory setting is ramp number 2 position (ramp number 7
position being the tallest ramp and maximum preload). For
recommended spring preload refer to Table 1-10. or Table 1-
11.
1. Remove seat. See 2.43 SEAT.
2. See Figure 1-32. Change the spring preload by turning
the preload adjuster at the upper part of the shock with
the SHOCK SPANNER WRENCH (HD-94700-52C) or
the wrench included in the tool kit.
a. Turn adjuster to setting specified in Table 1-10.,
Table 1-11. or Table 1-13. Rotate adjuster clockwise
to increase preload.
b. Rotate adjuster counterclockwise to decrease pre-
load.
1WARNING1WARNING
After installing seat, pull upward on front of seat to be
sure it is in locked position. While riding, a loose seat can
shift causing loss of control, which could result in death
or serious injury. (00070a)
3. Install seat. See 2.43 SEAT.
Setting Rear Shock Rebound Damping
1. See Figure 1-33. Using a screwdriver, turn the slotted dial
clockwise until it stops. This is the maximum rebound
damping setting.
2. Then turn the dial counterclockwise the recommended
amount specified in Table 1-10., Table 1-11. or Ta ble 1-
13.
Figure 1-32. Rear Shock Preload Adjuster
Figure 1-33. Rear Shock Rebound Adjustment
8388
Maximum preload adjustment (ramp number 7)
Minimum preload adjustment (ramp number 1)
b0954x1x
8416