2006 Buell Lightning: Appendix B B-13
HOME
CRIMPING INSTRUCTIONS
1. Strip wire lead removing 5/32 in. (4 mm) of insulation.
2. Compress handles until ratchet automatically opens.
NOTE
Always perform core crimp before insulation/seal crimp.
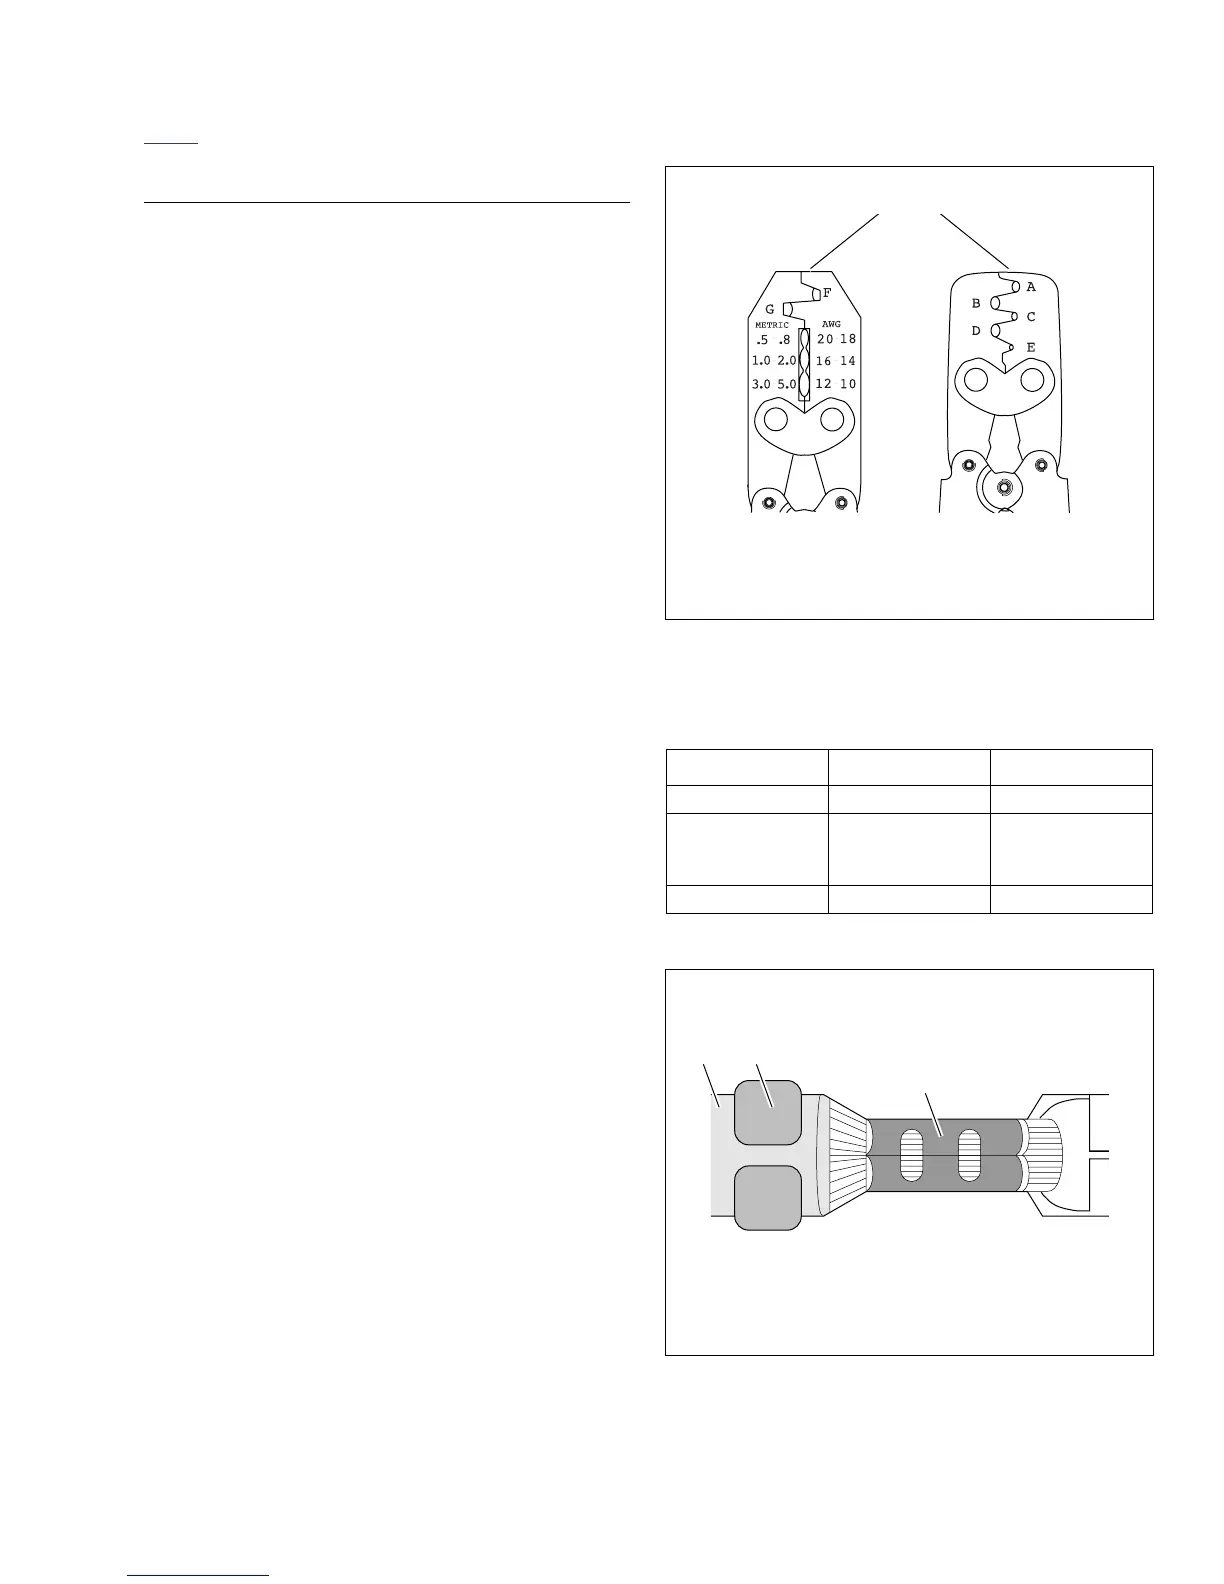
3. See Table B-1. Determine the correct dye or nest for the
core crimp.
NOTE
When the word “TIP” appears in the Crimp Table, use the tip
of the tool specified to perform the core crimp procedure. See
Figure B-15.
4. Lay the back of the core crimp tails on the appropriate
nest. Be sure the core crimp tails are pointing towards
the forming jaws.
5. Gently apply pressure to handles of tool until crimpers
slightly secure the core crimp tails.
6. Insert stripped wire between crimp tails. Verify that wire
is positioned so that short pair of crimp tails squeeze
bare wire strands, while long pair folds over insulation or
seal material.
7. Squeeze handle of crimp tool until tightly closed. Tool
automatically opens when the crimping sequence is
complete.
8. Table B-1. Determine the correct dye or nest for the insu-
lation/seal crimp.
9. Lay the back of the insulation/seal crimp tails on the
appropriate nest. Be sure the insulation/seal crimp tails
are pointing towards the forming jaws.
10. Squeeze handle of crimp tool until tightly closed. Tool
automatically opens when the crimping sequence is
complete.
11. See Figure B-16. Inspect the quality of the core (3) and
insulation/seal (2) crimps. Distortion should be minimal.
Figure B-15. Packard Terminal Crimp Tools
Table B-1. Packard Terminal Crimp Tools
SPECIFICATION PACKARD 115 PACKARD 271
Part No. HD-38125-8 HD-38125-7
Type of Crimp
Non-sealed
terminals,
butt splices
Non-sealed
terminals
Dye/nests F-G A-E
Figure B-16. Inspect Core and Insulation/Seal Crimps