6-22 2006 Buell Lightning: Drive/Transmission
HOME
DRIVE BELT REMOVAL
1. Place a scissor jack under jacking point and raise rear
wheel off ground. For location of jacking point see 2.31
EXHAUST SYSTEM.
2. Remove right side rider footpeg support bracket. See
2.32 FOOTPEG, HEEL GUARD AND MOUNT.
NOTE
The right rear chin fairing fasteners must be removed to
access the front sprocket cover.
3. Remove right rear chin fairing fasteners. See 2.36 CHIN
FAIRING.
4. For XB12Ss Models: Remove rear fender. See 2.34
FENDERS.
5. Remove belt guards. See 2.35 BELT GUARDS.
6. See Figure 6-40. Remove front sprocket cover (5) by
removing fasteners. See 2.33 SPROCKET COVER.
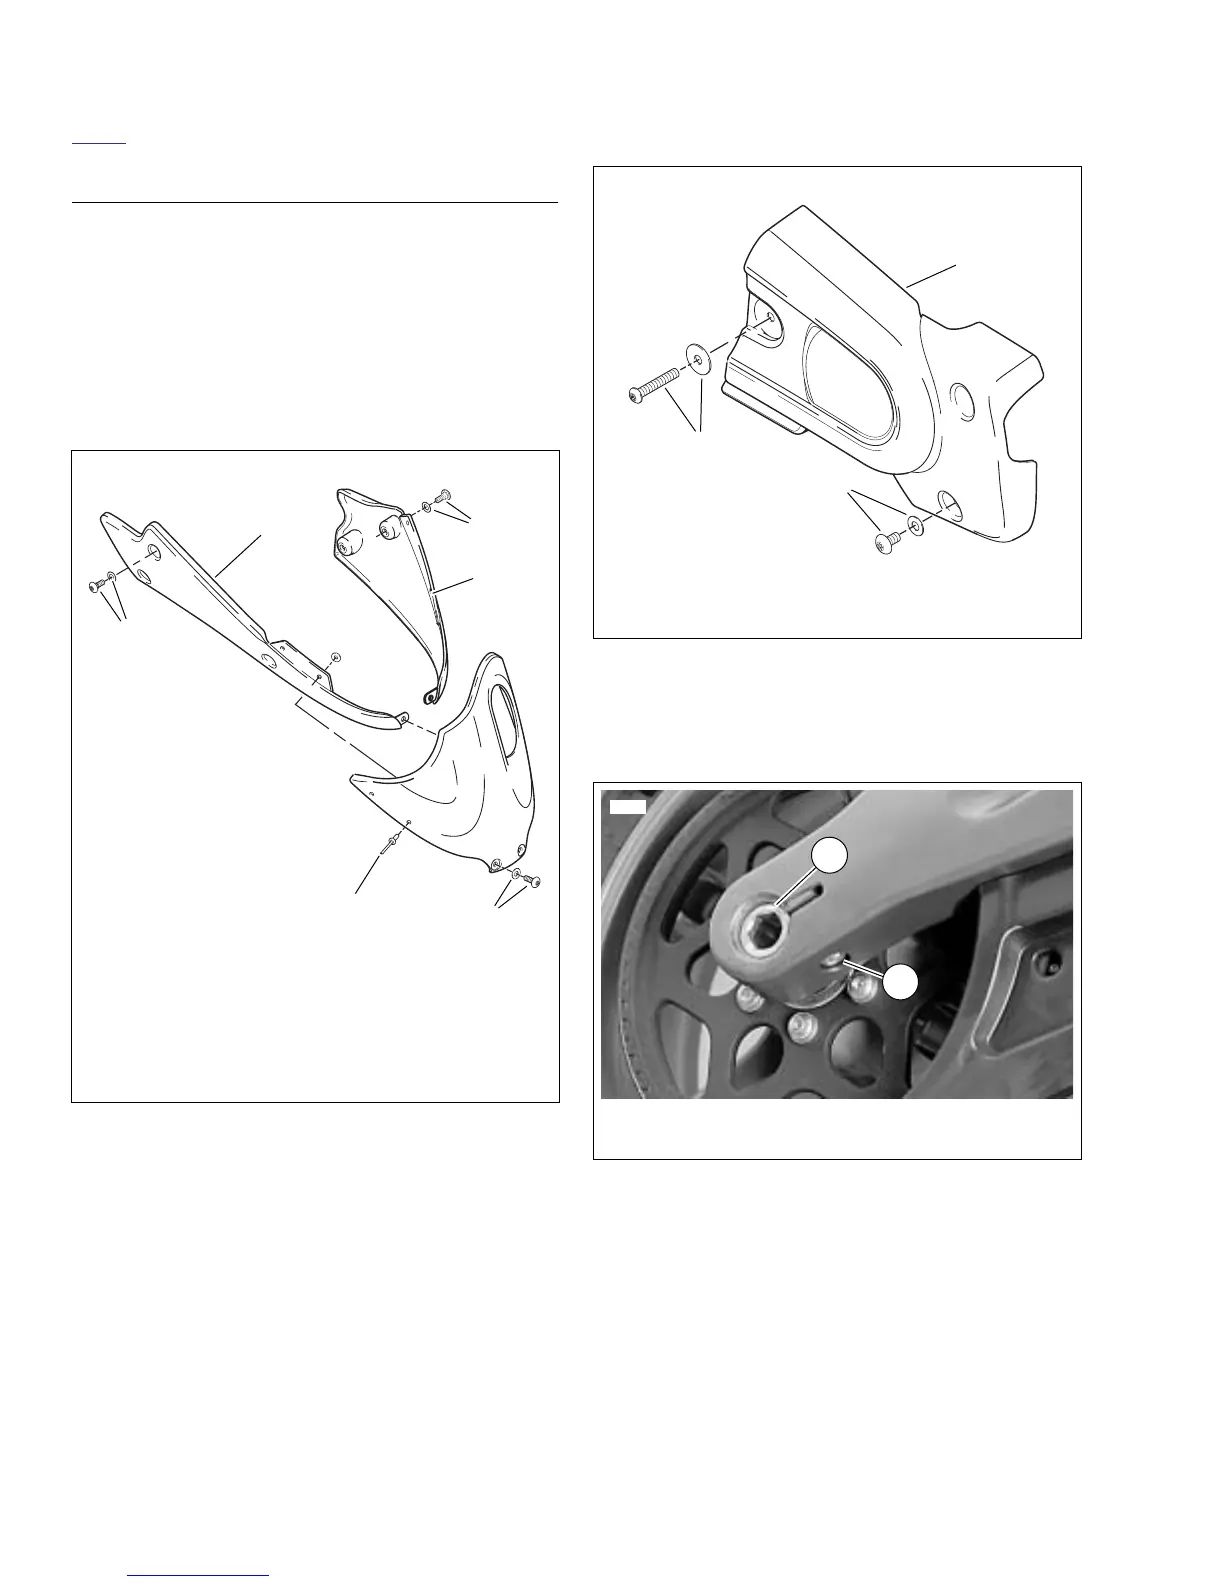
7. See Figure 6-41. Loosen rear axle pinch fastener (2).
8. Loosen rear axle (1) approximately 15 rotations to allow
partial tension to be removed from rear drive system.
9. Remove idler pulley assembly by removing nuts and
washers. See IDLER PULLEY REMOVAL in 6.6 DRIVE
BELT SYSTEM.
10. Remove swingarm brace. See 2.19 SWINGARM AND
BRACE.
NOTE
When removing or installing belt, do not bend or twist belt,
partially slide belt onto sprocket and "roll" wheel or belt dam-
age will occur.
11. Slide belt from sprocket and remove.
Figure 6-39. Chin Fairing Assembly
b0942x2x
1. Center section
2. Center section fasteners and washers (2)
3. Left section
4. Left section fastener and washer (2)
5. Right section
6. Right section fastener and washer (3)
6
5
4
3
2
1
Figure 6-40. Sprocket Cover
Figure 6-41. Rear Wheel Mounting, Right Side
b0943a2x
1. Sprocket cover fastener and washers
2. Sprocket cover
2
1
1
8420
2
1. Axle
2. Pinch bolt fastener
1