Measures against 012D jam occurrence
[Symptom/Question]
012D jam may occur with the machines earlier than the following countermeasure cut-in serial numbers in factory.
- 012D : Delivery sensor 3 delay jam.
[Cause]
The decurler drive shaft, the decurler drive shaft 1 or the swing shaft 1 being shaved in the delivery guide assembly causes the
symptom. After some endurance time, the grease applied to the circumference of the shaft is depleted and the shaft is shaved,
resulting in the above-mentioned symptom.
[Remedy/Answer]
When the above-mentioned symptom occurs, check the 3 shafts of part name listed below and identify the shaved shaft. Replace
the shaved shaft with the new type, and apply super lube grease. When replacing the shaft, it is recommended to replace the
ball bearings that are in contact with the shaved shaft, at the same time.
Unit name Part name New-type part number Reference of replacing procedure
Delivery guide assembly, lower
Transmission shaft FC6-2447-010 a) Step to replace the decurler drive shaft
Transmission shaft 1 FC6-8472-010
b) Step to replace the decurler drive shaft
1
Delivery guide assembly, upper Swing shaft 1 FC5-9920-010 c) Step to replace the swing shaft 1
[Reference]
-There is no need to replace the shafts in 3 locations at the same time. Replace only the shaved shaft with the new type.
-Do not reuse the E-ring removed in the procedure, and replace it with the new one.
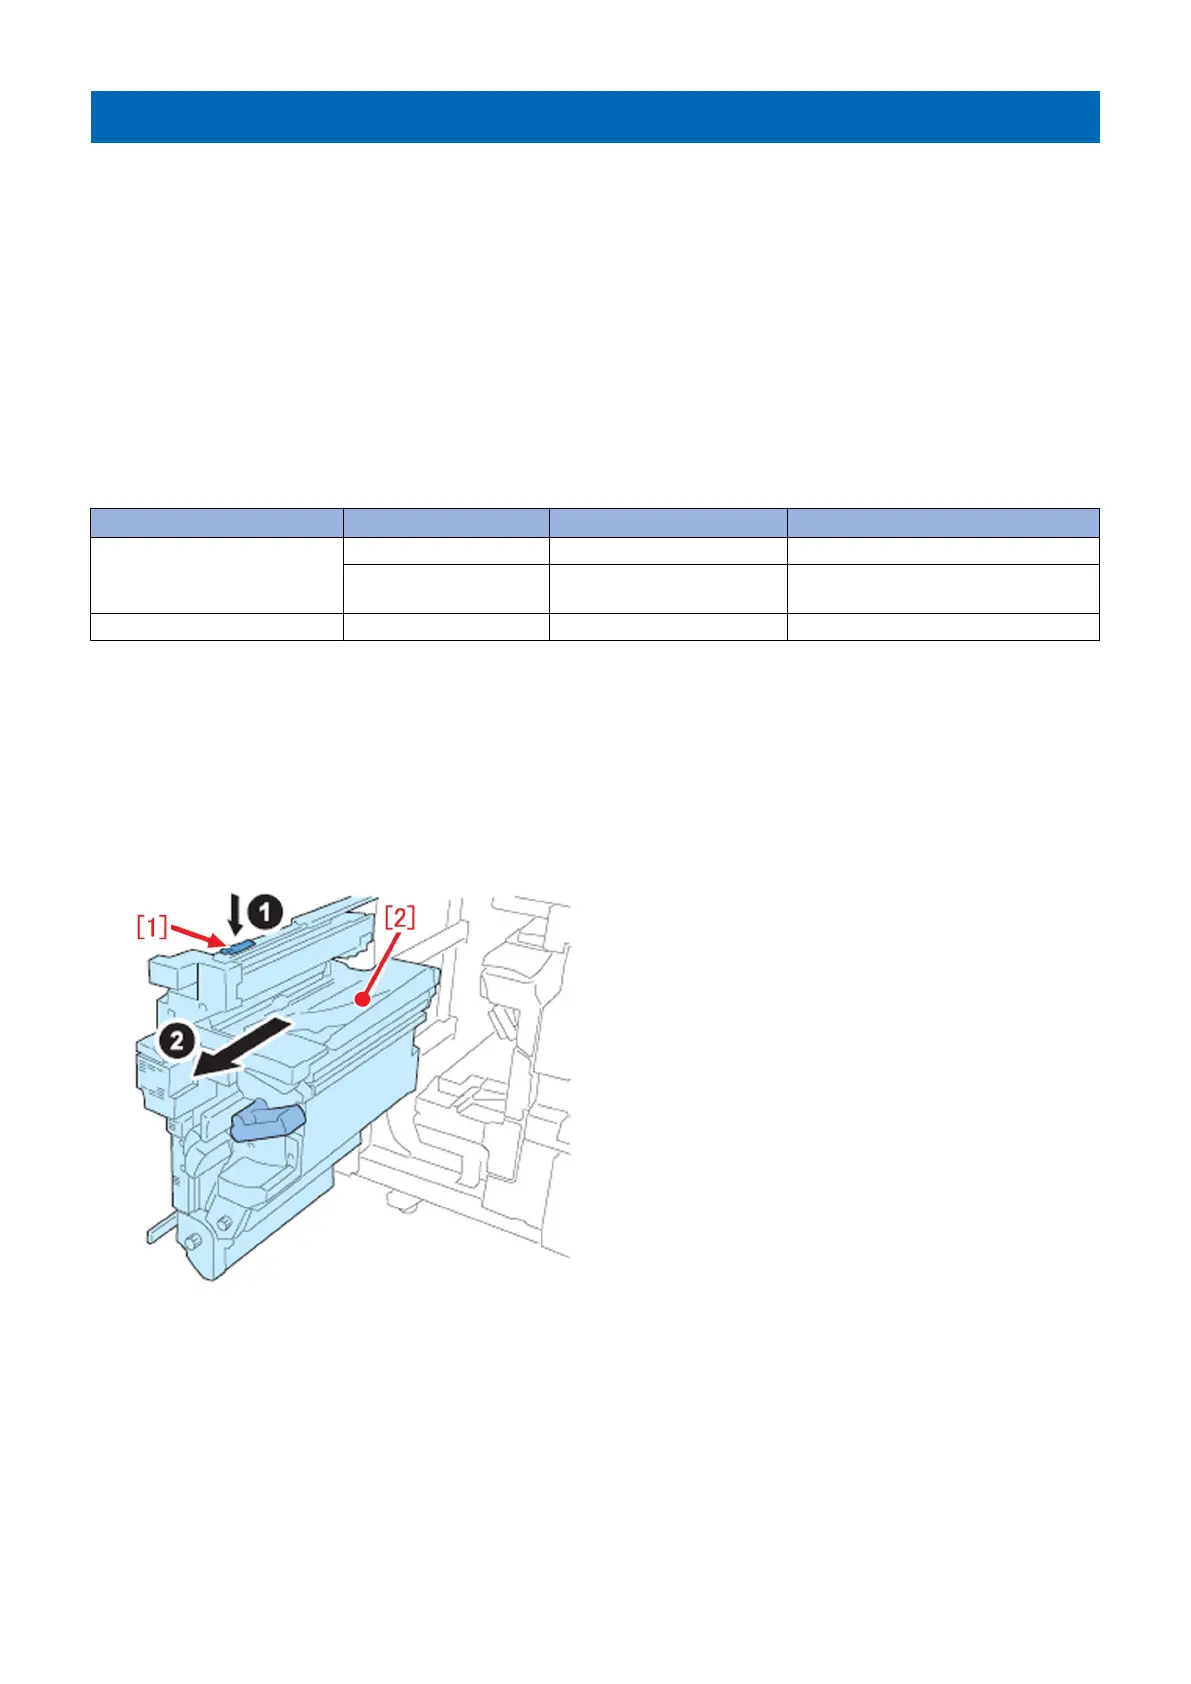
[Common step]
1) Referring to Service Manual, open the sub station front right cover and the sub station front left cover, release the lever (C-
D3), and pull out the reverse/delivery unit.
2) Release the leaf spring [1] and pull out the reverse/delivery unit [2] until it stops.
a) Step to replace the decurler drive shaft (FC6-2447-010)
a-1) Remove the 1 screw [1] and remove the motor cover [2].
138