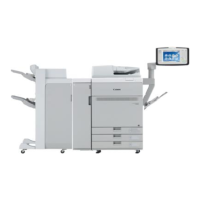
Points to note when attaching the inner cover 2 on the secondary
transfer drive unit
[Details]
When installing the inner cover 2 [2] with the cables [a] of the secondary transfer drive unit [1] located higher than the edge of
the edge saddle [b], the protrusion [c] on the back side of the inner cover 2 hits the cables and the coating of the cables may be
damaged [d].
[Remedy/Answer]
When working with the secondary transfer drive unit or removing the inner cover 2, check the cables for any dents, damages and
scratches.
If any dents, damages and scratches are found on the harness, prepare the new motor connecting cable (FM1-T808) and follow
the steps below.
If no dents, damages and scratches are found on the harness, start from the step 2) below.
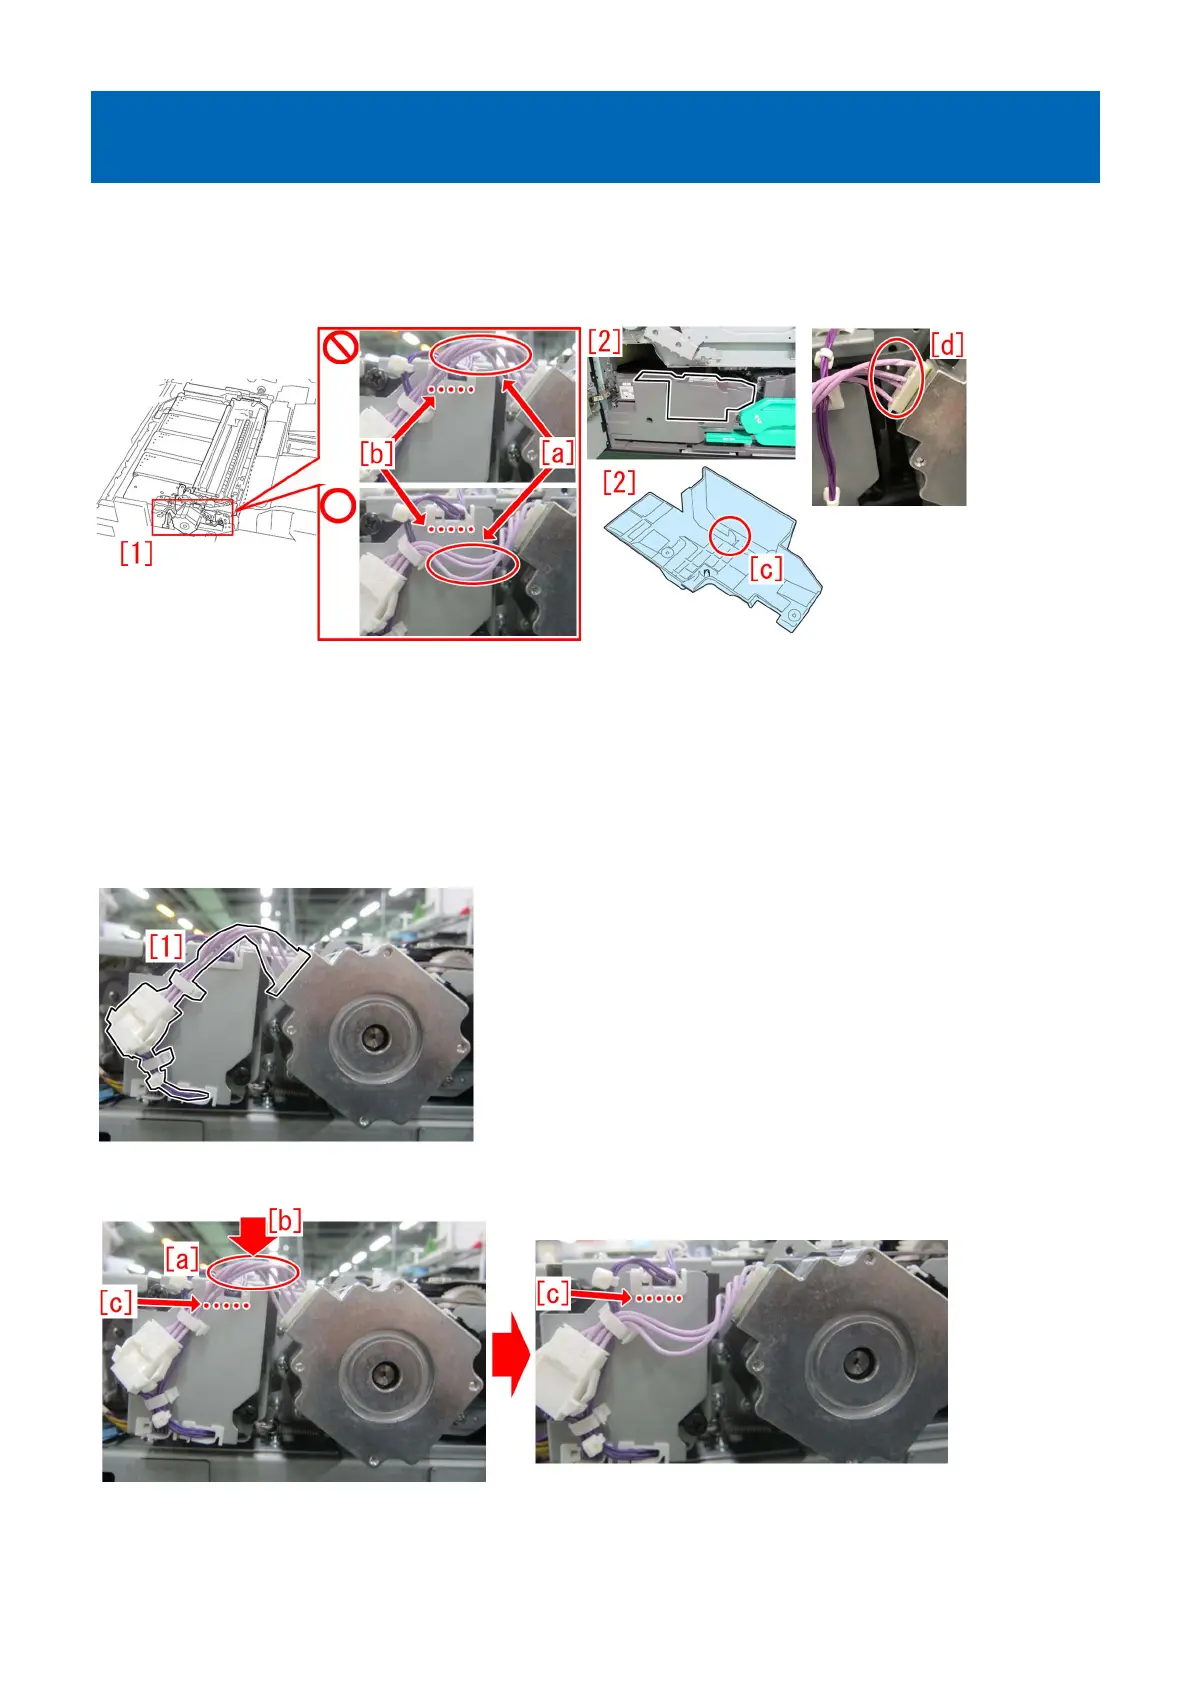
1) Replace the motor connecting cable [1] with a new one.
2) Press the [a] section of the motor connecting cable in the direction of the arrow [b] with a finger and set the cable below the
edge of the edge saddle [c].
3) Press the connector [a] and after confirming that the cable pressed in the step 2) is located below the edge of the edge saddle
[b], attach the inner cover 2.
255