Network Interface
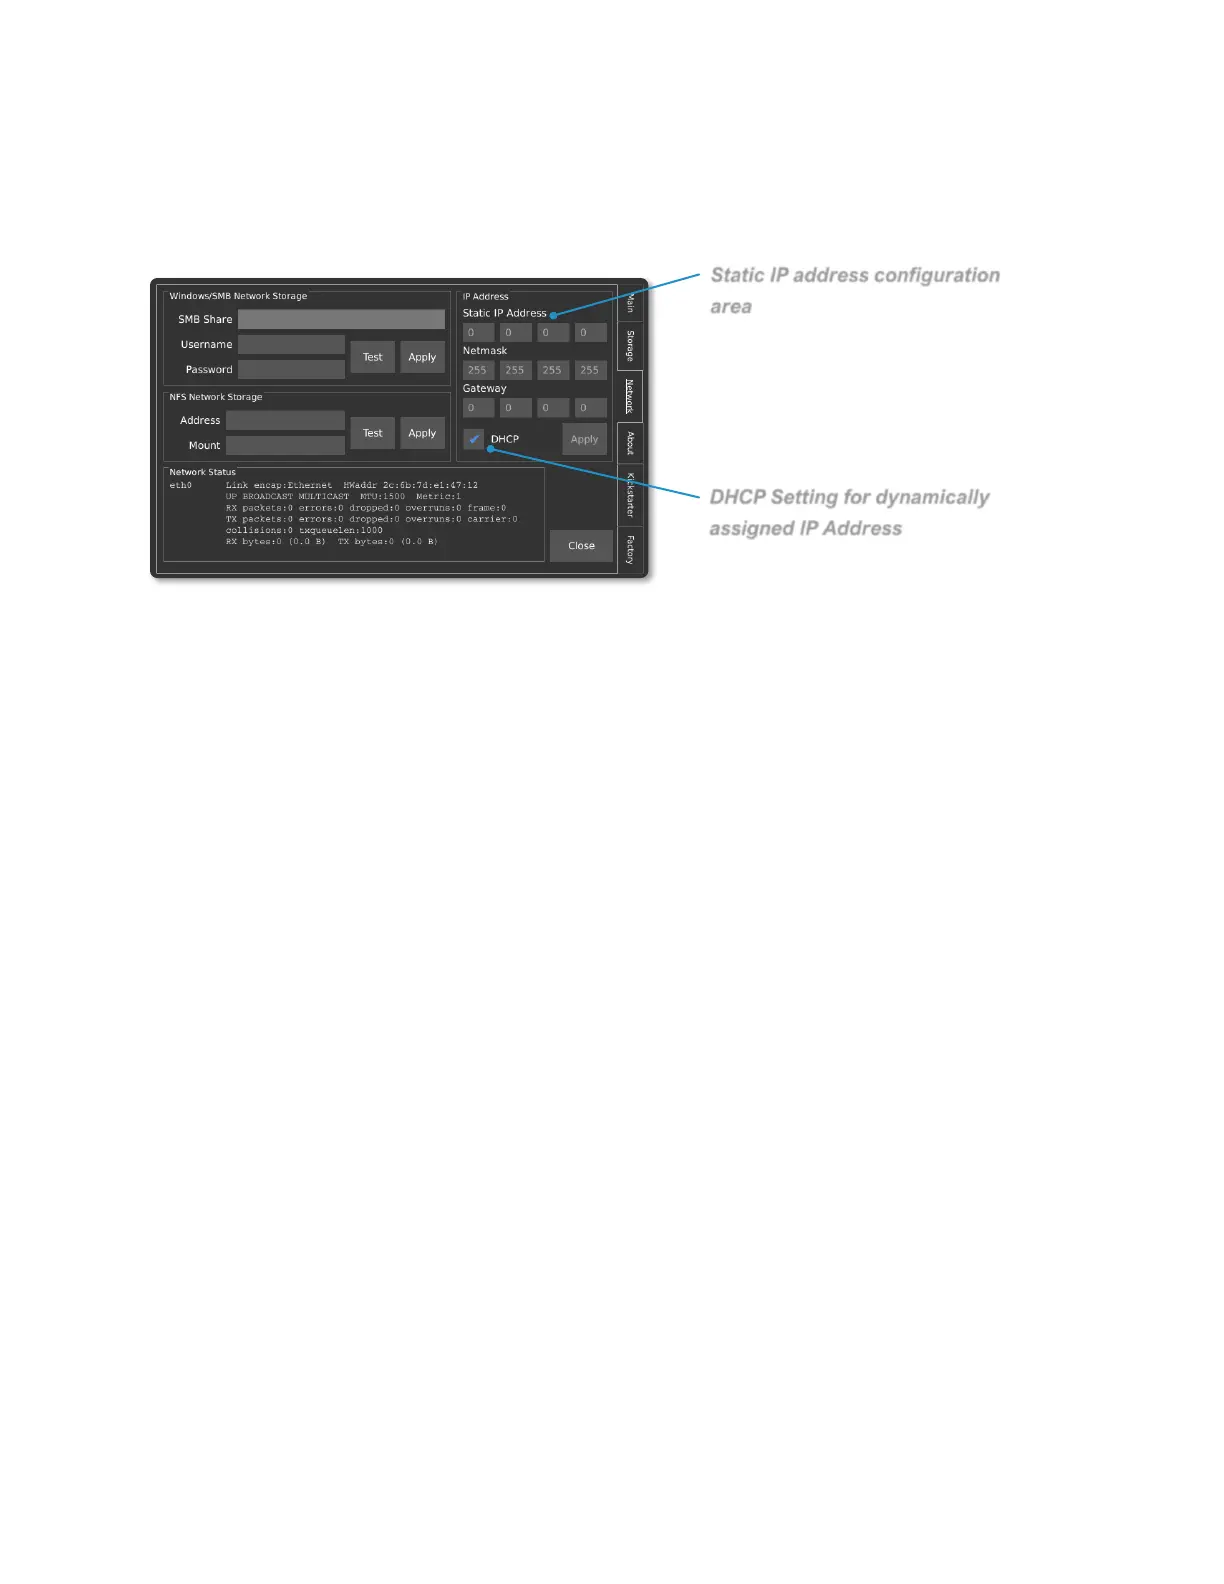
STATIC IP ADDRESS CONFIGURATION
The camera can be configured with a static IP address. To enter a static IP address,
enter the Util menu and then navigate the Network tab. A box in the upper-right corner
of the display offers fields for the IP, Netmask, and Gateway.
DYNAMIC IP ADDRESS CONFIGURATION VIA DHCP
The camera can automatically acquire an IP address via DHCP. To enable DHCP,
ensure that the DHCP checkbox is enabled. The acquired IP address will be shown in
the Network Status area.
ETHERNET OVER USB
The camera supports a virtual ethernet interface over the USB mini or USB micro
connector. In Windows, this is referred to as a Remote Network Driver Interface
Specification (RNDIS). If the camera is connected to the host computer using this
method, the IP address will be a fixed value of 192.168.12.1.
SAVING TO NETWORK STORAGE
The camera supports the ability to save footage directly to a computer over the network
via SMB v1.0 and NFS network protocols. Credentials to an SMB or NFS share can be
entered on by navigating to the Util menu, and then selecting the Network tab.