User Guide| LQ Series 4.0
l Open the Core Configuration Manager (CCM): input the IP address of the LQ
unit (found in the device front panel screen) into the address field of a browser
that is on the same network as the LQ unit. Password and Username: admin,
admin.
l For more detailed information on physically connecting devices, see Chapter
4. Basic set up (LAN) in the LQ user manual.
l If you don’t have, or have not yet activated a license for SIP, you will not be
able to generate SIP ports in the Accounts page of the CCM.
13.6.1
Set up: General outline
1. The LQ device must be connected to the same network as the SIP server. The
LQ unit must be able to see (contact) the SIP server. See your network
administrator you have any connectivity problems.
2. Connect the external 4-wire, 2-wire Partyline or radio to a port on the back of
the LQ unit.
3. Open the CCM. Navigate to the Accounts page and register SIP client(s).
4. Navigate to the Assignments page in the CCM and put the SIP enabled port
and the external port together in the same Channel.
Putting the two interfaces together in a Channel connects and routes audio in a
Partyline (conference) setup.
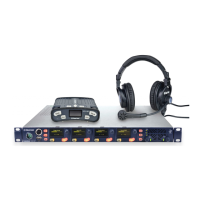
Note: Each LQ-R unit supports up to 24 ports: 8 hardware ports, 8 SIP ports and 8 virtual
ports. Agent- IC and IVC ports are considered 'virtual ' ports. Virtual ports can be
used in any combination up to 8 in total.
13.6.2
Demonstration: Program the CCM
1. Navigate to the Accounts page of the CCM and define the SIP server.
Page 102