EasyManuals Logo

cobas h 232 User Manual

cobas h 232
212 pages
To Next Page IconTo Next Page
To Previous Page IconTo Previous Page
Page #133 background imageLoading...
Page #133 background image
Performing a Test
133
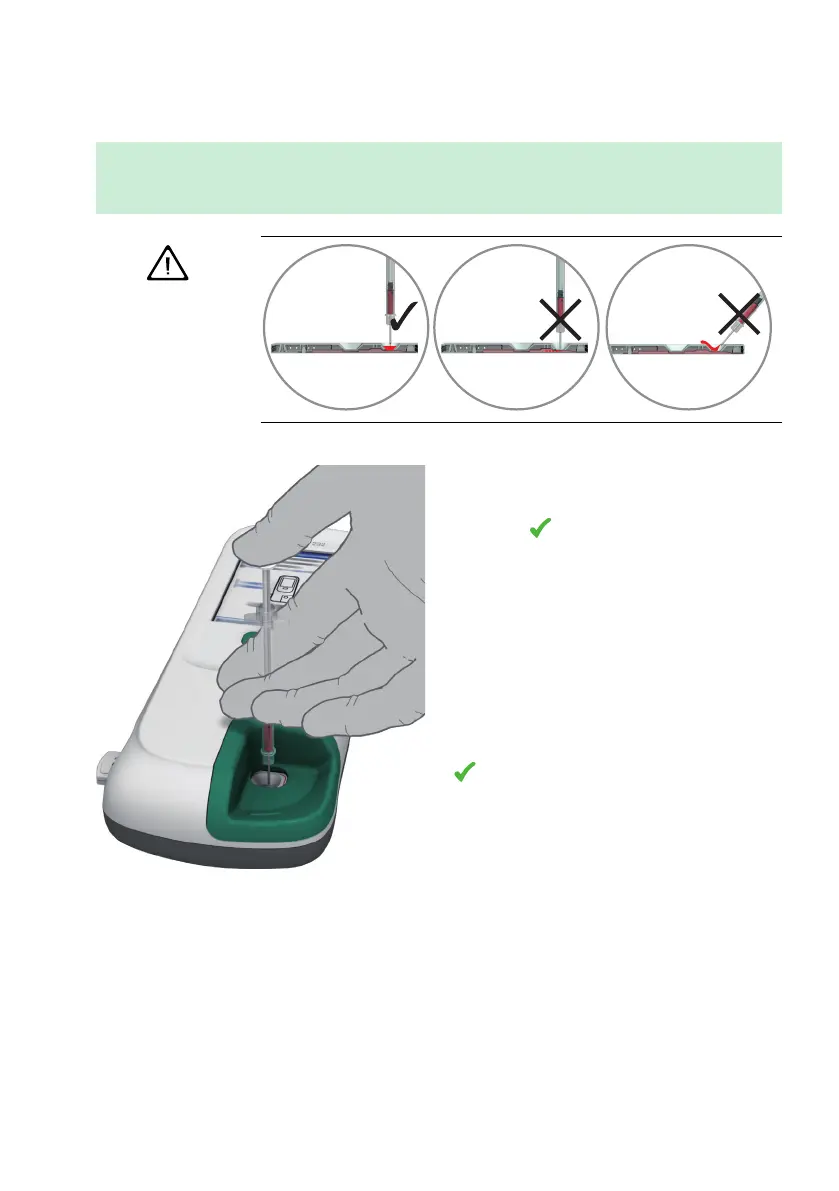
Always place the meter on a level, vibration-free surface when applying the sample to the
sample application area of the test strip. Once the sample has been completely absorbed by
the test strip, you can move the meter.
CAUTION
5 Apply the entire sample to the sample
application area of the test strip.
6 Touch to confirm that the sample has
been applied.
The hourglass icon appears as the meter
begins to process the sample. For better
control over the measurement process, you
should always confirm this yourself, instead of
waiting for the meter to detect the sample.
After you confirm that the sample has been
applied, or if the meter automatically recog-
nises that the sample has been applied, the
button disappears.

Table of Contents

Other manuals for cobas h 232

Questions and Answers:

Question and Answer IconNeed help?

Do you have a question about the cobas h 232 and is the answer not in the manual?

cobas h 232 Specifications

General IconGeneral
Device TypePoint-of-care analyzer
Sample TypeWhole blood, plasma
Measured ParametersTroponin T, Myoglobin, D-Dimer, NT-proBNP
ConnectivityUSB
Intended Usecardiac markers
Data ManagementLIS connectivity
ThroughputSingle test
Sample Volume150 µL
Operating Temperature15-30 °C
Operating Humidity10-85% (non-condensing)
DisplayColor touchscreen
Measurement PrincipleElectrochemiluminescence immunoassay (ECLIA)