40 - Initial Configuration DeviceMaster Installation and Configuration Guide: 2000594 Rev. F
Configuring the Network Settings
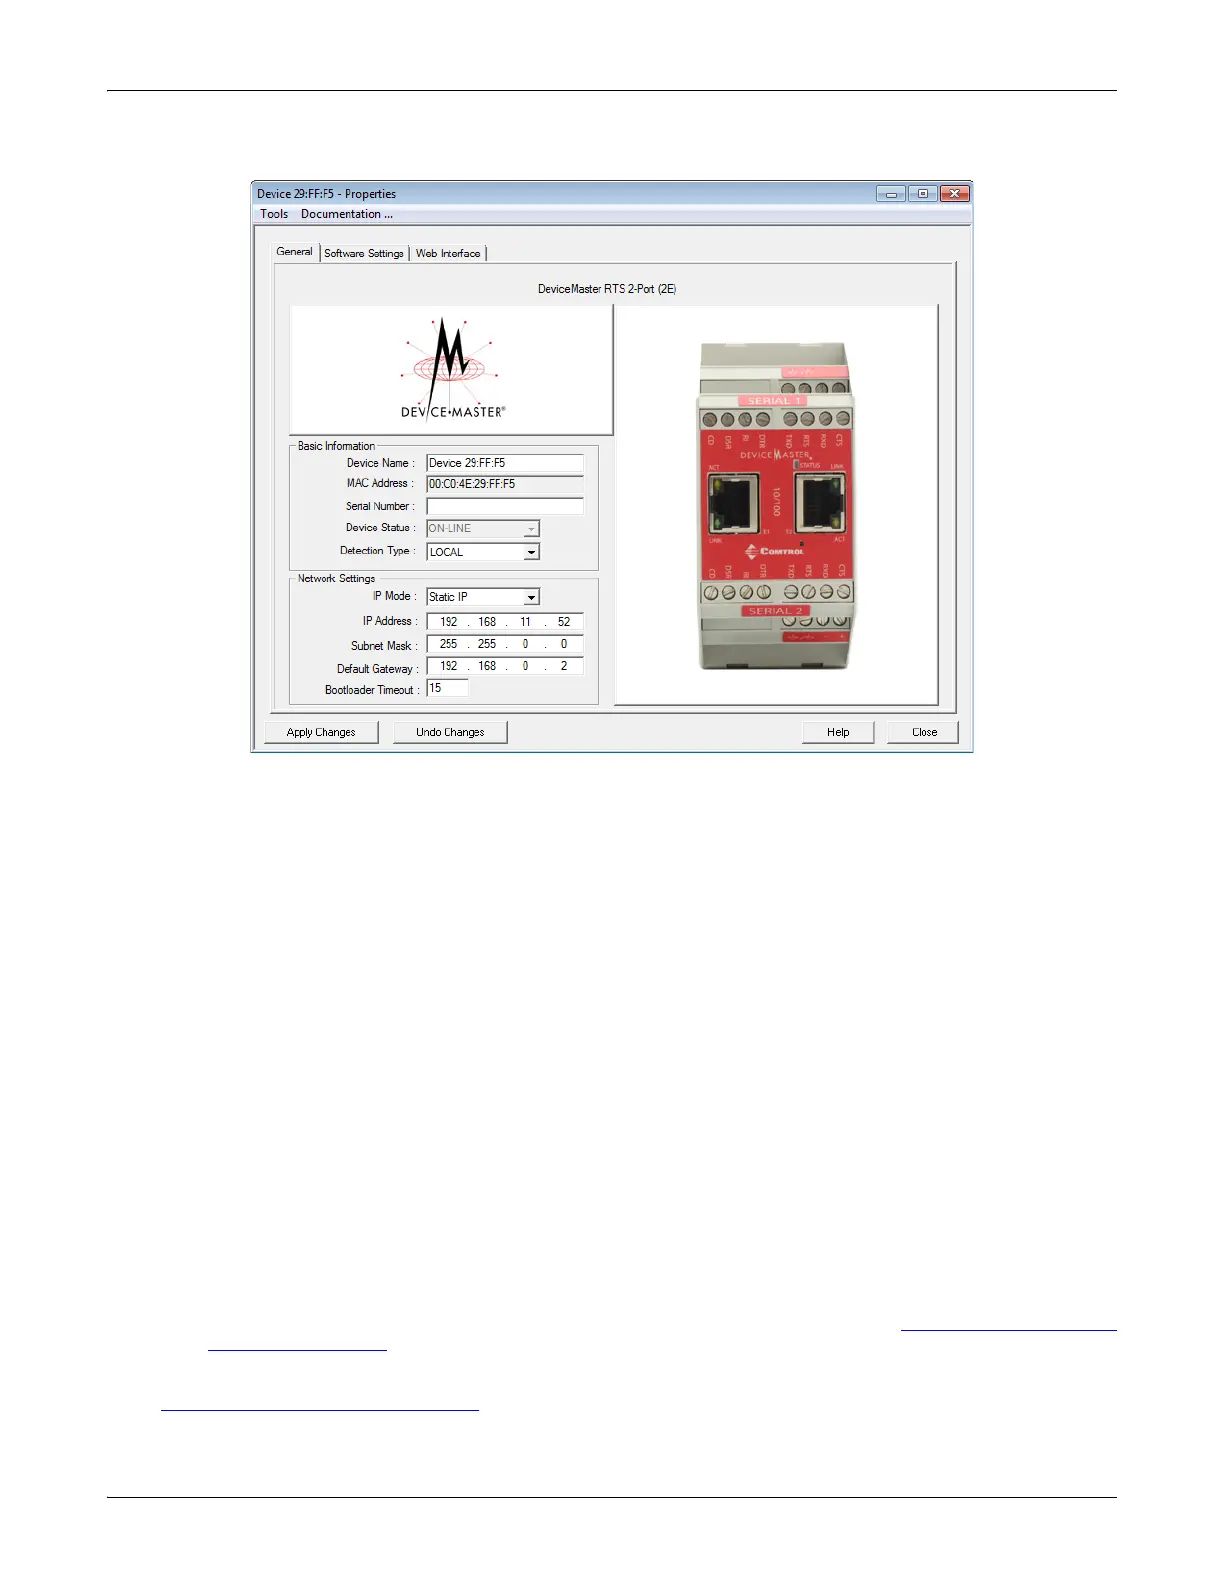
7. Optionally, rename the DeviceMaster in the Device Name field.
Note: The MAC address and Device Status fields are automatically populated and you cannot change those
values.
8. Optionally, enter the serial number, which is on a label on the DeviceMaster.
9. If necessary, you can change the Detection Type.
• REMOTE means that the DeviceMaster is not connected to this segment of the network and it uses IP
communications, not MAC communications.
• LOCAL means that the DeviceMaster is on this local network segment and uses MAC communications.
An IP address is not required but Technical support recommends using an IP address.
10. Change the DeviceMaster network properties as required for your site.
• If you want to disable IP communications on the DeviceMaster, click Disable IP.
• To use the DeviceMaster with DHCP, click DHCP IP, and make sure that you provide the MAC address
of the device to the network administrator. Make sure that the administrator reserves the IP address,
subnet mask and gateway address of the DeviceMaster in the DHCP server.
• To program a static IP address, click Static IP and enter the appropriate values for your site.
Note: For additional information, open the PortVision DX Help system.
11. Typically, the Bootloader Timeout value should be left to it’s default value. In some situations, you may
need to temporarily adjust the Bootloader Timeout to a higher value during a firmware update.
12. Click Apply Changes to update the network information on the DeviceMaster.
Note: If you are deploying multiple DeviceMasters that share common values, you can save the
configuration file and load that configuration onto other DeviceMasters. See Using the SocketServer
Configuration Files on Page 107 for more information.
13. Click Close to exit the Properties window.
Go to Checking the SocketServer Version
on Page 41 to check the SocketServer version. You should update
SocketServer firmware before any further configuration.
Note: SocketServer versions previous to v9.00 did not support the Bootloader
Timeout option in the PortVision DX Properties screen.