29
Motion Area Setup
From the motion setup window, click <EDIT AREA> in the right corner to
display the area setup screen.
Setting the motion area may diff er depending on the camera model. Below is
a typical setting of the motion area.
1. Click <EDIT AREA> to move to the motion area setup screen.
2. If using the remote control, press the [ENTER] button to mark the
current position.
3. Use the arrow buttons to move to a desired block and press [ENTER].
The area setup will begin.
Then, use the arrow buttons to specify the area.
R Alternatively, you can use the drag-and-drop method to specify or
release the area when using the mouse.
4. If you select the speci ed area again, it will be released.
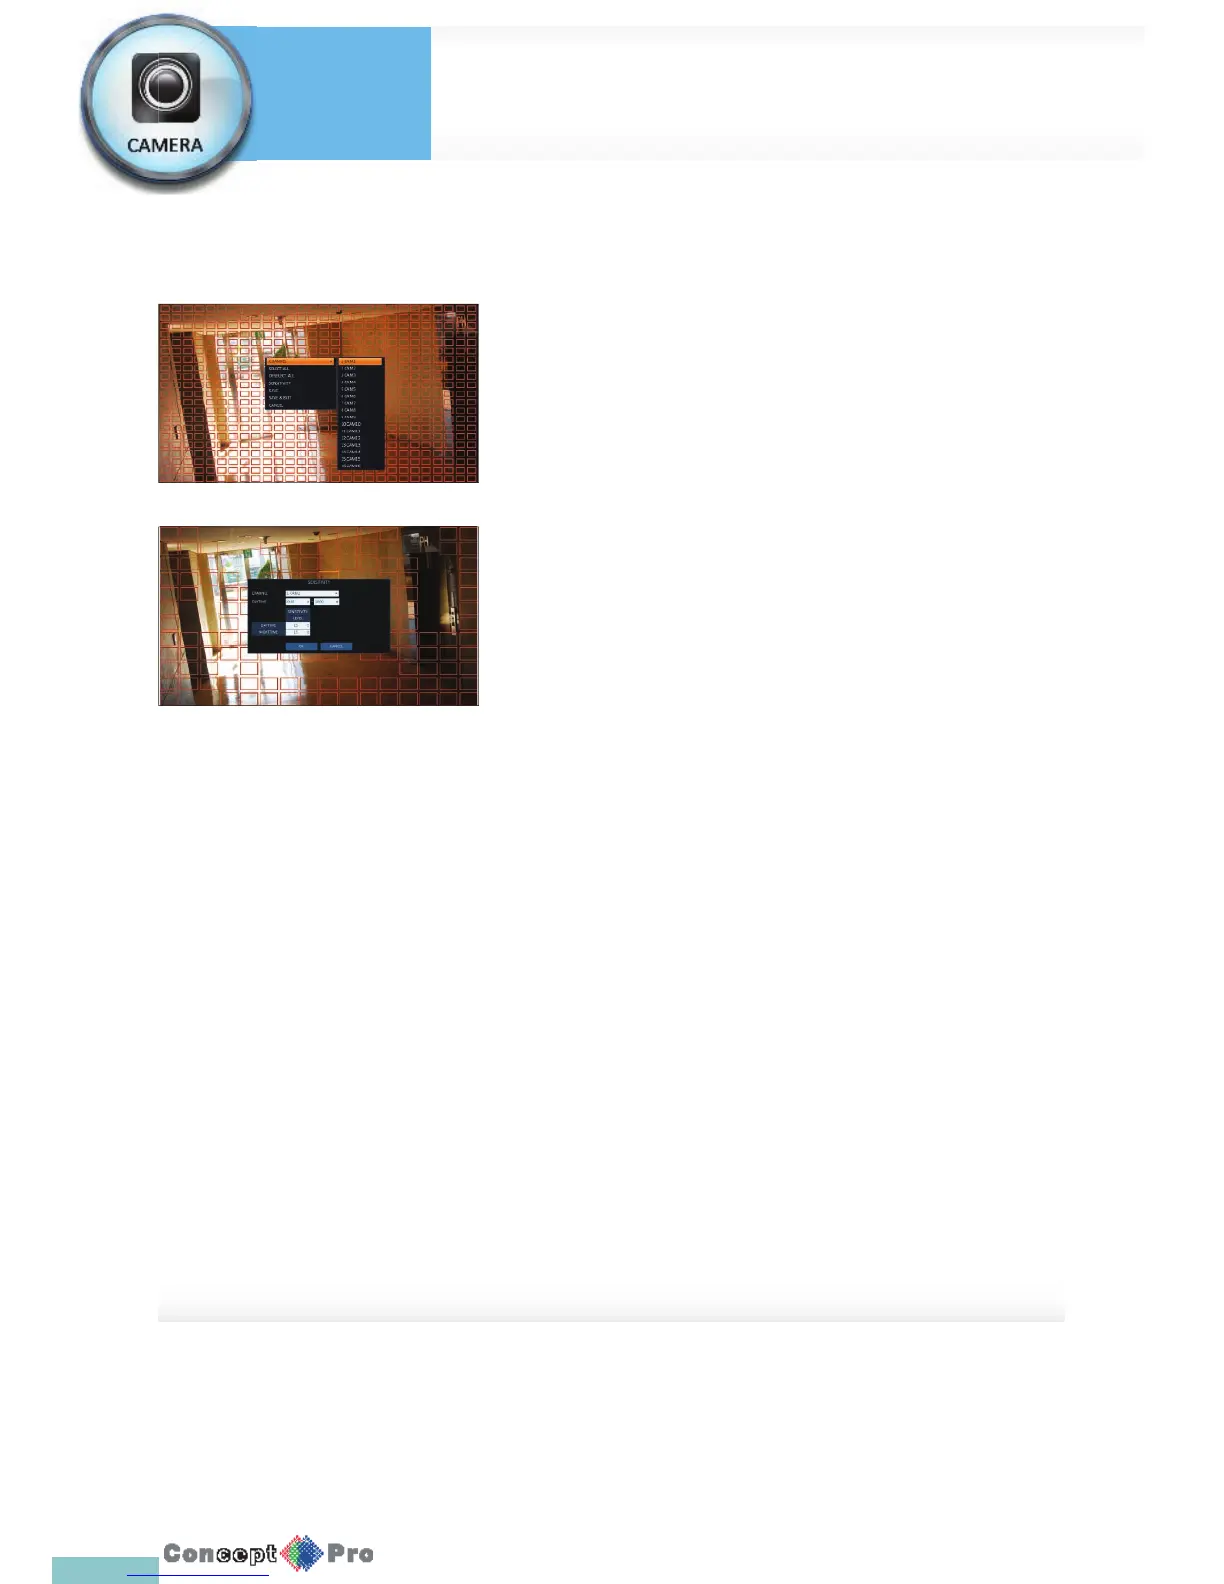
5. Press the [EXIT] button on the remote control or right-click any area to
display the popup window as shown in the picture to the left.
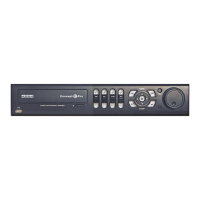
6. While the popup window is displayed, select <Sensitivity> to set the
motion detection sensitivity of the channel currently selected.
> Channel: Select the channel to set the motion sensitivity.
> SENSITIVITY: 1 (Low) ~ 30 (High) - The higher
the number is, the higher the sensitivity level becomes.
> DAYTIME: specify the time period that will be considered as
daytime.
- DAYTIME: specify the <SENSITIVITY> for the daytime.
- NIGHTTIME: specify the <SENSITIVITY> for the nighttime.
R Images recorded in a low contrast scene such as at night cause severe
noise, triggering the motion event too often.
R If unwanted events occur frequently at night, you may want to reduce
the motion sensitivity during the night .
Camera Setting
System
Settings