6262
Size/FPS/Quality Setting continued
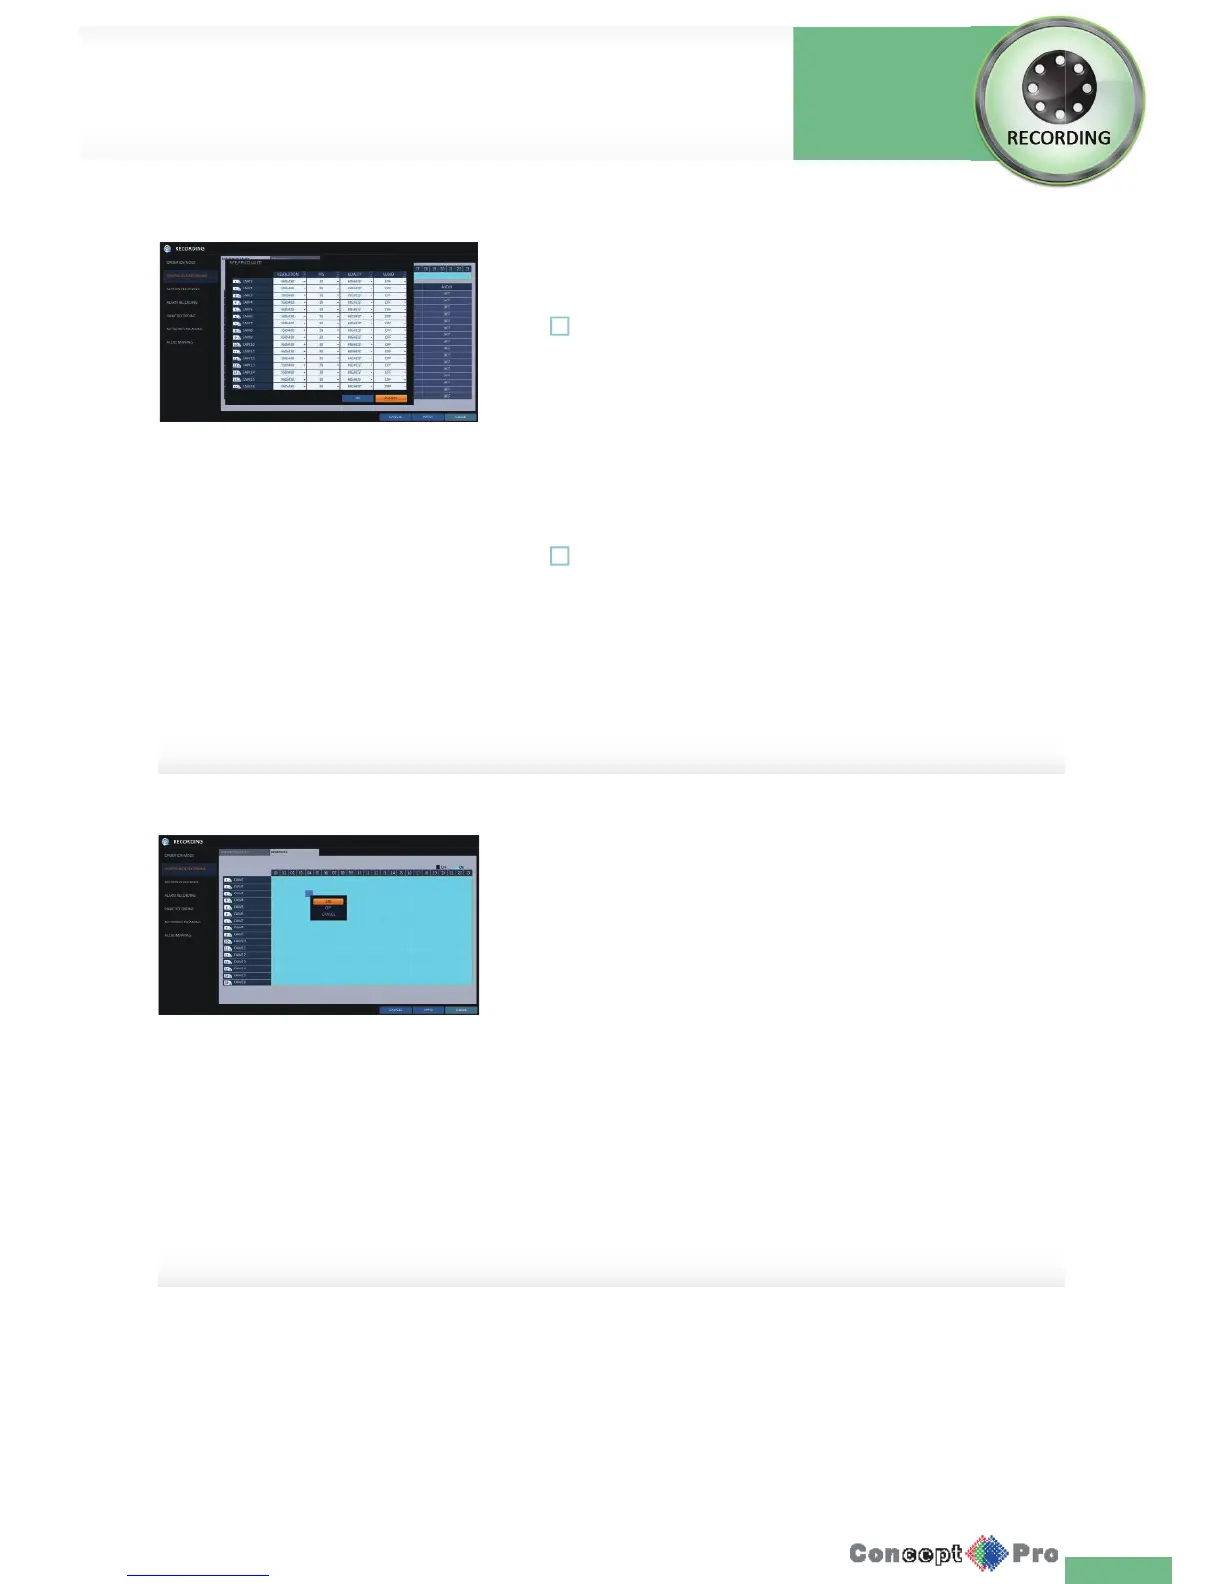
3. When the cell selection is complete, the “SIZE/FPS/QUALITY” table
appears.
! Specify the <RESOLUTION>, <FPS>, <QUALITY> and use of the
<AUDIO> recording for each channel.
> RESOLUTION: set the size of the video recording.
> FPS: set the frame rate per second.
> QUALITY: set the recording quality.
AUDIO: specify the use of the audio recording.
4. When done, click <OK>.You can check the recording size in the size
table underthetimeselectionbar.
! The video resolution and the FPS option may diff er depending on the
speci cation of the camera.
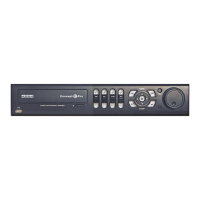
Schedule Setting
1. Select a start day of the week on the schedule.
2. Click a time cell from which you want start to make the schedule and
drag it to the nsih time cell. Or use the [pqtu] buttons on the remote
control to move to the cell and press [ENTER]. Then, use the[pqtu]
buttons to move to a desired cell and press [ENTER] again.
3. When the time selection is complete, you will be prompted to specify the
use of recording in the Record Setup window.
4. To apply the change, click <APPLY> in the bottom of the screen.
5. When done, press the [EXIT] button on the remote control or click
<CLOSE> in the lower screen. The con rmation message appears and
you will return to the previous menu.
Record Setup
Record
Settings